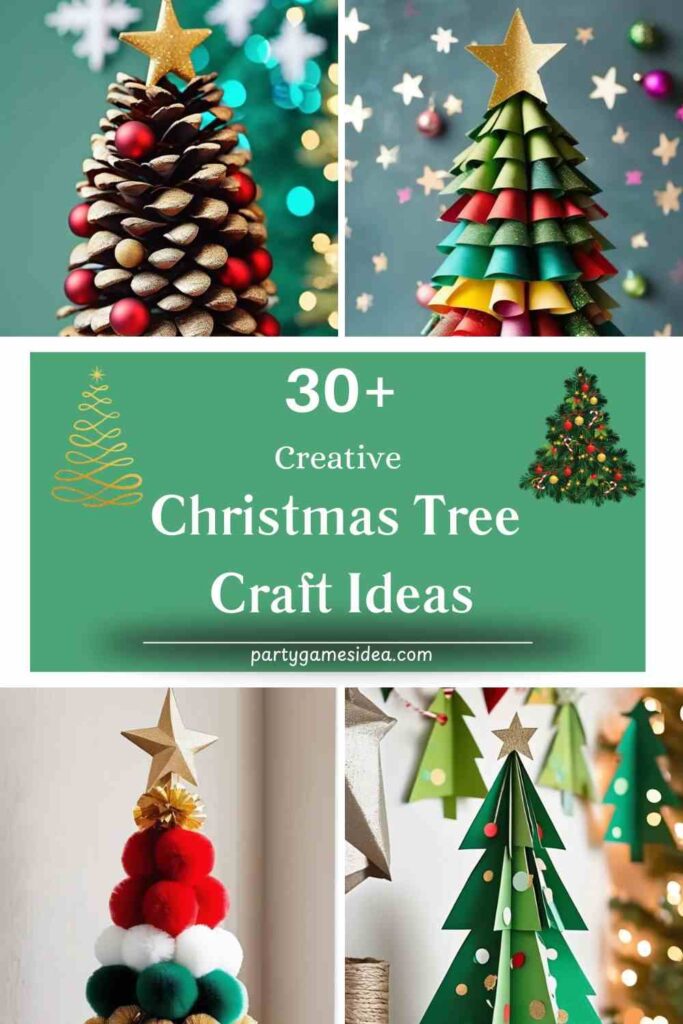
Christmas Tree Craft Ideas are a wonderful way to celebrate the holiday season with creativity and fun. Crafting your own Christmas tree can be an enjoyable activity for all ages, whether you’re making a small ornament, a full-sized decoration, or a festive centerpiece. Not only does it bring out the holiday spirit, but it also offers a great opportunity to personalize your decorations, adding a unique touch to your home. From simple paper designs to intricate 3D trees, there are plenty of materials you can use, including construction paper, glitter, fabric, and more, allowing everyone to express their creativity in different ways.
Christmas Tree Craft Ideas
The Christmas Tree Craft Ideas is a fantastic way to embrace the holiday season and get creative with decorations. These 35 Christmas tree craft ideas will inspire fun and festive projects for all ages, and with various materials, everyone can make something special. Whether you’re looking for simple crafts for kids or more intricate designs for adults, there’s something for everyone.
Paper Plate Christmas Tree
A simple and fun craft for young children.
- Materials: Paper plate, green paint, star stickers, glitter.
- Steps:
- Paint the paper plate green and cut it into a triangular shape.
- Decorate with glitter, buttons, or paper ornaments.
- Add a star sticker on top and hang with string.
- Tips: This craft is great for toddlers and preschoolers, helping develop fine motor skills while enjoying festive fun.
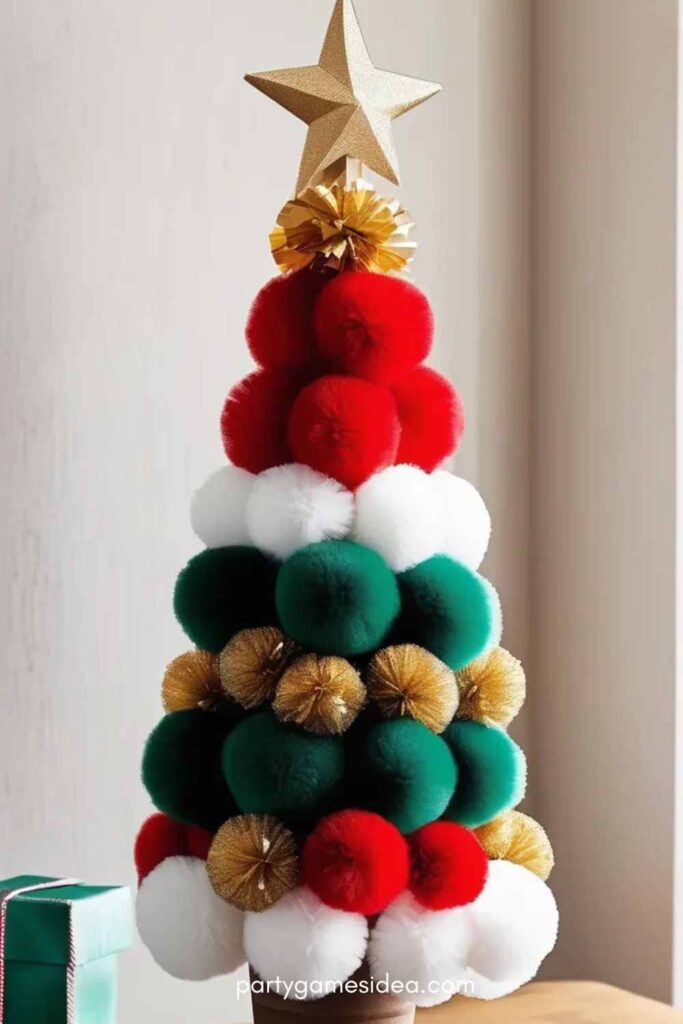
Pom-Pom Christmas Tree
Soft, fluffy pom-poms make a cozy and colorful tree.
- Materials: Green construction paper, pom-poms, glue.
- Steps:
- Cut the construction paper into a triangle shape.
- Glue pom-poms in a pattern or randomly across the tree.
- Add a pom-pom for the tree topper.
- Tips: Use varying sizes and colors of pom-poms for a playful effect. This craft works well with younger kids as it’s hands-on and fun.
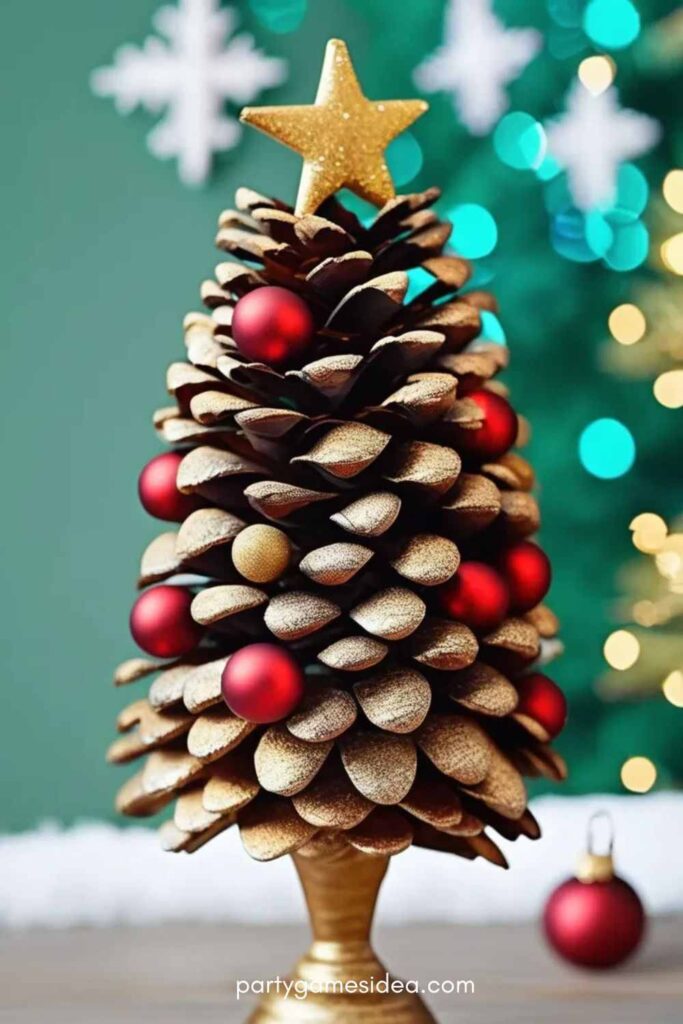
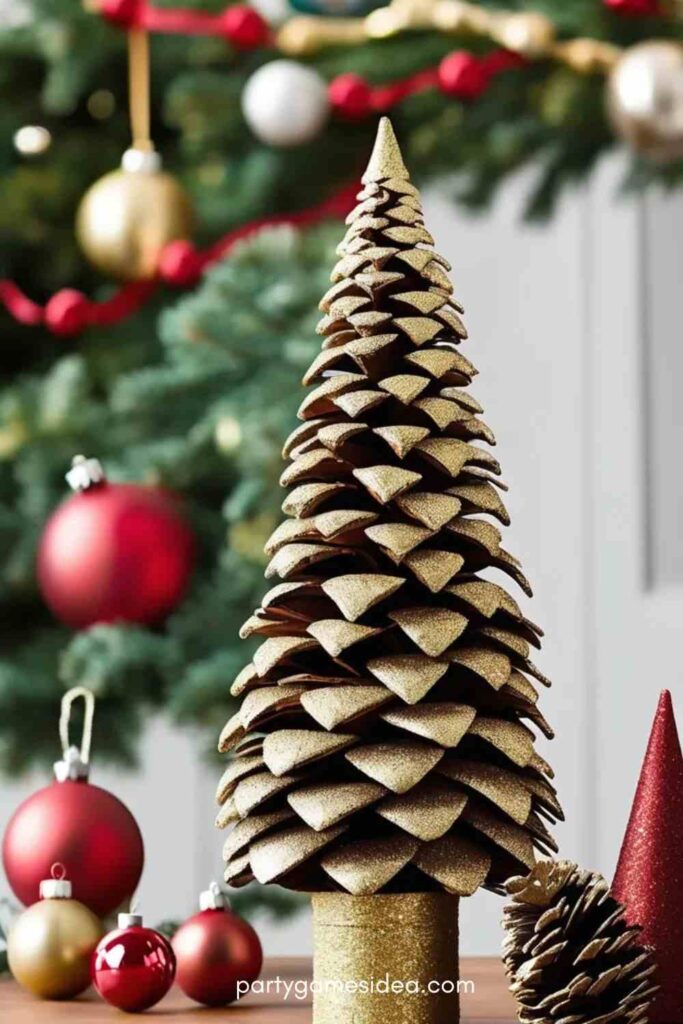
Pine Cone Christmas Tree
Use nature’s materials to create a rustic, charming tree.
- Materials: Pine cones, green paint, glitter, glue, star topper.
- Steps:
- Paint the pine cone green and let it dry.
- Add glitter for a snowy effect.
- Attach a star to the top to finish.
- Tips: This craft is a wonderful way to introduce kids to nature. Collect pine cones during a walk and make a fun activity out of it!
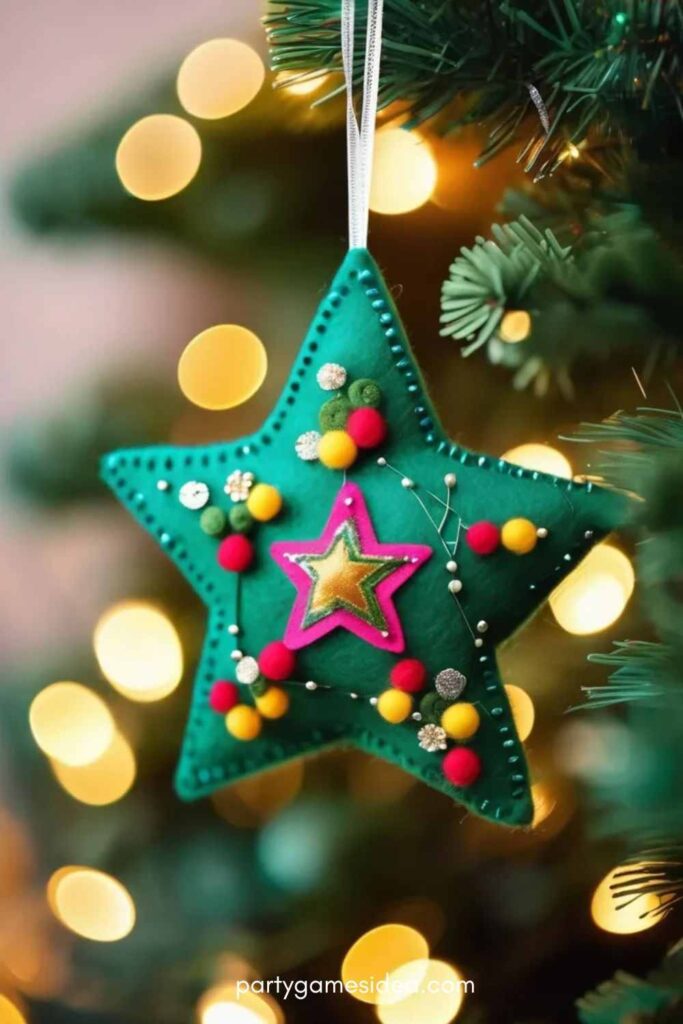
Felt Christmas Tree Ornament
A cozy felt tree ornament perfect for hanging on your tree.
- Materials: Felt sheets (green, red, yellow), thread, needle, buttons.
- Steps:
- Cut out a tree shape from the felt.
- Sew or glue buttons as ornaments on the tree.
- Add a loop at the top to hang it on the tree.
- Tips: You can personalize the buttons to reflect your style. This craft is great for older children or adults who enjoy sewing.
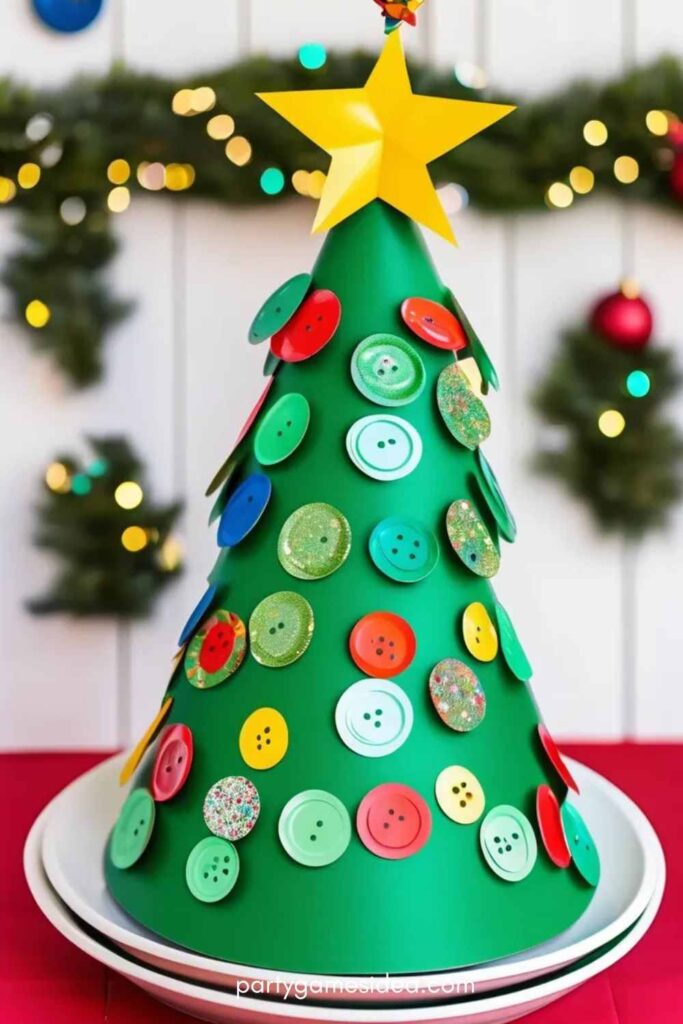
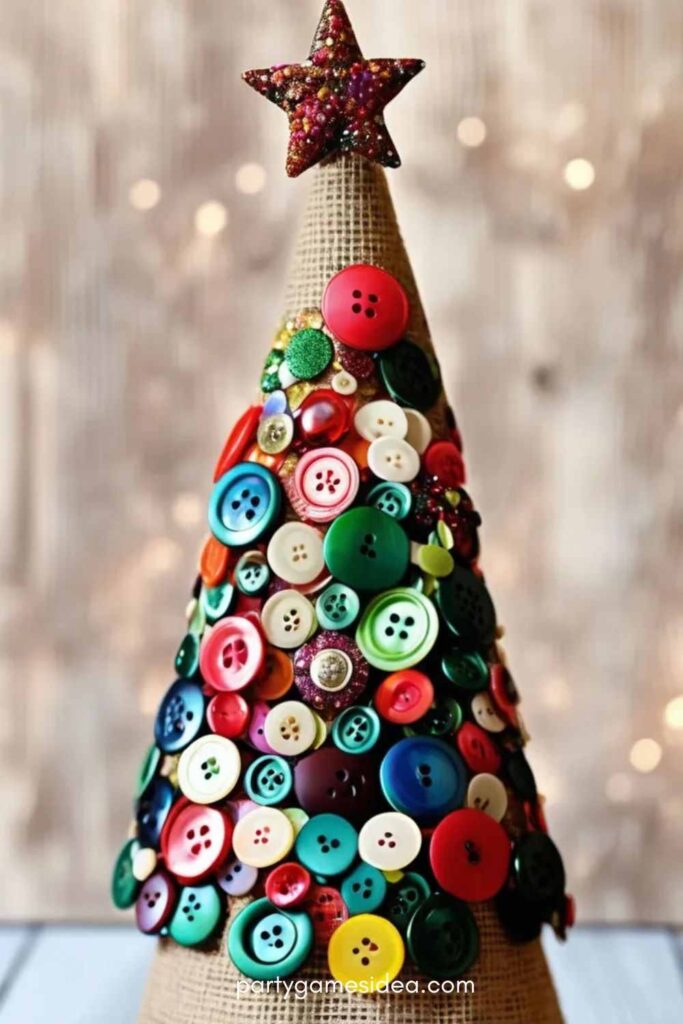
Button Christmas Tree
An easy yet beautiful way to make a tree using buttons.
- Materials: Green paper, assorted buttons, glue.
- Steps:
- Cut a triangular shape from the green paper.
- Glue buttons in a tree shape.
- Add a small button or star for the topper.
- Tips: Mix and match button colors for a more festive, layered look. This project is perfect for using up spare buttons.
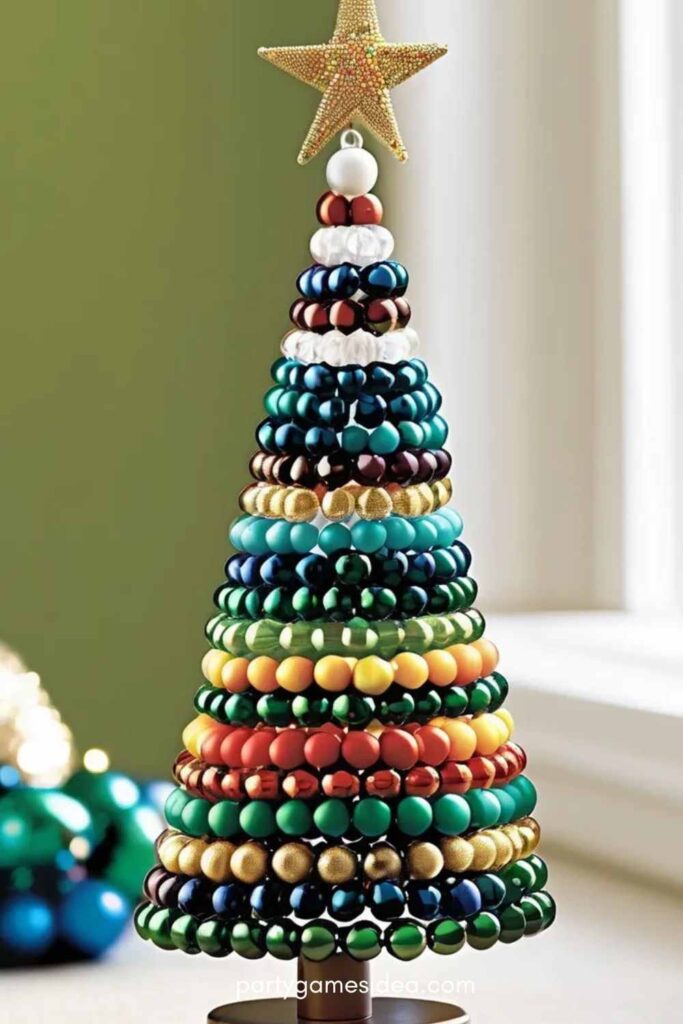
Bead Christmas Tree
Create a sparkling, beaded tree for added shine.
- Materials: Pipe cleaners, beads, star topper.
- Steps:
- Twist pipe cleaners into a tree shape.
- Thread beads onto the pipe cleaners.
- Add a star topper for the finishing touch.
- Tips: Use different colored beads to make the tree vibrant. This is a great activity for older kids or adults who enjoy detailed crafts.
Paper Roll Christmas Tree
Recycle paper rolls into a fun, eco-friendly craft.
- Materials: Empty toilet paper rolls, green paint, glue, glitter.
- Steps:
- Cut the toilet paper roll into smaller rings.
- Paint the rings green and glue them into a tree shape.
- Decorate with glitter or small ornaments.
- Tips: This is an excellent way to repurpose materials. You can make multiple trees and decorate them in different styles.
DIY Paper Christmas Tree Garland
A simple, paper-based craft perfect for hanging.
- Materials: Green paper, scissors, string, glue.
- Steps:
- Cut out paper triangles to make the tree shapes.
- Attach them to a string to form a garland.
- Hang along your mantel or windows.
- Tips: This garland is easy to make in bulk, so involve kids to make a fun family project.
Glitter Pine Cone Tree
A sparkly twist on the classic pine cone tree.
- Materials: Pine cones, glue, glitter, ribbon.
- Steps:
- Coat the pine cones in glue and roll them in glitter.
- Attach them to a wooden base or arrange them in a bowl for a centerpiece.
- Tips: Add a ribbon at the top for a festive bow. This craft can be adapted for different sizes of pine cones.
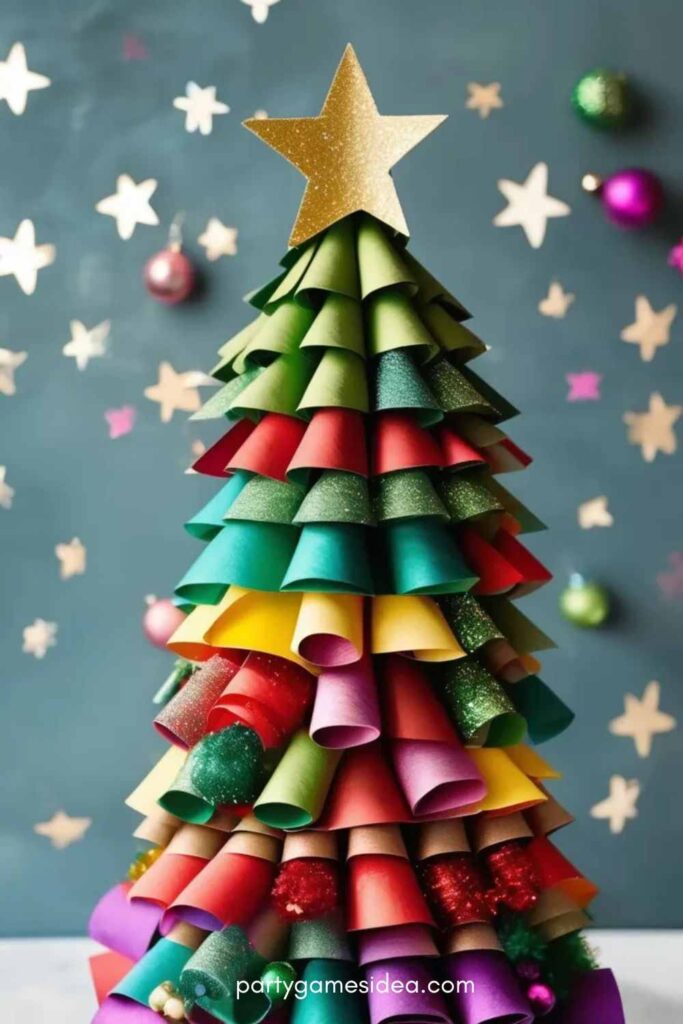
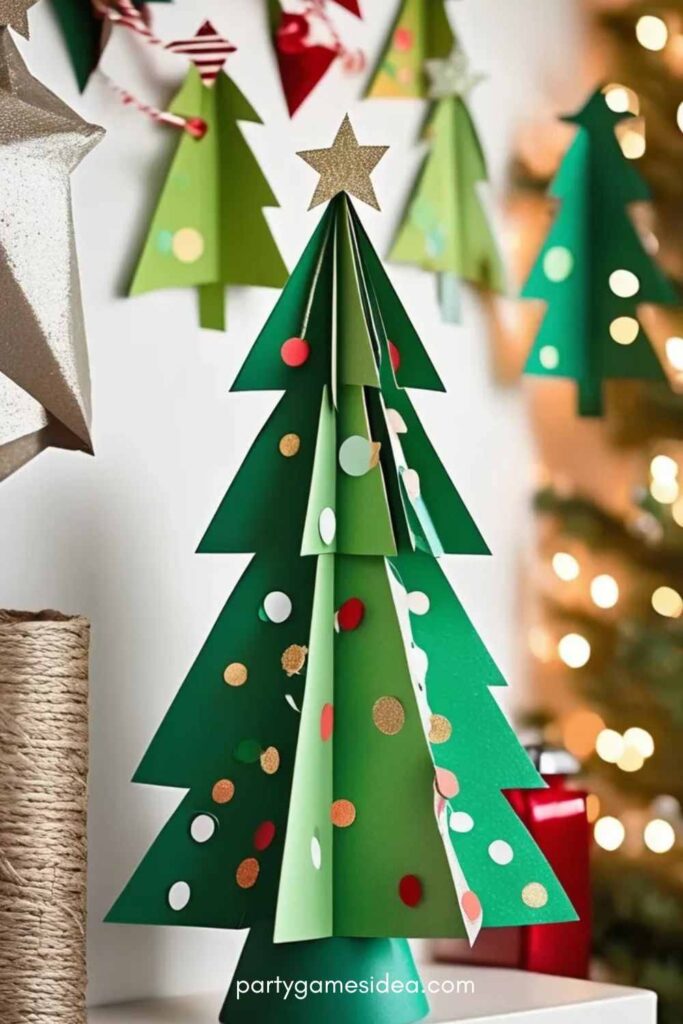
3D Paper Christmas Tree
An eye-catching, dimensional tree made from paper.
- Materials: Green paper, scissors, glue, star decoration.
- Steps:
- Cut out a series of paper circles and stack them to create layers of the tree.
- Glue each layer together to form a 3D tree.
- Add a star or ornament to finish.
- Tips: This project requires some patience, but the final result is a stunning 3D display.
Felt Christmas Tree
A soft, interactive tree you can decorate.
- Materials: Green felt, Velcro, felt decorations.
- Steps:
- Cut a tree shape from the green felt.
- Attach Velcro to the tree and small felt ornaments.
- Let kids place and remove the ornaments.
- Tips: This is great for younger kids to develop motor skills while decorating the tree.
Mason Jar Christmas Tree
Transform a mason jar into a charming holiday tree.
- Materials: Mason jar, green fabric, glitter, decorations.
- Steps:
- Fill the mason jar with green fabric or foam to create the base of the tree.
- Decorate the top with glitter, beads, or small ornaments.
- Tips: This makes a great gift or centerpiece and can be customized with different decorations for a personal touch.
Paper Bag Christmas Tree
Repurpose paper bags into a creative tree decoration.
- Materials: Paper bags, green paint, scissors, string lights.
- Steps:
- Cut the paper bags into strips and paint them green.
- Stack and glue them to form a tree shape.
- Add string lights for a glowing effect.
- Tips: This craft is perfect for creating a large-scale tree. You can even add garlands or other embellishments.
Button Tree on Canvas
Create a framed work of art with buttons.
- Materials: Canvas, buttons, glue, paint.
- Steps:
- Paint a tree shape on the canvas.
- Glue buttons in a tree shape for decoration.
- Tips: Use large, colorful buttons to create a vibrant tree or more neutral tones for a rustic look.
DIY Christmas Tree with Stickers
An easy, no-mess craft for younger kids.
- Materials: Green paper, Christmas-themed stickers, scissors.
- Steps:
- Cut a triangle from the green paper.
- Use Christmas-themed stickers to decorate the tree.
- Tips: This craft is simple yet fun for kids, and you can switch up the stickers for different themes each year.
Snowman Tree Craft
Combine the classic snowman with a Christmas tree.
- Materials: White construction paper, green markers, buttons, glue.
- Steps:
- Draw a snowman shape with a triangular green tree body.
- Decorate with buttons, ornaments, and a small hat.
- Tips: This is a playful twist on both Christmas tree and snowman crafts, ideal for family fun.
Stamped Christmas Tree
Create textured patterns with stamps.
- Materials: Stamps, ink pads, paper.
- Steps:
- Stamp a tree design onto paper using green ink.
- Decorate with additional stamps or embellishments.
- Tips: You can create your own stamps using foam or purchased stamp sets for intricate designs.
Newspaper Christmas Tree
A creative way to recycle old newspapers.
- Materials: Old newspapers, glue, paint, decorations.
- Steps:
- Roll newspaper into cones or cut it into strips.
- Paint the cones green and stack them into a tree shape.
- Decorate with paint or other craft items.
- Tips: This eco-friendly project gives new life to old newspapers and makes a great tree decoration.
Popsicle Stick Christmas Tree
A simple, sturdy craft using popsicle sticks.
- Materials: Popsicle sticks, green paint, glue, decorations.
- Steps:
- Arrange the popsicle sticks into a triangle shape.
- Paint them green and decorate with small ornaments.
- Attach a small star at the top.
- Tips: You can make this craft as a keepsake by writing names or dates on the sticks.
Wooden Christmas Tree
A rustic, natural-looking tree made from wood pieces.
- Materials: Small wood slices, glue, twine, decorations.
- Steps:
- Stack and glue wood slices in the shape of a tree.
- Decorate with twine, pinecones, or small ornaments.
- Tips: This craft is perfect for a rustic or farmhouse-style holiday decor.
Craft Stick Christmas Tree
Use craft sticks to make a simple yet stylish tree.
- Materials: Craft sticks, glue, green paint, glitter.
- Steps:
- Glue the sticks together to form a triangular tree.
- Paint the tree green and sprinkle with glitter for a sparkling finish.
- Tips: This craft can easily be modified for various skill levels, from simple designs to more elaborate trees.
Snowy Pine Cone Christmas Tree
A winter wonderland-inspired pine cone tree.
- Materials: Pine cones, white paint, glitter, glue.
- Steps:
- Paint the tips of the pine cones with white paint to mimic snow.
- Add glitter to make the tree shimmer.
- Stack or arrange the pine cones in a tree shape.
- Tips: This craft works well for a snowy, natural theme and is great for adults or older kids.
Chalkboard Christmas Tree
A customizable tree using chalkboard paint.
- Materials: Chalkboard paint, small chalkboard sign, markers.
- Steps:
- Paint a tree shape on the chalkboard.
- Use chalk or markers to decorate and personalize the tree.
- Tips: You can change the decorations every day to suit your mood or theme.
Recycled CD Christmas Tree
Upcycle old CDs into a sparkling tree.
- Materials: Old CDs, glue, sequins, stars.
- Steps:
- Glue the CDs into a tree shape.
- Add sequins and stars for extra sparkle.
- Tips: This is an eco-friendly craft that also makes use of materials you might already have around the house.
These ideas are just a few of the many ways you can get creative with Christmas tree crafts. Each project can be tailored to fit different skill levels and ages, making them perfect for family activities, classroom projects, or festive home decor.
Creative Variations
Crafting a Christmas tree doesn’t have to follow a traditional pattern—get creative by using alternative materials, experimenting with different shapes, and adding a personal theme to make your tree unique. These variations open up endless possibilities to explore, offering something for every style and skill level. Let’s dive into some fun and creative variations that will elevate your Christmas tree crafts.
Alternative Materials: Using Recycled Materials
Recycling is not only good for the environment but also provides a fantastic way to create unique and eco-friendly Christmas trees.
- Cardboard: Use old cardboard boxes to create sturdy tree shapes. Cut and paint them to make vibrant, fun trees, or glue them together to form a multi-layered tree.
- Fabric Scraps: Repurpose fabric scraps to create textured trees. Cut fabric into shapes like triangles or small squares to form tree branches, and glue them to a sturdy base.
- Magazine Pages: Roll magazine pages into cones or cut them into strips for a more artistic and recycled tree look.
- Old CDs: Repurpose old CDs by stacking them to form a tree shape. Their reflective surface can add a beautiful touch of sparkle to your design.
Tips:
- Recycled materials can add a rustic or modern feel depending on how you use them.
- Cardboard trees can be painted or wrapped in decorative paper for extra flair.
- Fabric scrap trees are perfect for adding texture and vibrancy.
Different Tree Shapes: Creating a 3D Tree
While traditional Christmas tree crafts often focus on flat shapes, creating a 3D tree can bring a whole new dimension to your decor.
- Cone-Shaped Foam or Paper: Use foam or thick paper cones as the base for a three-dimensional tree. Wrap these bases in fabric, paper, or paint them in your desired colors. Stack different-sized cones for a layered effect.
- Origami Tree: Fold paper into intricate patterns to form a 3D tree. This technique requires a bit more patience but results in a stunning, geometric design.
- Wire Frame: Create a wire frame in the shape of a tree, then wrap it with fabric, garlands, or even LED lights for a modern, glowing effect.
- Cardboard Layers: Stack multiple cardboard triangles on top of each other for a simple but effective 3D look.
Tips:
- Experiment with different materials for the base to create a tree that fits your style—use lightweight foam for a delicate look or thick cardstock for a sturdier tree.
- The size and arrangement of the layers can create a more natural or stylized look, depending on how you stack them.
Theme Ideas: Personalizing with Themes
One of the most fun parts of crafting a Christmas tree is personalizing it with a unique theme that suits your style, interests, or holiday spirit. These themed trees make for creative decor ideas and add an extra layer of fun to your crafts.
- Snowman Tree: Combine the magic of a snowman with your Christmas tree. Use a white tree base and decorate it with a scarf, buttons, and a small top hat. Add snow-like elements such as cotton or faux snow for an extra frosty touch.
- Rustic Tree: Go for a natural, woodsy feel by using natural materials such as twigs, burlap, pinecones, and moss. This theme evokes the charm of a country Christmas.
- Pastel-Colored Tree: For a softer, more whimsical look, try a pastel-colored tree using light shades like pink, blue, lavender, and mint. Decorate with matching ornaments like small stars, soft ribbon, and subtle glitter.
- Glam or Metallic Tree: For a touch of luxury, create a glam tree using metallic elements like gold, silver, or copper. Incorporate beads, sequins, and shiny ribbon to elevate the design.
- Nature-Inspired Tree: Add natural elements like dried flowers, feathers, or leaves to create a nature-inspired Christmas tree. You can incorporate earthy colors like browns, greens, and deep reds for a cozy vibe.
Tips:
- Choose a theme that reflects your holiday personality, whether that’s a traditional, rustic vibe or something more modern and shiny.
- Add details like mini ornaments, painted designs, or themed ribbons to help tie the theme together.
By thinking outside the box, using alternative materials, experimenting with shapes, and embracing unique themes, you can craft a Christmas tree that’s truly one-of-a-kind. Whether you’re creating trees for home decor, gifts, or as fun holiday activities, these variations offer endless possibilities for festive creativity!
Tips and Tricks
Creating Christmas tree crafts can be a delightful and memorable activity for all ages, especially when you incorporate a few tips and tricks that make the process even more enjoyable. Here are some creative ways to encourage kids, simplify cleanup, and maximize the fun of your crafting sessions.
Encourage Kids to Express Their Creativity
One of the most exciting aspects of crafting is the opportunity for kids to personalize their projects. Encourage children to use their imagination and choose their favorite colors and decorations for their Christmas trees.
- Choose Favorite Colors: Let kids pick their favorite colors for ornaments, ribbons, or even the tree itself. Bright colors, pastels, or even a rainbow-themed tree can be exciting choices.
- Add Personal Touches: Allow them to add their own designs or even draw small pictures on the tree. Let them decorate with stickers, buttons, or cut-out shapes that represent their interests.
- Use Different Mediums: Encourage using crayons, markers, fabric scraps, or glitter to make each tree unique and fun. The more creative freedom, the more invested they’ll be in the process.
Tips:
- Provide a variety of supplies like buttons, pom-poms, sequins, and stickers so that kids can have fun exploring different textures and colors.
- Encourage them to think outside the box – a “space-themed” tree with stars or a “forest” tree with mini animals can spark even more creativity.
Use the Craft as an Ornament or Handmade Gift
Crafting your own Christmas tree can go beyond just home decor—it makes for a heartfelt ornament or gift. Here’s how you can use the craft in different ways:
- Christmas Tree Ornaments: Once the craft is complete, turn it into an ornament for your holiday tree. Simply add a loop of ribbon or twine to the top, and it’s ready to hang.
- Handmade Gifts: A miniature Christmas tree crafted with love can be a wonderful handmade gift. This is perfect for family members, teachers, or friends, especially when personalized with names or favorite colors.
- Gift Tags or Cards: Smaller tree crafts can double as unique gift tags or greeting cards. Cut out mini tree shapes from craft paper, decorate them, and attach them to gift bags or use them as part of a holiday card.
Tips:
- Add a personal message or name on the tree to make it even more meaningful as a gift or ornament.
- Use lightweight materials (like foam or paper) so that the trees are easy to hang on the Christmas tree or give as gifts without adding too much weight.
Use Glitter Glue for Easier Cleanup
Crafting with kids can get a bit messy, but with a few simple adjustments, the cleanup process can be a breeze. Glitter glue is a fantastic alternative to loose glitter, making your crafting experience cleaner and more efficient.
- Glitter Glue for Mess-Free Sparkle: Instead of using loose glitter, which can scatter everywhere, opt for glitter glue. It provides the same sparkle but is much easier to control and clean up.
- Easy Application: Glitter glue comes in bottles with fine tips, making it easy for kids to apply in small amounts to their crafts without making a mess.
- Quick Drying: Glitter glue tends to dry faster than loose glitter, which helps speed up the crafting process, especially when you’re working with impatient little hands.
Tips:
- Use glitter glue on the edges of the tree or in specific areas to create a shimmering effect without overwhelming the design.
- For added fun, try using different colored glitter glues to create beautiful patterns and designs on the tree.
By encouraging kids to express their creativity, offering practical ideas for turning their crafts into ornaments or gifts, and opting for glitter glue to minimize mess, your Christmas tree crafts will be a fun and stress-free activity. These tips help keep the crafting experience enjoyable and memorable for everyone involved!
FAQ
What materials do I need to make a Christmas Tree Craft Ideas?
To make a Christmas Tree Craft Ideas, you’ll need a variety of materials depending on the style and complexity of your project. Here are some essential materials:
- Base materials: Paper (construction paper, cardstock, or foam sheets), cardboard, or foam cones for a 3D effect.
- Decorative items: Glitter, sequins, buttons, beads, or pom-poms for adding sparkle and texture.
- Adhesives: Glue (liquid glue, hot glue gun, or glue sticks) or double-sided tape for securing pieces together.
- Tools: Scissors for cutting shapes and decorations, and markers or crayons for adding color and details.
- Optional accents: Ribbons, stickers, fabric scraps, mini ornaments, or even recycled items like buttons, bottle caps, or magazine cutouts.
These materials offer endless opportunities to personalize your Christmas tree craft, making it as simple or elaborate as you like!
Can I make a Christmas Tree Craft Ideas with kids?
Yes, making a Christmas Tree Craft Ideas with kids is a fantastic and fun activity! It’s a great way to engage their creativity and allow them to express themselves during the holiday season. Here are a few reasons why it works so well:
- Simple and Adaptable: You can tailor the craft to suit different age groups, from simple paper tree cutouts for younger kids to more detailed 3D tree designs for older ones.
- Creative Freedom: Kids can choose their favorite colors, decorations, and themes, making each tree unique and personal.
- Easy Materials: Most Christmas tree crafts require basic materials like construction paper, glue, and crayons or markers, which are easy to find and safe for children to use.
- Skill Development: Crafting helps children improve fine motor skills, hand-eye coordination, and patience.
Just keep the materials safe and child-friendly (e.g., non-toxic paints, safe scissors) and let them have fun!
How can I personalize my Christmas Tree Craft Ideas?
Personalizing your Christmas Tree Craft Ideas is a great way to make it special and unique. Here are several creative ways to add a personal touch:
- Favorite Colors: Use your favorite colors for the tree, ornaments, and decorations. Whether it’s classic red and green or pastel shades, selecting a color scheme that reflects your style can make the craft feel more personal.
- Add Names: Write the names of family members or friends on the tree or ornaments to create a custom holiday display. You could also use the tree as a personalized gift or greeting card.
- Themed Decorations: Choose a specific theme for your tree, like a rustic design with burlap and pinecones, a snowman theme with white and blue accents, or even a space-themed tree with stars and planets.
- Photos or Handprints: Incorporate family photos, handprints, or drawings as ornaments or tree decorations to make it even more meaningful.
- DIY Ornaments: Make personalized ornaments with initials, favorite symbols, or mementos to hang on the tree.
By adding personal elements, you can create a Christmas tree craft that feels special and unique to you or your family!
How can I make my Christmas Tree Craft Ideas more durable?
To make your Christmas Tree Craft Ideas more durable, consider using sturdy materials and techniques that ensure longevity. Here are some tips to help:
- Use Strong Materials: Opt for heavier paper like cardstock, foam board, or felt instead of regular construction paper. These materials are sturdier and will hold up better over time.
- Reinforce the Base: If you’re creating a 3D tree, consider using a foam cone, wooden dowels, or cardboard for the base. These materials provide better support and prevent the tree from toppling over easily.
- Seal with a Protective Coating: After decorating your tree, apply a layer of Mod Podge or clear varnish to seal the decorations. This will protect the colors and prevent wear and tear, especially for items like glitter or paper embellishments.
- Use Strong Adhesives: Instead of regular school glue, use stronger adhesives like hot glue or tacky glue to ensure that decorations stay in place longer, particularly for heavier items like buttons, beads, or ornaments.
- Avoid Overloading with Weight: While it’s fun to add lots of decorations, try not to overload the tree with too many heavy items, as this could cause the base or branches to bend or break.
These steps will help ensure your Christmas tree craft is both durable and long-lasting, ready to be enjoyed for seasons to come!

Hi, I’m Hailey Say, the proud mom and owner of PartyGamesIdea.com. As a dedicated party designer and an expert in party ideas, I have a deep passion for crafting memorable and enjoyable experiences for every occasion. From holiday games to baby showers, bridal showers, bachelor parties, group gatherings, and more, I specialize in creating unique and fun party ideas that cater to all age groups and interests.
With an extensive collection of ideas ranging from printable games, teen and adult games, kids’ party activities, birthday party games, girls’ games, memory games, family games, and outdoor games, I aim to make every event special. My expertise also extends to themed parties such as dinner parties, brunch parties, graduation celebrations, college parties, and fun night games.
On PartyGamesIdea.com, I share my passion and creativity, helping people turn their party visions into reality. With years of experience and a keen eye for detail, I am committed to making your event planning process enjoyable and stress-free. Join me on PartyGamesIdea.com, and together, we’ll create unforgettable memories for you and your loved ones.

