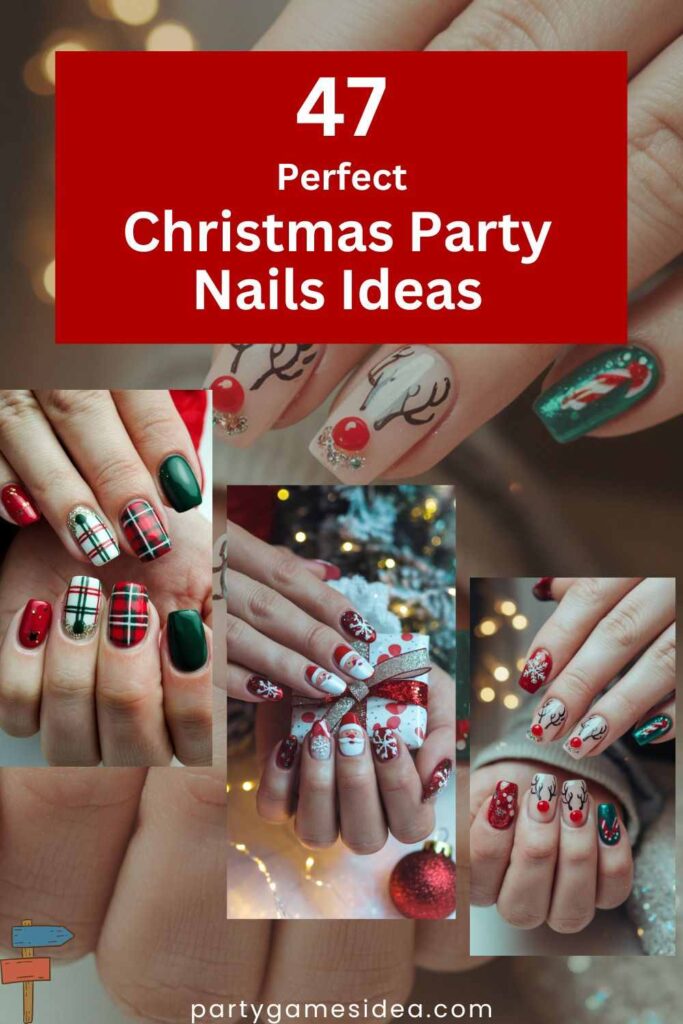
Christmas Party Nails Ideas are a creative and festive way to add some holiday cheer to your look this season. As the holiday season approaches, many people look for ways to enhance their outfits for Christmas parties, and nail art is a fun and easy way to do so. Whether you prefer classic red and green designs or more modern, sparkly accents, your nails can make a bold statement that reflects the joy and excitement of the season.
Nail art plays an important role in completing your holiday ensemble. When attending a Christmas party, your nails are often one of the first things people notice, and they can serve as the perfect finishing touch to your overall look. Festive nails not only complement your outfit but also give you the chance to showcase your personal style with creative designs, making you feel even more confident and ready to celebrate.
Christmas Party Nails Ideas
Christmas Party Nails Ideas are a fun and creative way to celebrate the holiday season with festive flair. From sparkling glitter to classic holiday motifs, these nail designs complement your outfit and enhance your party look. Get inspired by these Christmas party nails ideas for a dazzling and joyful celebration!
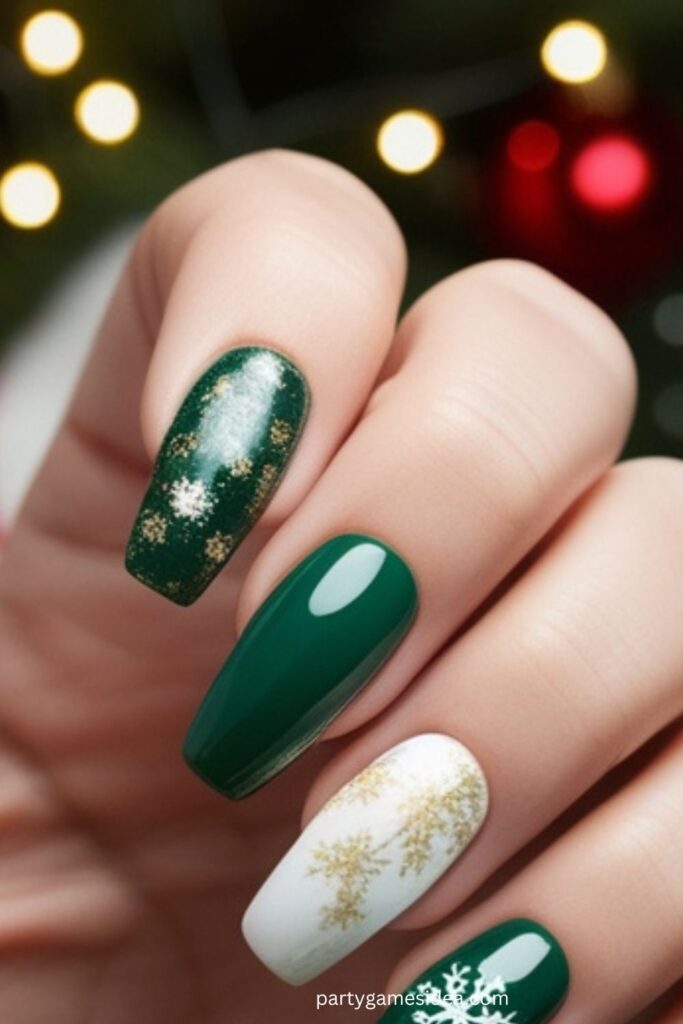
Classic Red and Green Christmas Nails
A timeless combination, red and green nails exude the festive spirit of Christmas. These bold, vibrant colors will instantly add holiday cheer to your nails.
Tips:
- Use glossy or matte finishes depending on your style.
- Add a touch of glitter on accent nails for extra sparkle.
- Combine solid colors with simple patterns like stripes or polka dots for a playful twist.
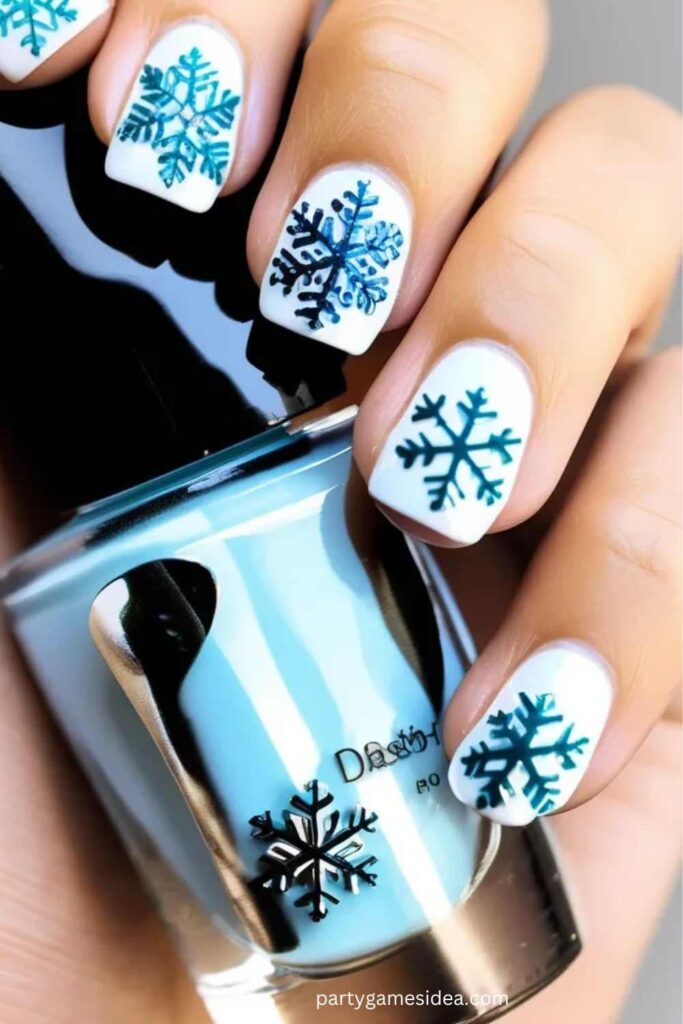
Snowflake Nail Art
Snowflakes are a quintessential part of Christmas, symbolizing the winter season. Delicate snowflakes on your nails will make your manicure look magical and festive.
Tips:
- Use white or silver nail polish for the snowflakes on a blue, white, or silver base.
- Opt for a fine-tipped nail brush or a stamping kit to achieve detailed snowflake designs.
- Add rhinestones to make the snowflakes pop!
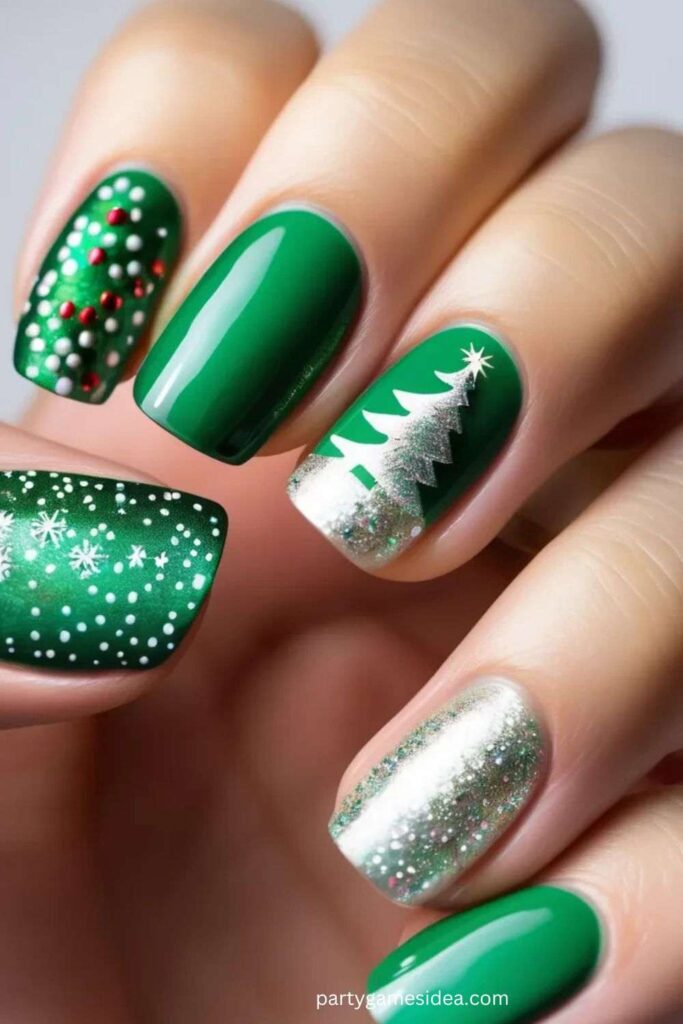
Christmas Tree Nails
Create a mini Christmas tree design on your nails for a cute and festive look. Whether simple or elaborate, these trees will instantly evoke holiday cheer.
Tips:
- For a simpler design, use green polish with gold or silver accents for the tree decorations.
- For a bolder look, paint each nail as a different Christmas tree design using rhinestones or glitter for added texture.
- Experiment with multi-colored lights for a fun, vibrant effect.
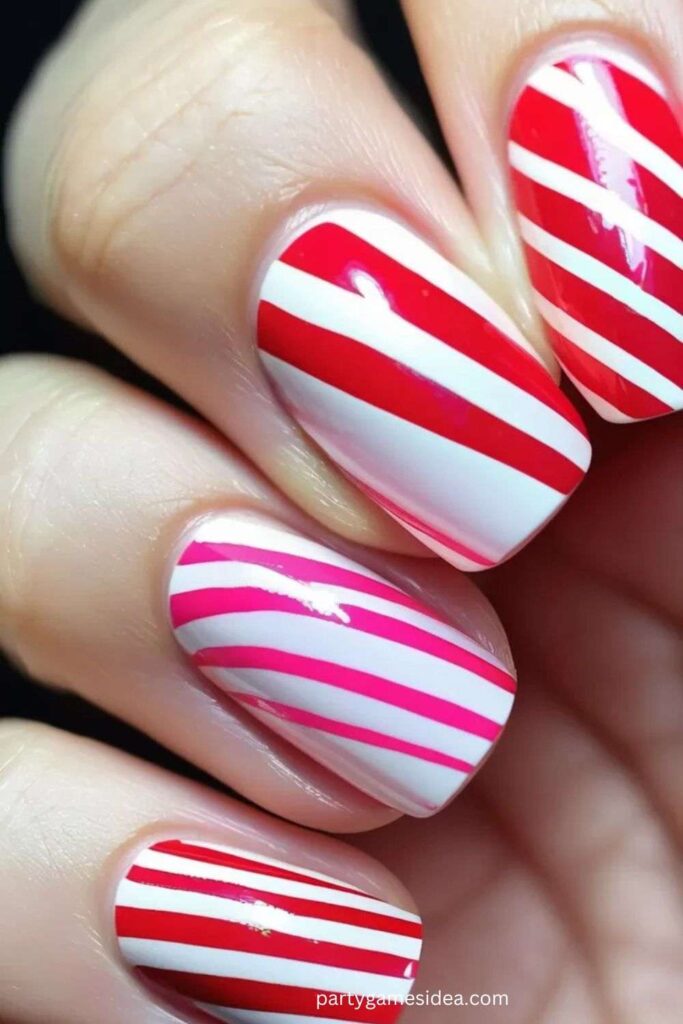
Candy Cane Stripes
Candy cane stripes are a fun and easy way to add a sweet touch to your nails. The classic red-and-white stripes are instantly recognizable and perfectly festive.
Tips:
- Use striping tape to create precise, clean lines.
- Mix up the pattern by adding diagonal stripes or a zigzag design.
- Try a matte finish for a more modern take on this traditional design.
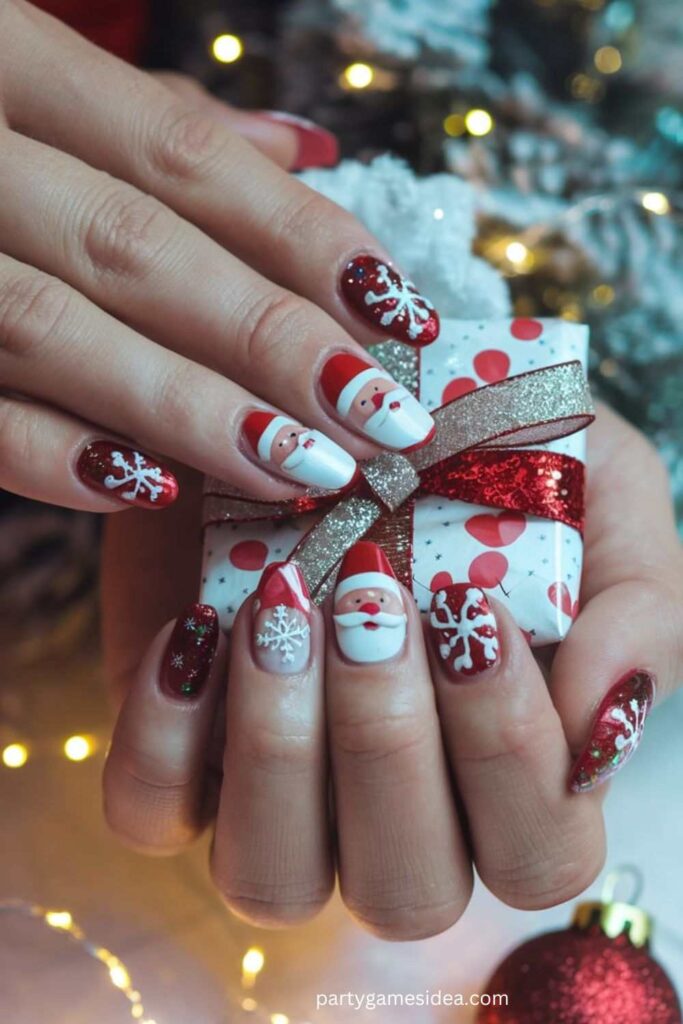
Santa Claus Nails
Santa Claus nails add a playful, whimsical element to your holiday manicure. Whether it’s Santa’s face or his iconic red outfit, these nails are a fun way to embrace the holiday spirit.
Tips:
- Use red for the background, white for the beard, and black for the belt buckle.
- Add a small rhinestone or glitter to Santa’s hat for some sparkle.
- Keep the rest of the nails simple to make the Santa design stand out.
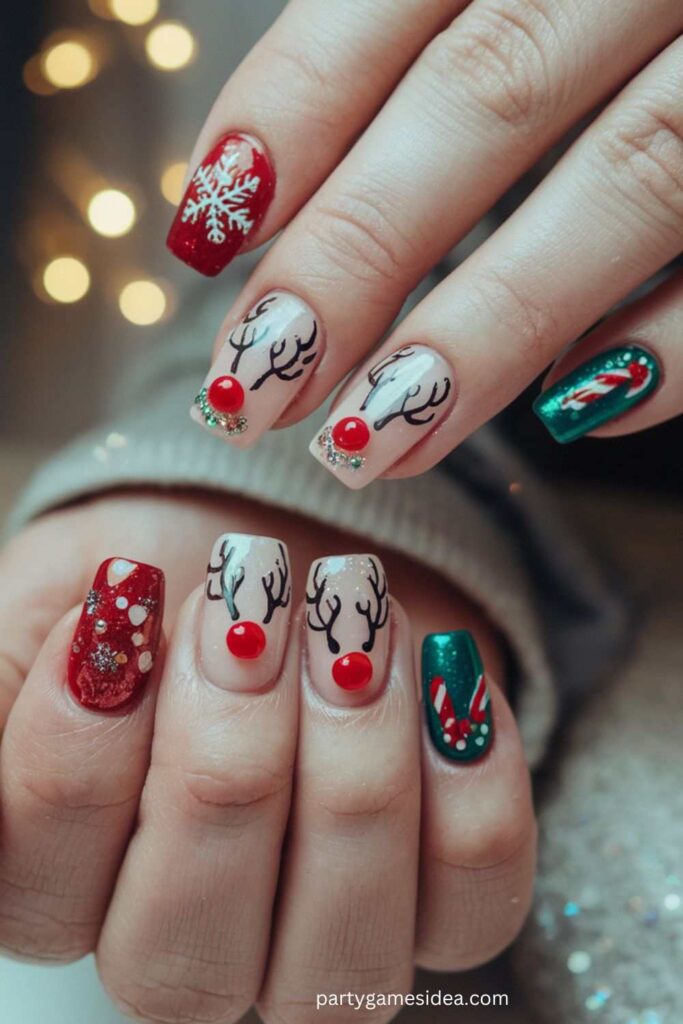
Reindeer Nail Art
Reindeer nails bring a bit of humor and holiday cheer to your manicure. This design is perfect for those who want something fun and festive.
Tips:
- Use brown or beige polish for the reindeer, and black or red for the nose.
- Add antlers using thin lines or stamps.
- Combine with a glittery or matte finish to make the design pop.
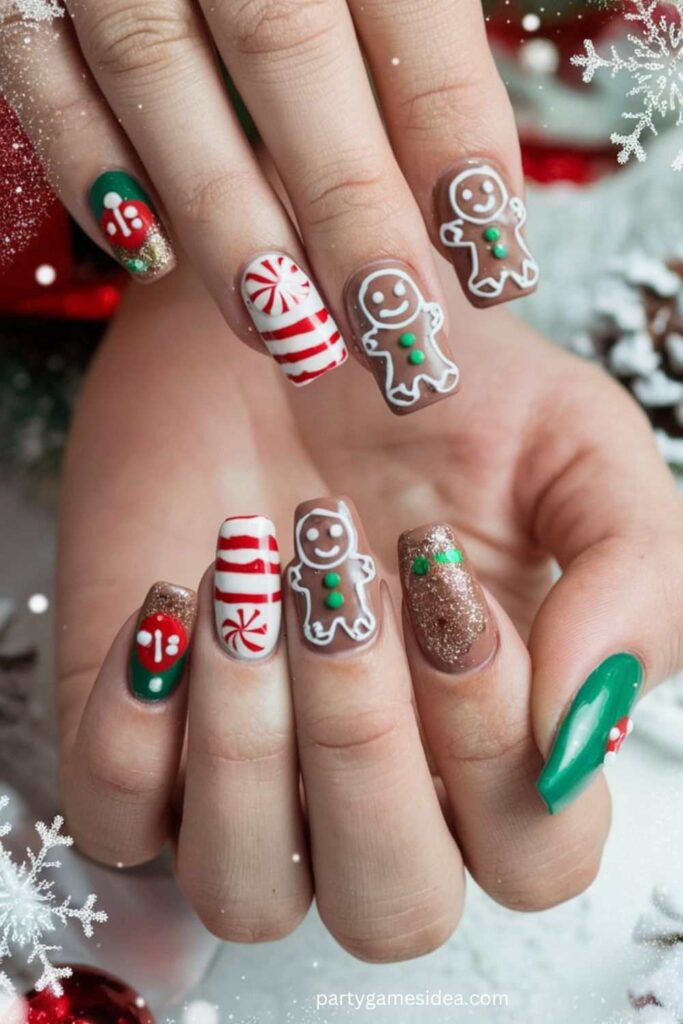
Gingerbread Man Nails
These cute little gingerbread men are perfect for anyone looking to add a sweet, edible-inspired look to their Christmas nails.
Tips:
- Use light brown or beige polish for the base.
- Add white details for icing, buttons, and a cute smile.
- Stick to pastel shades for a soft, adorable effect.
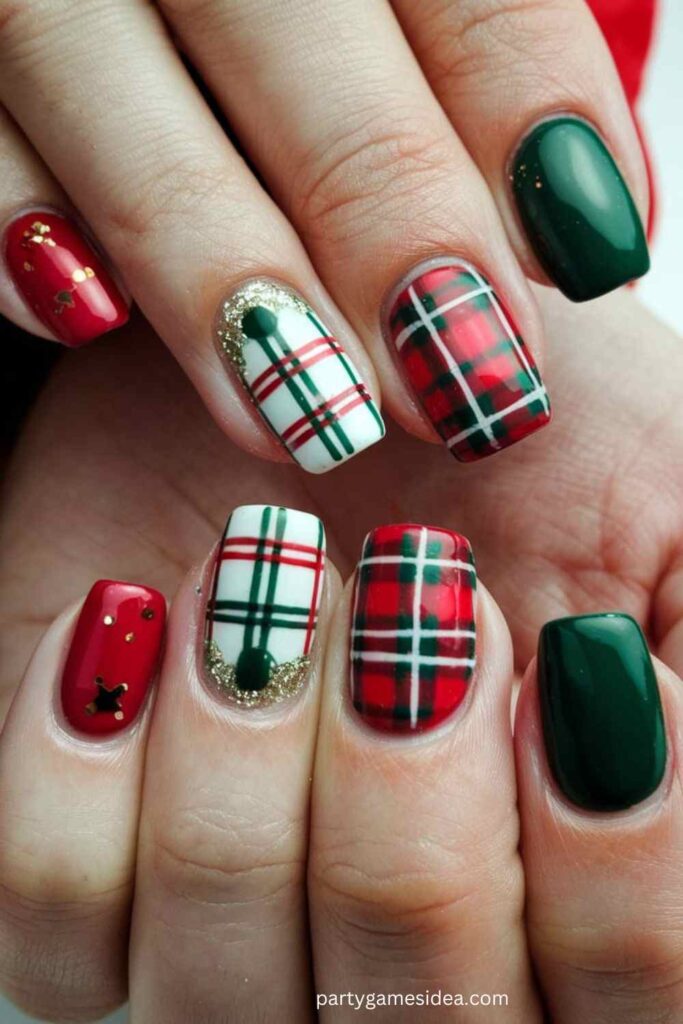
Plaid Christmas Nails
Plaid patterns are perfect for cozy Christmas vibes. This design works wonderfully for a more rustic, yet festive, look.
Tips:
- Use red, green, and white for a traditional holiday plaid.
- Apply thin tape to achieve crisp, clean lines.
- Mix with solid colors or snowflakes for added detail.
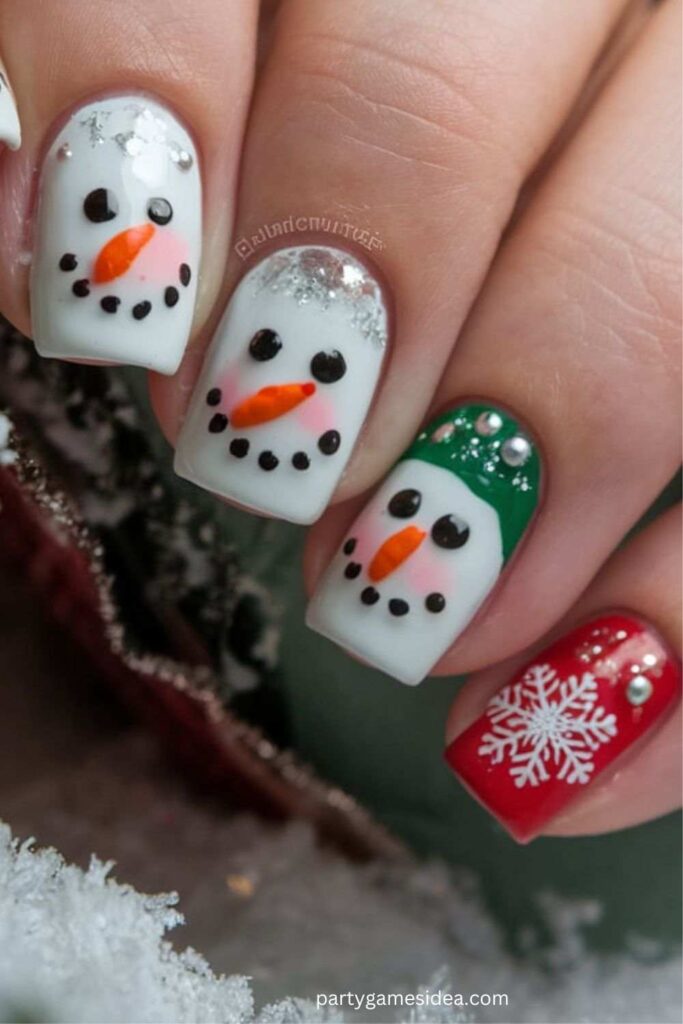
Snowman Nails
Celebrate the fun of winter with snowman designs on your nails. These designs are both cute and festive, perfect for the holiday season.
Tips:
- Paint a simple snowman on the nail with black dots for buttons and eyes, and orange for the carrot nose.
- Add scarves, hats, or even mini snowflakes for more details.
- Keep the rest of the nails simple with a neutral color like light blue or silver.
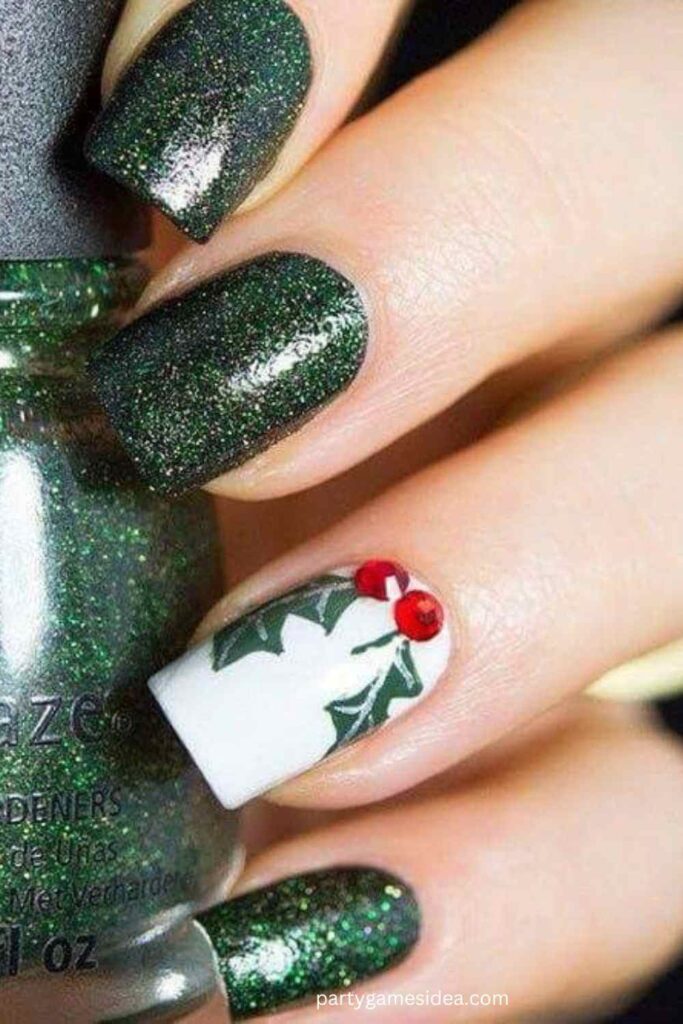
Holly and Berries Nails
Holly is a classic symbol of Christmas, and adding it to your nails will bring a touch of nature and festivity to your look.
Tips:
- Use dark green polish for the leaves and red polish for the berries.
- Keep the design simple and minimalistic or add glitter for extra sparkle.
- Paint a few small holly designs on accent nails for a balanced look.
Gold and White Nails
For an elegant holiday look, gold and white nails are the perfect choice. The combination exudes sophistication while still feeling festive.
Tips:
- Create a white base with gold accents or vice versa.
- Try a gold French tip or a glittery ombre effect.
- Add a few rhinestones for extra glamour.
Christmas Lights Nail Art
Bring the magic of Christmas lights to your nails with colorful bulbs and string designs.
Tips:
- Use bright, bold colors like red, blue, green, and yellow for the lights.
- Draw the light string in a curved or zigzag pattern along your nails.
- Add glitter or rhinestones for extra shine.
Santa Hat Nails
Santa’s signature red hat can be the star of your nail art, offering a cute and simple design that still captures the holiday spirit.
Tips:
- Keep the base color red, with white for the brim and pom-pom.
- Experiment with a glittery topcoat to add some sparkle to the hat.
- Use a bold, matte finish for a modern look.
Silver Snowfall Nails
Silver nails with white snowflakes offer a glamorous, wintry look that’s perfect for the holidays.
Tips:
- Start with a silver base coat and add delicate white snowflakes using a thin nail brush.
- Use a subtle glitter to make it look like falling snow.
- Make the snowflakes smaller on the tips for a French manicure effect.
Red Glitter Nails
Add some festive glamour with all-over red glitter nails. These nails shine bright and are perfect for a more bold, statement-making look.
Tips:
- Apply a clear base coat, then add glitter polish or loose glitter.
- Layer the glitter for a dense, full coverage or keep it subtle for a more sophisticated look.
- Pair with a simple design on accent nails, like a small star or snowflake.
Blue and White Christmas Nails
For a cool and icy holiday look, blue and white nails can give you a chic, frosty vibe. This color scheme works beautifully with snowflakes and other winter elements.
Tips:
- Experiment with gradients to mimic a winter sky.
- Use darker blues for an elegant, deep effect.
- Add white snowflakes or silver detailing for contrast.
Matte Black Christmas Nails
For a sleek, modern twist on holiday nail art, matte black nails can make your design stand out. Pair it with metallic or glittery accents for a bold contrast.
Tips:
- Use matte black as a base and add a silver or gold accent.
- Try matte black with a metallic gold Christmas tree or reindeer design.
- Pair with rhinestones or studs for an edgy look.
Christmas Sweater Nails
For a cozy, festive vibe, Christmas sweater nails are a fun design choice. They can be detailed or simple but always have a warm, charming effect.
Tips:
- Use a textured topcoat for a knit sweater effect.
- Paint traditional holiday motifs, such as snowflakes, trees, or candy canes.
- Stick to soft colors like red, white, and green for a cozy vibe.
Frosted Nails
A frosted look adds a cool, icy touch to your nails that’s perfect for the season. The design mimics the look of frost-covered windows.
Tips:
- Start with a light pastel or neutral base and use a sheer glitter to create the frosted effect.
- Add small rhinestones or pearls for a delicate touch of sparkle.
- Focus on the tips of the nails for a more natural, frosted effect.
Stamped Christmas Nails
Nail stamping allows you to create intricate designs without the need for freehand painting. It’s perfect for detailed Christmas designs.
Tips:
- Choose stamps that feature festive designs like snowflakes, reindeer, or Christmas trees.
- Use a metallic or glittery topcoat to make the stamped designs stand out.
- Stamp on solid color nails for a striking contrast.
Rhinestone Accents
For extra glamour, add rhinestone accents to your Christmas party nails. They make your nails sparkle and shine like a Christmas ornament.
Tips:
- Add rhinestones to accent nails or as a border around the cuticle.
- Mix and match sizes for a more dynamic, eye-catching effect.
- Pair rhinestones with a matte or glittery base coat for balance.
Candy Cane French Tips
Take your French tips to the next level with a candy cane design. This festive twist on a classic nail look is perfect for the holiday season.
Tips:
- Use red and white polish to create striped tips.
- Add glitter or rhinestones to the tips for extra sparkle.
- Keep the base color neutral to let the tips stand out.
3D Christmas Nail Art
For something truly eye-catching, try 3D nail art with festive designs like mini ornaments, Christmas trees, or even little gifts.
Tips:
- Use nail glue to attach tiny 3D embellishments like bows or rhinestones.
- Keep the rest of the nails simple so the 3D art can stand out.
- Experiment with small embellishments that add texture without overwhelming the design.
Metallic Gold Nails
For a bold, luxurious look, metallic gold nails are a perfect choice. This design works for both casual and formal Christmas parties.
Tips:
- Use gold polish as a base and add delicate accents like red or green nail art.
- Pair with simple designs like stars or dots for a festive touch.
- Finish with a shiny topcoat to enhance the metallic finish.
Ombre Christmas Nails
Ombre nails are a trendy, stylish way to create a smooth gradient effect that’s perfect for holiday parties.
Tips:
- Blend red and green, gold and white, or blue and silver for a festive ombre effect.
- Add glitter at the tips for extra sparkle.
- Use a sponge or a nail art brush to create the gradient effect.
Nail Care Tips for the Holidays
The holiday season brings festive celebrations, and with all the fun of Christmas party nails, it’s essential to maintain healthy, beautiful nails. Proper nail care ensures your designs stay flawless and your nails remain strong throughout the season. Here are some key tips to keep your nails in top condition during the holiday festivities.
Pre-party Preparation: Moisturizing and Nail Strengthening
- Hydrate your nails: Use a nourishing cuticle oil or hand cream to moisturize your nails and cuticles, especially during the colder months when nails tend to get dry.
- Strengthen your nails: Apply a strengthening treatment or base coat to prevent brittleness and breakage. Look for products containing keratin or biotin to help fortify your nails.
- Avoid harsh chemicals: Use gentle nail polish removers free of acetone and chemicals that can weaken your nails. Moisturize after every use to maintain healthy nails.
How to Maintain a Fresh Look Throughout the Festive Season
- Regular touch-ups: To keep your Christmas party nails looking fresh, perform minor touch-ups on chips or faded spots. Carry a small nail polish bottle or a touch-up kit for quick fixes.
- Apply a top coat: A high-quality top coat can extend the life of your manicure by protecting your nail art from chipping and adding a glossy finish.
- Avoid excessive wear: Try not to expose your nails to excessive water or harsh environments (like cleaning or dishwashing) to keep them looking pristine longer.
Removal Tips for Glitter and Embellishments
- Soak to remove glitter: Glitter can be tricky to remove. Soak a cotton pad in acetone-based nail polish remover and place it on your nail for 5–10 minutes. Gently rub off the glitter to avoid damaging the nail surface.
- Use a foil wrap method: Wrap your nails in aluminum foil with a cotton pad soaked in acetone to help break down glitter polish more effectively.
- Be gentle: Don’t peel off embellishments or glitter. Allow the remover to do the work to preserve your nails and prevent damage.
DIY vs. Professional Nail Art
When it comes to achieving the perfect Christmas party nails, you have two main options: doing it yourself or visiting a professional nail salon. Both have their advantages and disadvantages, so it’s important to weigh the pros and cons before deciding which option best suits your needs.
Pros of DIY Nail Art
- Cost-effective: Doing your nails at home can save you money, especially if you’re on a budget or plan to change your nail designs frequently.
- Creative freedom: You have complete control over the design, colors, and style. You can experiment with different techniques, patterns, and trends without any restrictions.
- Convenience: You can do your nails anytime, in the comfort of your own home, without needing to make an appointment or travel to a salon.
Cons of DIY Nail Art
- Time-consuming: Doing your nails yourself can take longer, especially if you’re trying intricate designs or using multiple colors.
- Skill level: If you’re a beginner, achieving professional-looking results may be challenging. Mistakes are common, and perfecting the technique takes practice.
- Durability: DIY manicures, especially without the right tools, may not last as long as salon nails, leading to chips or wear quicker.
Pros of Professional Nail Art
- Expert results: Nail artists have the skill and experience to create intricate designs with precision, ensuring that your nails look polished and flawless.
- Time-saving: A professional can complete your manicure in less time compared to doing it yourself, leaving you with more time to enjoy the holiday festivities.
- Long-lasting: Salon manicures often use high-quality products and techniques that provide a more durable finish, so your nails will stay looking fresh longer.
Cons of Professional Nail Art
- Costly: Professional nail art can be expensive, especially for intricate designs or premium services like gel manicures or embellishments.
- Limited customization: While nail salons offer a wide variety of designs, they may not always be able to replicate your specific vision exactly as you want.
- Appointments: You need to schedule an appointment, which can be a hassle during the busy holiday season, and there may be long waiting times.
Step-by-Step DIY Tutorial Ideas for Beginners
If you decide to take the DIY route and create your own Christmas party nails, here are some beginner-friendly nail art ideas with simple step-by-step instructions:
1. Classic Red and Green Stripes
- What you’ll need: Red and green nail polish, striping tape, base coat, top coat.
- Steps:
- Start by applying a base coat to protect your nails.
- Once the base coat is dry, use striping tape to create the lines for your red and green stripes.
- Paint one section with red and the other with green.
- Carefully remove the tape while the polish is still wet to reveal clean, crisp stripes.
- Finish with a top coat to seal the design.
2. Snowflake Nails
- What you’ll need: White nail polish, light blue polish, thin nail brush, rhinestones (optional).
- Steps:
- Apply a base coat and then paint your nails with light blue polish.
- Once dry, use a thin nail brush to create snowflake designs with white polish.
- Add rhinestones to the center of the snowflakes for extra sparkle (optional).
- Seal the design with a top coat for a smooth finish.
3. Simple Glitter Tips
- What you’ll need: Nude or neutral nail polish, glitter polish, top coat.
- Steps:
- Apply a nude or neutral base color to your nails.
- Once dry, apply a thin layer of glitter polish to the tips of your nails for a festive French manicure effect.
- Add a second layer of glitter to make the tips more prominent.
- Finish with a top coat for a glossy, long-lasting shine.
4. Santa Hat Nails
- What you’ll need: Red nail polish, white nail polish, black nail polish, dotting tool.
- Steps:
- Paint your nails with a red base color.
- Once dry, use a dotting tool to create a white “fluff” at the base of your nails to mimic the brim of Santa’s hat.
- Add a small white pom-pom at the tip of the nail.
- If you wish, add a black line for a belt at the bottom for a fun detail.
- Seal your design with a top coat.
By following these simple DIY tutorials, you can create your own beautiful and festive Christmas nails. Whether you choose to go the DIY route or opt for a professional manicure, your nails will be ready to sparkle and shine for your holiday celebrations.
FAQ
What are some popular Ideas of Christmas party nail designs?
Christmas Party Nails Ideas can range from classic holiday colors like red, green, and gold to fun, festive designs like snowflakes, reindeer, and Christmas trees. Popular ideas include glitter tips, ombre nail art, and candy cane stripes. You can also add small embellishments like rhinestones, stars, or Santa hats for extra holiday charm. To create a personalized look, consider adding a mix of textures, such as matte and glossy finishes, or try nail stamping or hand-painted designs for more intricate art.
How long do Christmas party nails last?
The longevity of your Christmas Party Nails Ideas depends on the type of polish and the care you take. Gel manicures tend to last 2–3 weeks without chipping, while regular nail polish may last up to a week with proper maintenance. To extend the life of your nails, apply a top coat every few days, avoid exposing your nails to harsh chemicals, and wear gloves when doing chores. Nail art designs like glitter or rhinestones can also be prone to wear, so it’s important to handle them gently.
How do I remove glitter polish from my nails?
Removing glitter polish can be tricky, but there are several methods to make it easier. First, soak a cotton pad in acetone and place it on your nails for about 5–10 minutes to break down the glitter. You can also use the foil method: wrap your nails in foil with a cotton pad soaked in acetone for a more effective removal. Be gentle when rubbing off the glitter to avoid damaging your nails. If necessary, follow up with a nourishing cuticle oil or hand cream to rehydrate your nails after the removal process.
Can I do Christmas Party Nails Ideas at home if I’m a beginner?
Yes, even beginners can create beautiful Christmas Party Nails Ideas with a little practice! Start with simple designs, like glitter tips, stripes, or polka dots. There are also many online tutorials and kits available to help guide you. For best results, make sure to have a steady hand and use high-quality tools, such as a fine brush for detailed designs. If you make a mistake, don’t worry—just use a small brush dipped in nail polish remover to fix it. Over time, your technique will improve, and you’ll be able to create more intricate holiday designs.

Hi, I’m Hailey Say, the proud mom and owner of PartyGamesIdea.com. As a dedicated party designer and an expert in party ideas, I have a deep passion for crafting memorable and enjoyable experiences for every occasion. From holiday games to baby showers, bridal showers, bachelor parties, group gatherings, and more, I specialize in creating unique and fun party ideas that cater to all age groups and interests.
With an extensive collection of ideas ranging from printable games, teen and adult games, kids’ party activities, birthday party games, girls’ games, memory games, family games, and outdoor games, I aim to make every event special. My expertise also extends to themed parties such as dinner parties, brunch parties, graduation celebrations, college parties, and fun night games.
On PartyGamesIdea.com, I share my passion and creativity, helping people turn their party visions into reality. With years of experience and a keen eye for detail, I am committed to making your event planning process enjoyable and stress-free. Join me on PartyGamesIdea.com, and together, we’ll create unforgettable memories for you and your loved ones.

