
Homemade decorations and crafts add a personalized touch that store-bought items can’t replicate. Whether you’re making ghostly garlands, creepy candle holders, or themed party favors, DIY Halloween Craft Ideas allow you to customize each piece to fit your vision and make your home stand out. It’s a chance to get creative, bond with family or friends, and make memorable pieces that you can use year after year.
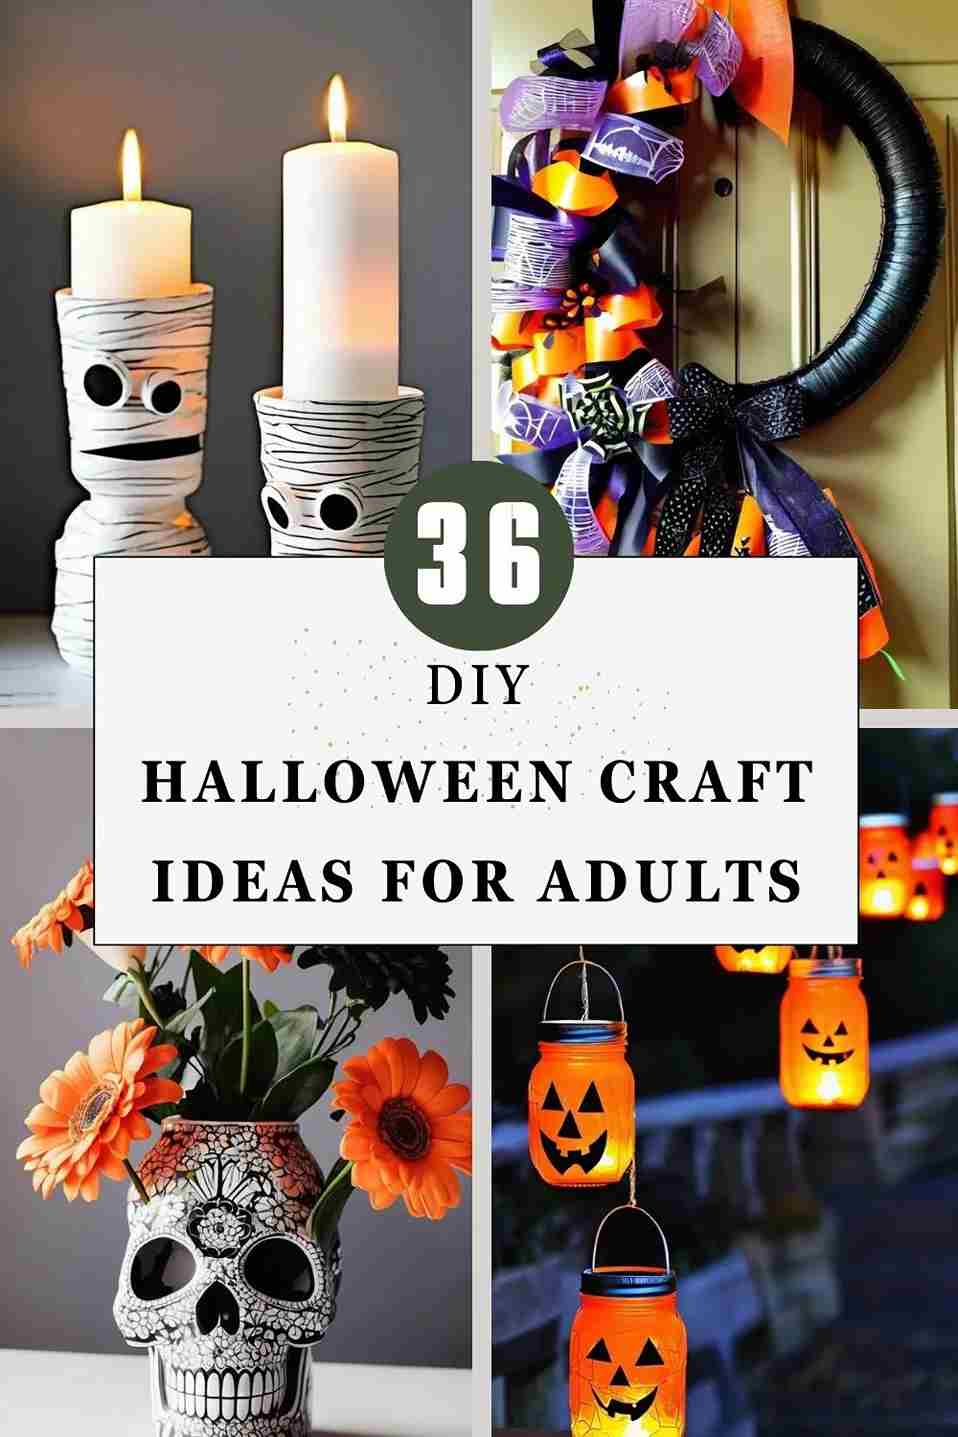
DIY Halloween Craft Ideas For Adults
Get ready to unleash your creativity this Halloween with DIY craft ideas that add a personal touch to your spooky season decor. Whether you’re hosting a party or simply looking to get in the spirit, these fun projects are perfect for adults and can be easily customized. Dive into a world of crafts that will delight your inner artist and enchant your guests!
Spooky Wine Bottle Candles
Turn empty wine bottles into eerie candle holders for your Halloween décor.
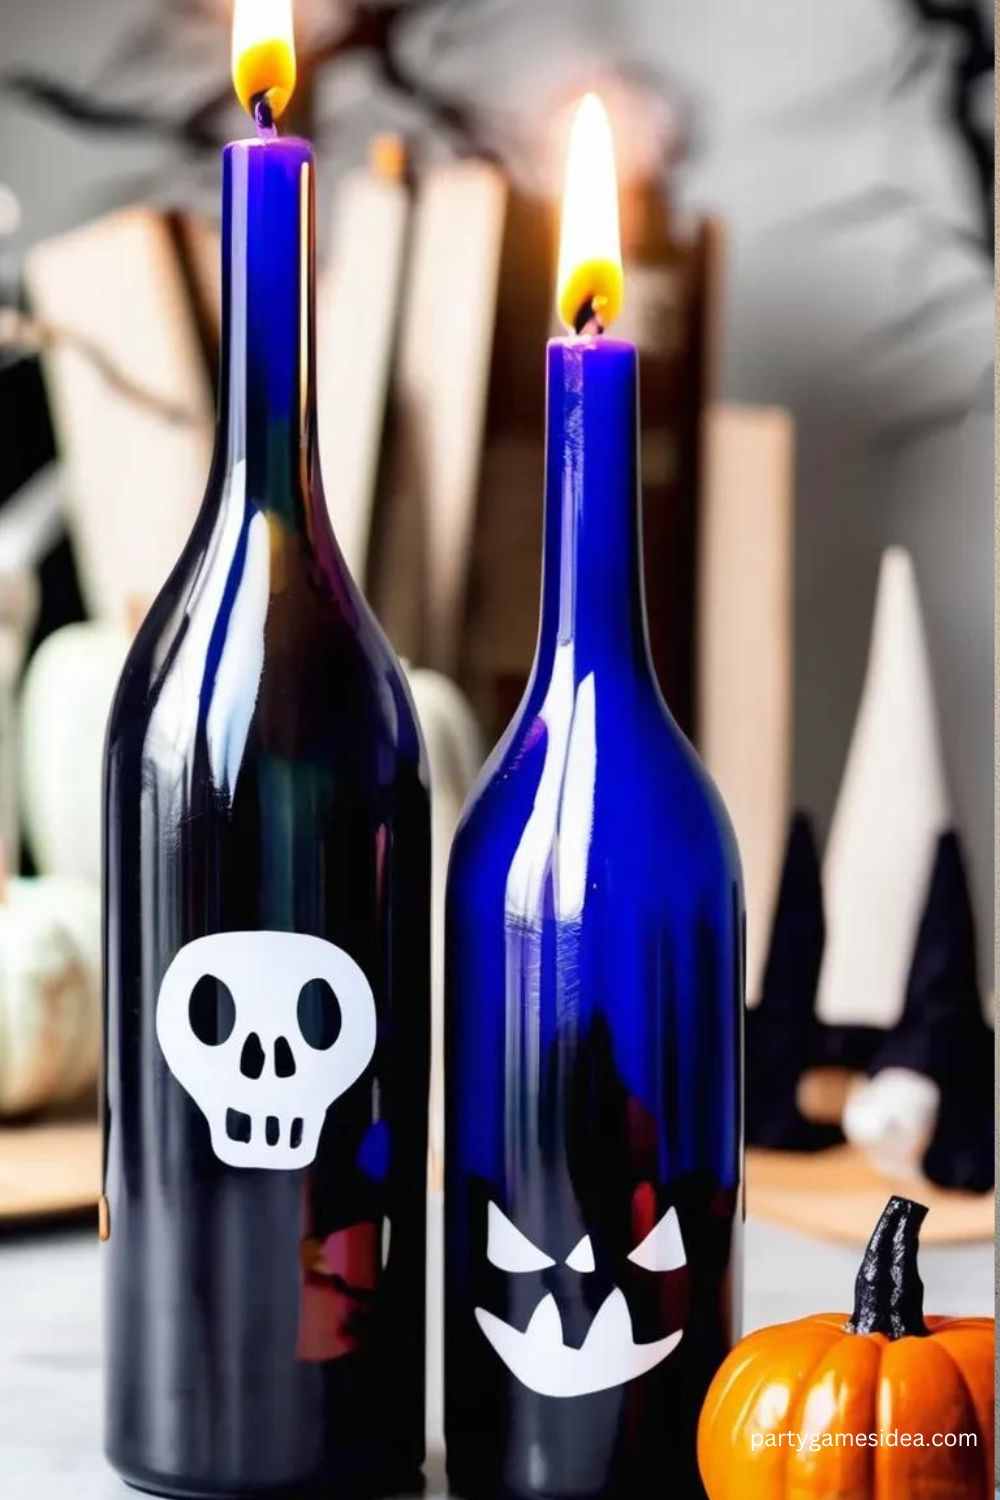
- Setup: Paint wine bottles black or cover them with creepy labels, then insert tall candles.
- Tips: Drip candle wax down the sides for a haunted look.
- Materials: Wine bottles, black paint, candles, labels.
Pumpkin Mason Jar Lanterns
Mason jars transformed into glowing pumpkin lanterns create a cozy, spooky atmosphere.
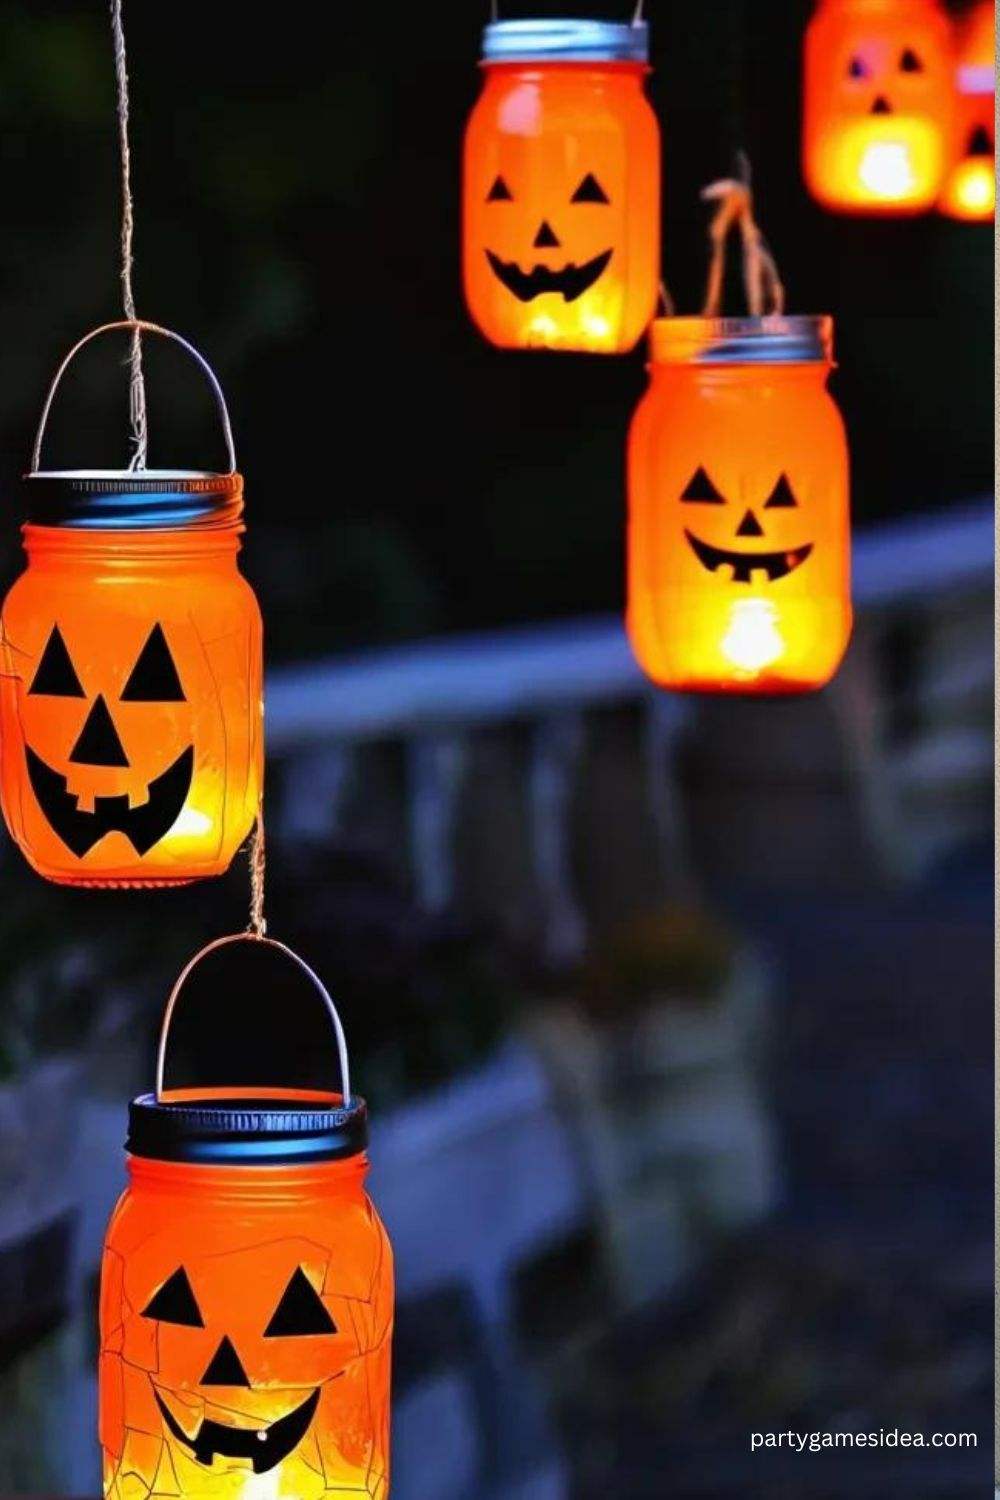
- Setup: Paint jars orange, draw pumpkin faces, and add battery-powered tea lights inside.
- Tips: Use tissue paper for a translucent glow effect.
- Materials: Mason jars, orange paint, black marker, battery lights.
Bat Wall Art
Create a colony of bats flying across your walls for a dramatic Halloween effect.
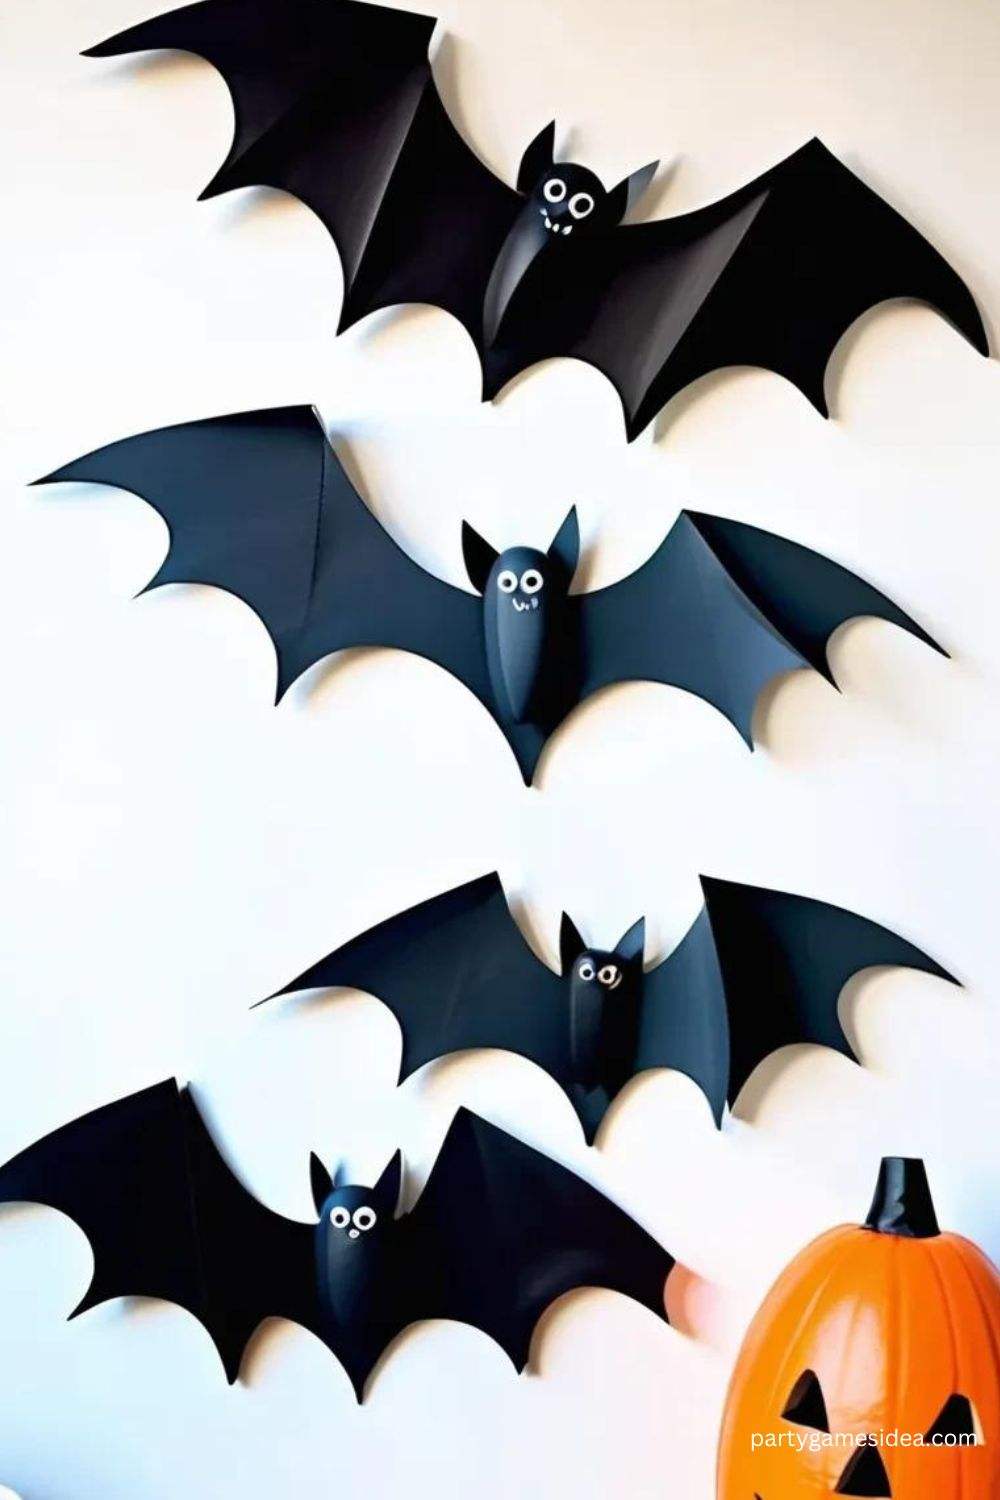
- Setup: Cut out bat shapes from black paper and tape them in different flying positions.
- Tips: Vary the size of the bats for a more dynamic display.
- Materials: Black paper, scissors, tape.
Skull Flower Vase
Combine a skull decoration with faux flowers for an edgy centerpiece.
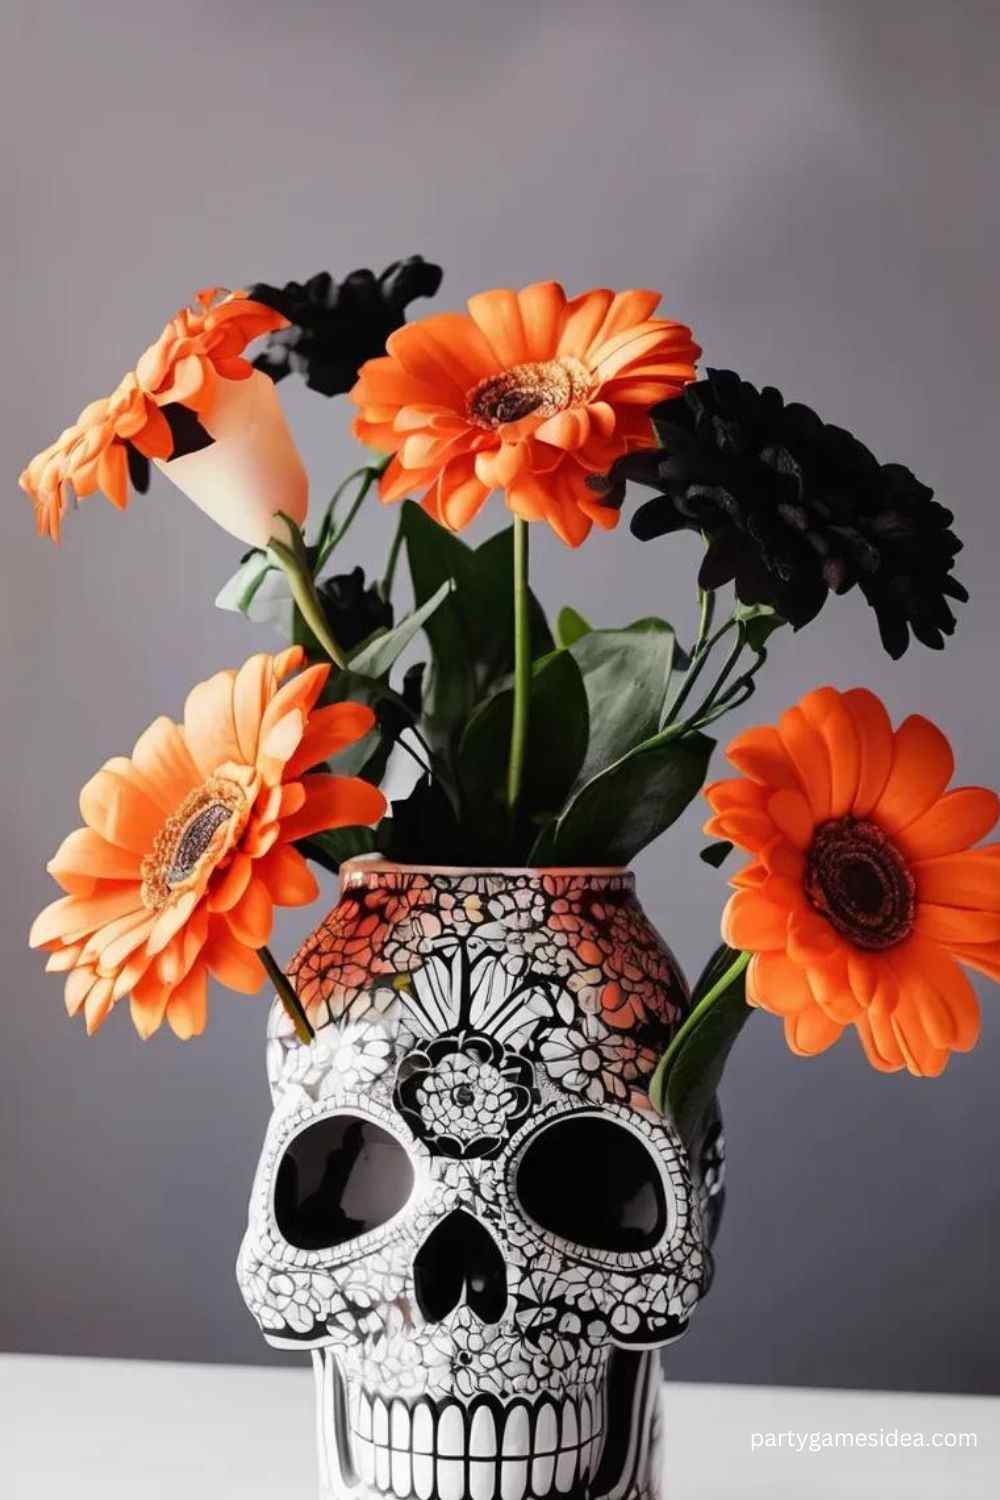
- Setup: Hollow out a plastic skull and insert a small vase filled with dark or blood-red flowers.
- Tips: Add spider webbing around the base for extra spookiness.
- Materials: Plastic skull, faux flowers, vase.
Spider Web Doormat
Upgrade your Halloween décor by making a spooky doormat that greets your guests with a web.
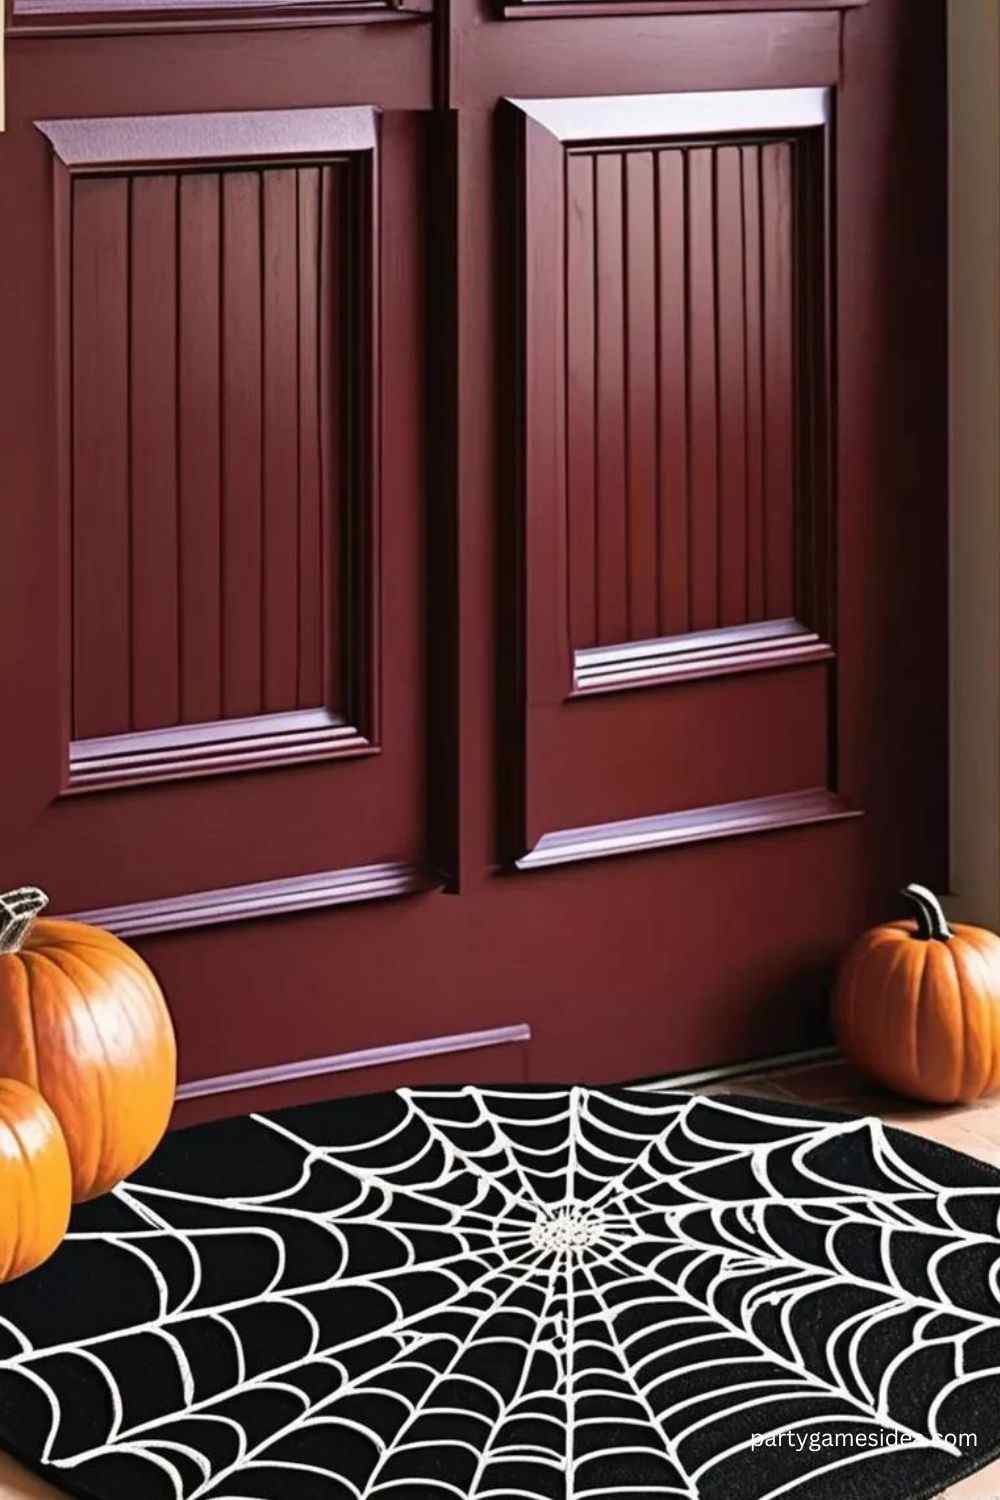
- Setup: Paint a spider web design on a plain doormat using white fabric paint.
- Tips: Add plastic spiders to the web for added creepiness.
- Materials: Plain doormat, white paint, plastic spiders.
Creepy Picture Frames
Add eerie portraits or photos to vintage frames for instant haunted-house vibes.
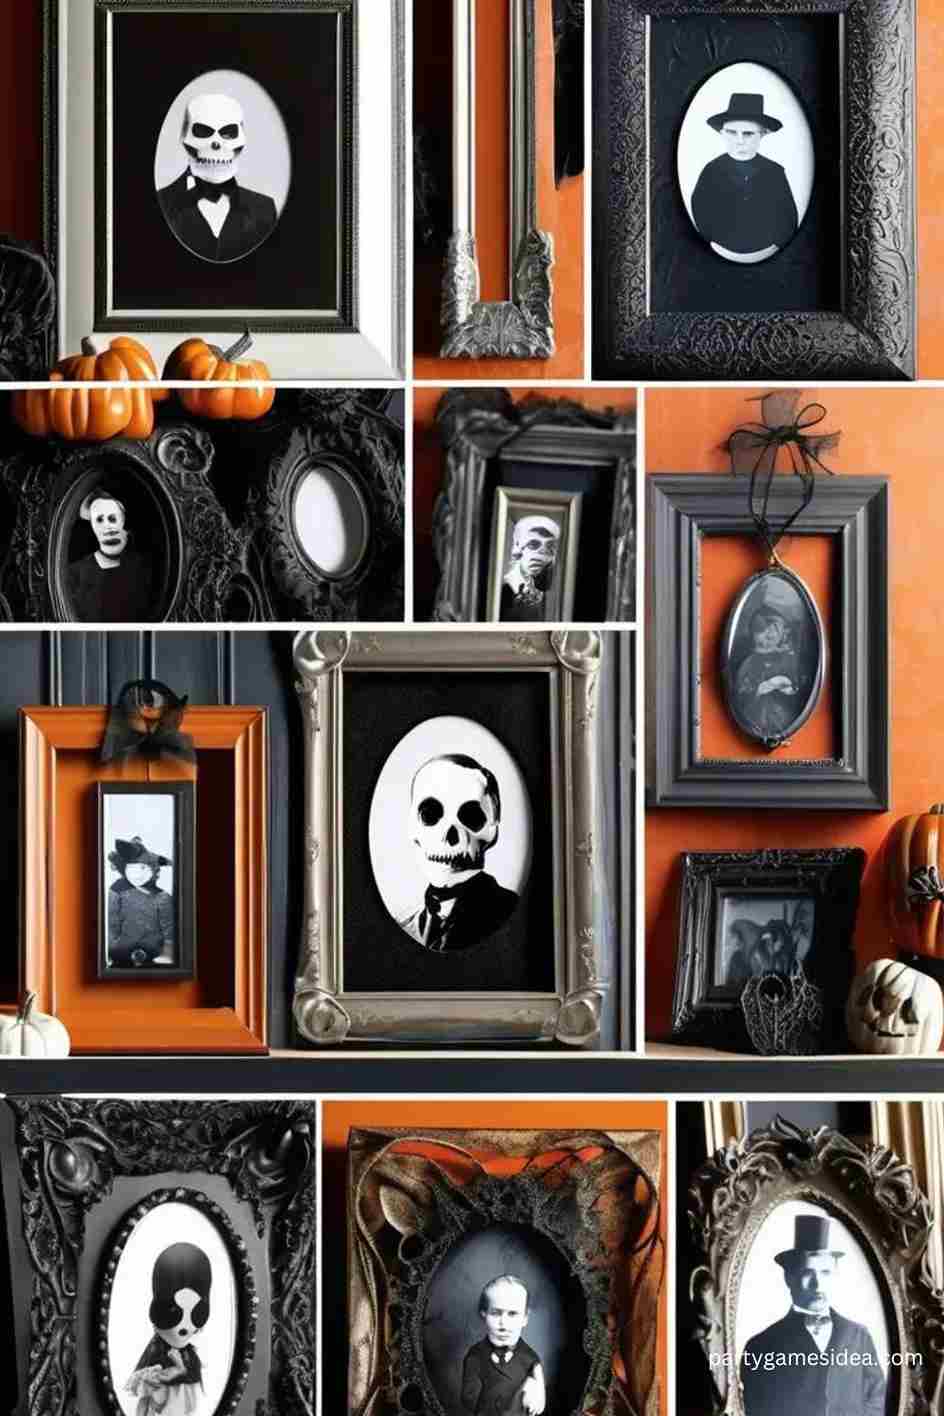
- Setup: Print out black-and-white spooky photos and place them in ornate, aged frames.
- Tips: Add a cracked glass effect for a realistic haunted look.
- Materials: Old frames, printed photos, glass paint.
Mummy Candle Holders
Wrap candles in gauze to create adorable mummy-themed candle holders.
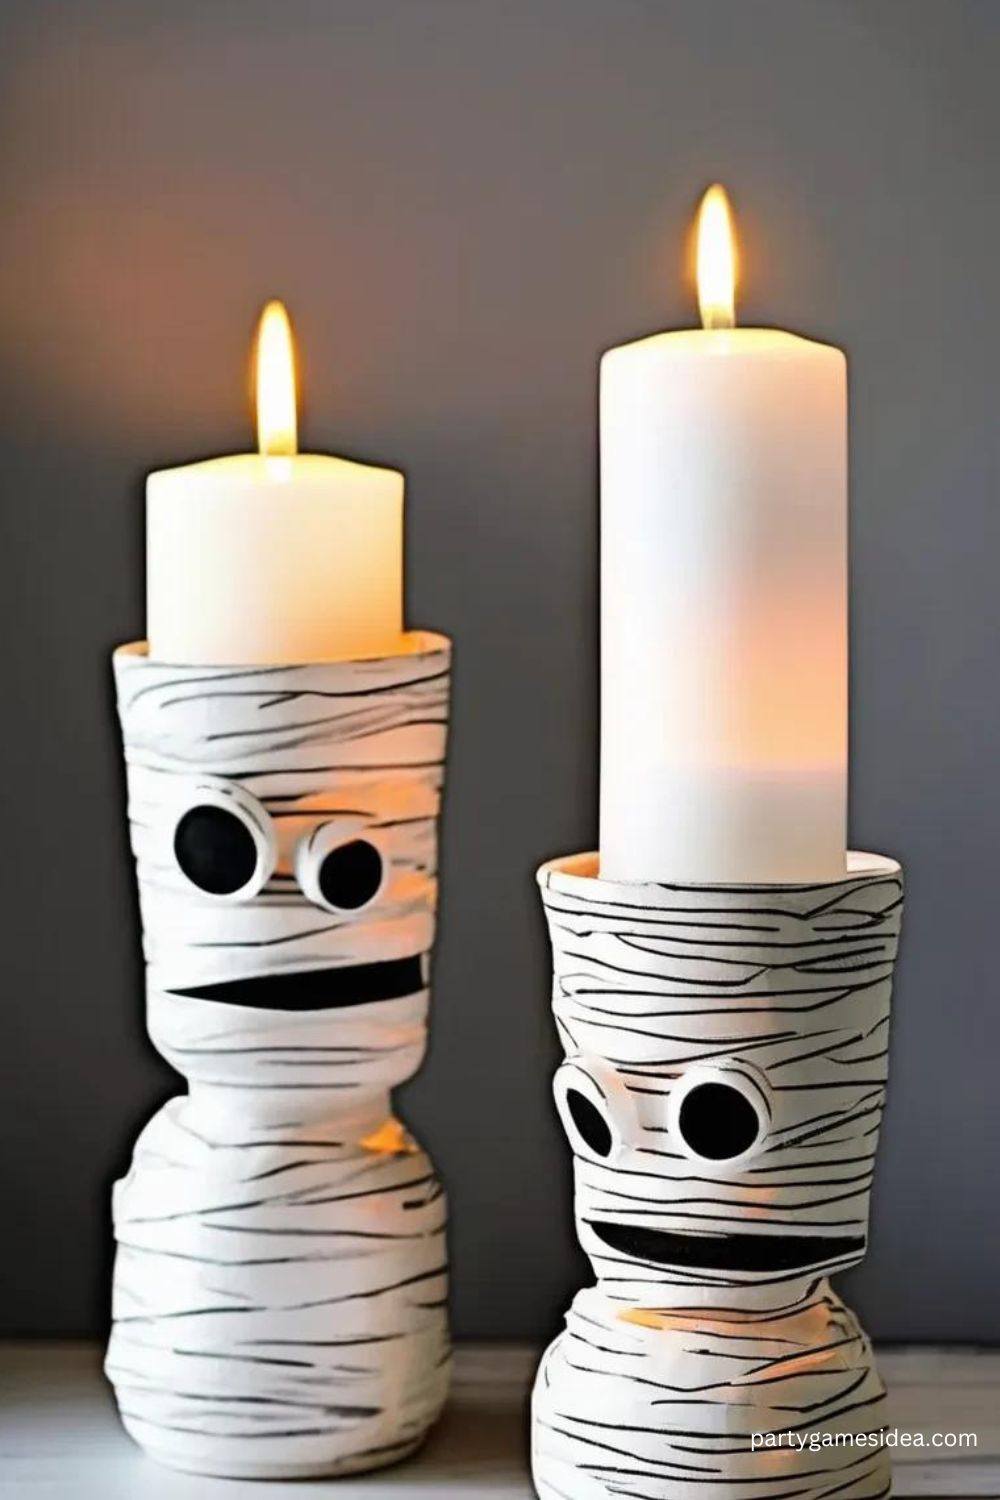
- Setup: Wrap gauze around glass jars, securing with glue, and attach googly eyes.
- Tips: Use battery-powered lights inside for safety.
- Materials: Gauze, googly eyes, jars, lights.
DIY Halloween Wreath
Make a creepy Halloween wreath to hang on your door using black and orange elements.
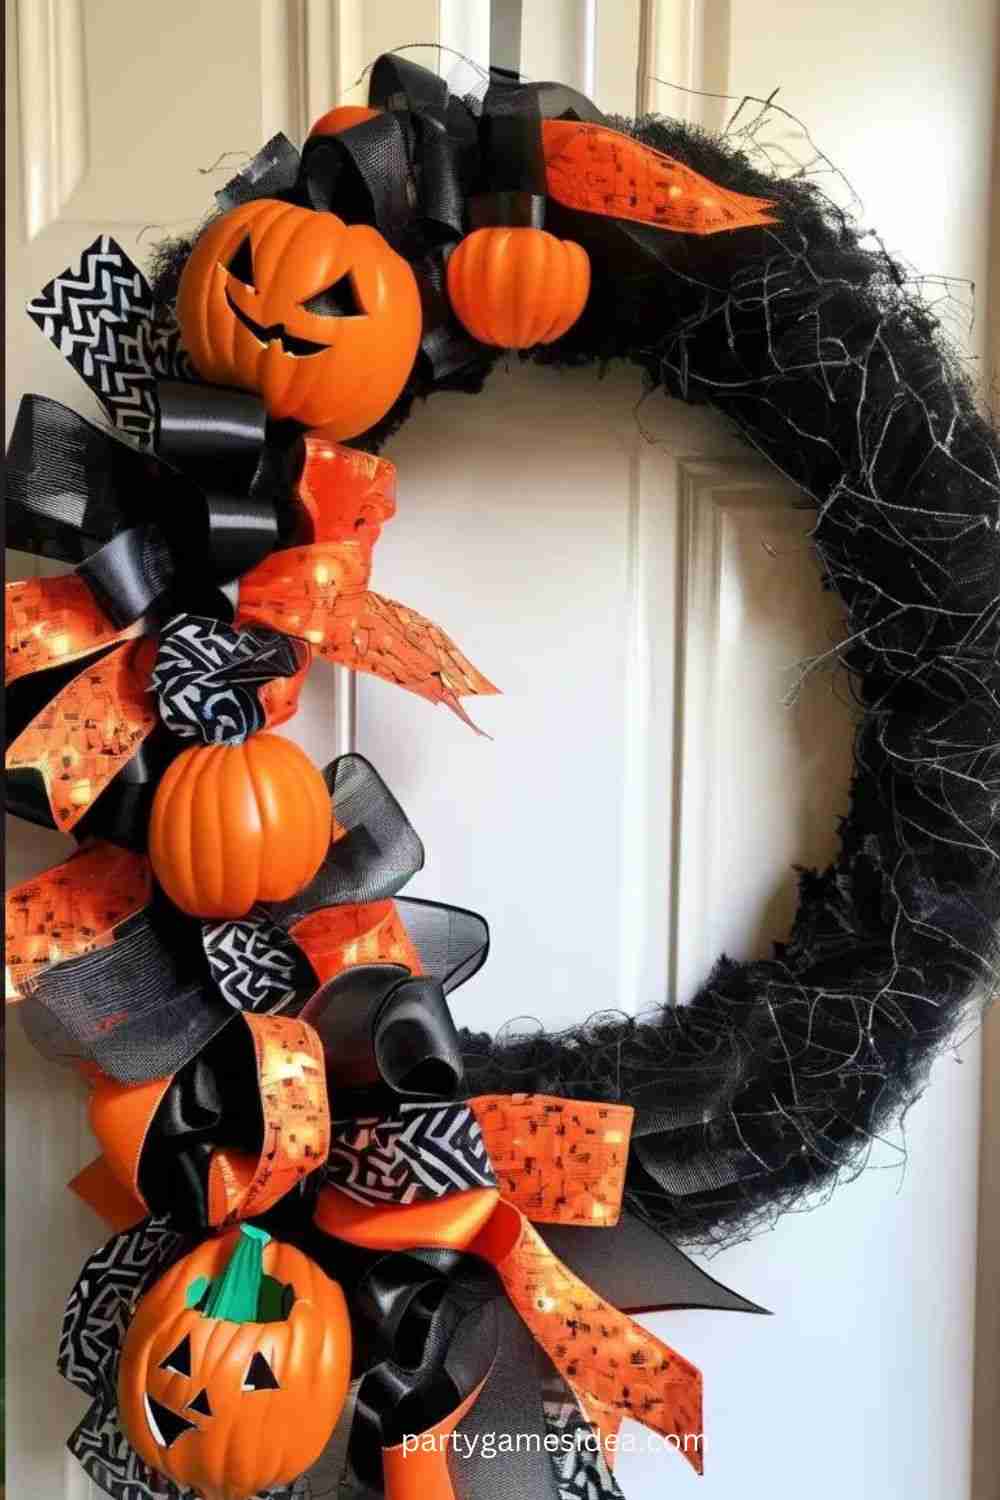
- Setup: Attach faux leaves, small pumpkins, and spiders to a grapevine wreath.
- Tips: Add ribbon for a finishing touch.
- Materials: Grapevine wreath, faux pumpkins, spiders, ribbon.
Glowing Eyes in the Bushes
Give your yard a spooky upgrade with glowing eyes peeking out from the bushes.
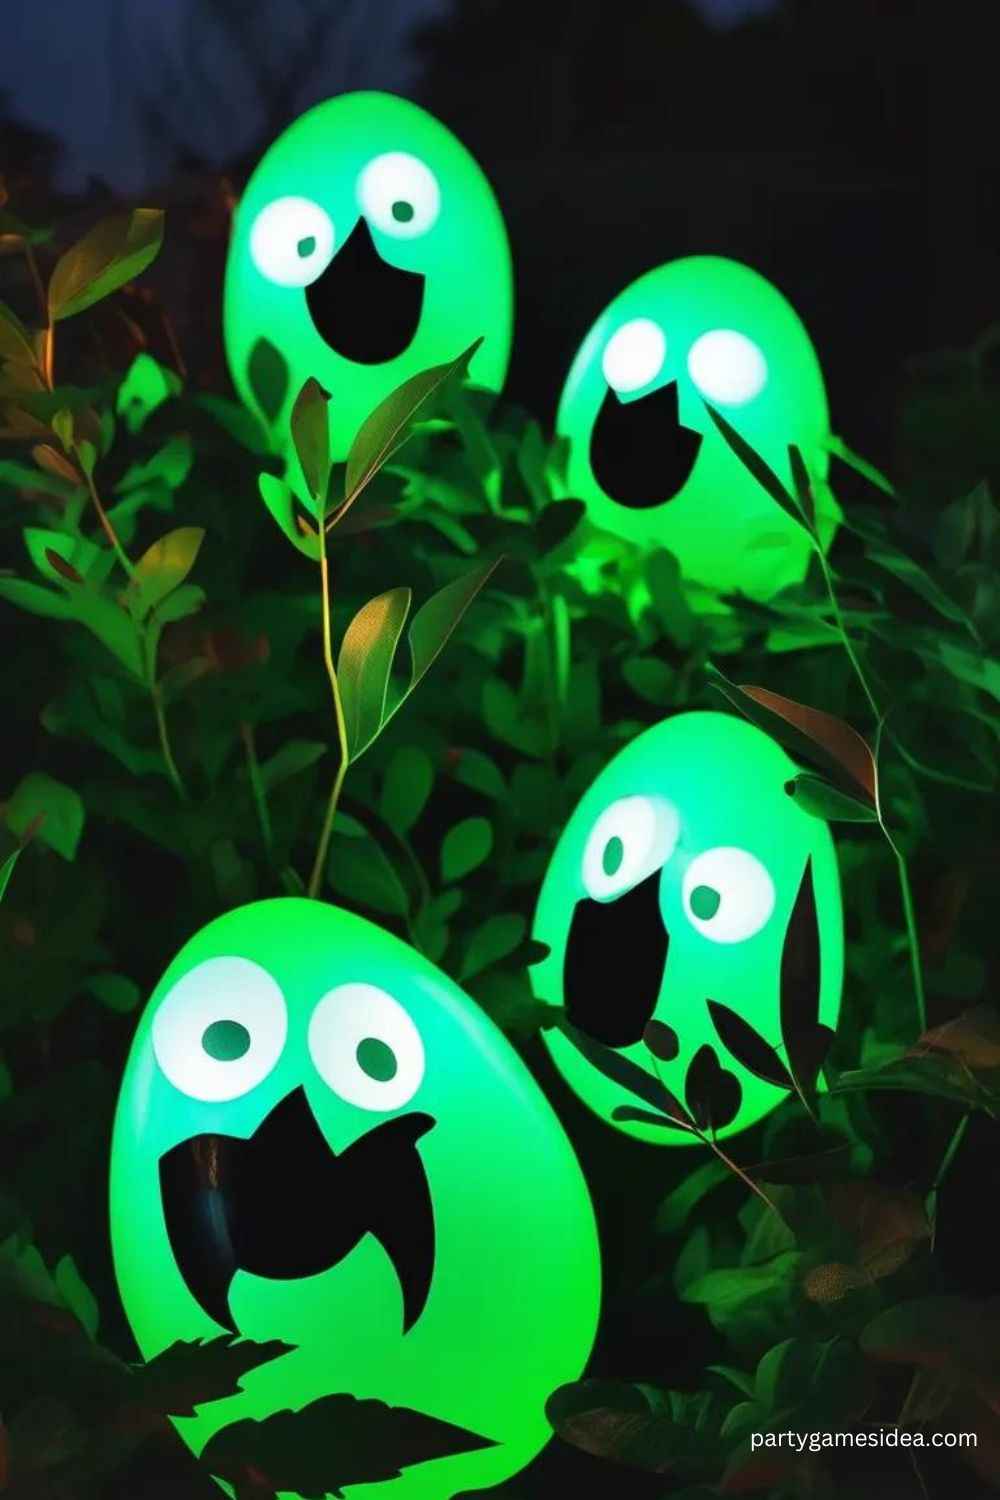
- Setup: Cut eye shapes into empty toilet paper rolls and place glow sticks inside.
- Tips: Hide them in dark spots for maximum effect.
- Materials: Toilet paper rolls, glow sticks.
Gothic Candlestick Holders
Give your dining table a spooky touch with gothic-inspired candlestick holders.
- Setup: Paint old candlesticks black and add dark red candles for a dramatic look.
- Tips: Use matte black paint for a more ominous vibe.
- Materials: Candlestick holders, black paint, candles.
Monster Hand Soap Bottles
Turn regular soap bottles into spooky monsters to add some Halloween spirit to your bathroom.
- Setup: Paint soap bottles with monster faces or wrap them in bandages for a mummy look.
- Tips: Pair with Halloween-themed hand towels.
- Materials: Soap bottles, paint, gauze.
Ghost Garland
Create a garland of cute, hanging ghosts to decorate your mantel or doorway.
- Setup: Wrap cotton balls in white fabric, tie with string, and draw ghost faces.
- Tips: Use glow-in-the-dark fabric for an extra spooky look at night.
- Materials: White fabric, cotton balls, string, marker.
Spider Egg Sacs
Add eerie, hanging spider egg sacs around your house using cotton and plastic spiders.
- Setup: Stuff small cotton balls into white stockings and hang them in corners.
- Tips: Add small plastic spiders to the outside for a realistic effect.
- Materials: Stockings, cotton balls, plastic spiders.
Tombstone Yard Markers
Transform your yard into a creepy graveyard with DIY tombstone markers.
- Setup: Carve tombstone shapes from Styrofoam, paint grey, and write spooky epitaphs.
- Tips: Add moss or cracks to make the tombstones look weathered.
- Materials: Styrofoam, grey paint, markers.
Blood-Drip Candles
Turn ordinary candles into terrifying “blood-drip” candles for your Halloween table.
- Setup: Melt red wax over white candles to create the look of dripping blood.
- Tips: Use different sized candles for variety.
- Materials: White candles, red wax.
Witch’s Broom Door Hanger
Welcome guests with a witch’s broom hanging on your front door.
- Setup: Tie sticks together to form a broom and decorate with a black ribbon.
- Tips: Add fake spider webs for an extra creepy touch.
- Materials: Sticks, ribbon, twine.
Pumpkin Topiary
Stack pumpkins of different sizes to create a unique topiary for your front porch.
- Setup: Glue small pumpkins on top of larger ones and display in a planter.
- Tips: Paint the pumpkins in a matching color scheme for a polished look.
- Materials: Pumpkins, glue, planter.
Vampire Bat Mirror
Transform a regular mirror into a spooky scene by adding bat decals.
- Setup: Attach bat-shaped decals around the edges of a mirror.
- Tips: Position the bats so they appear to be flying out of the reflection.
- Materials: Bat decals, mirror.
Haunted House Luminaries
Light up your walkways with haunted house-themed luminaries.
- Setup: Cut haunted house silhouettes from black paper and glue them inside white paper bags.
- Tips: Place battery-powered candles inside the bags for safe illumination.
- Materials: Paper bags, black paper, battery lights.
Spider Web Wine Glasses
Add a creepy touch to your Halloween party with spider web-adorned wine glasses.
- Setup: Paint spider web designs on the glass using white glass paint.
- Tips: Add small plastic spiders to the stems for extra flair.
- Materials: Wine glasses, white glass paint, plastic spiders.
Skeleton Hand Napkin Holders
Give your table setting a spooky upgrade with DIY skeleton hand napkin holders.
- Setup: Attach plastic skeleton hands to napkin rings.
- Tips: Spray-paint the hands black for a gothic look.
- Materials: Skeleton hands, napkin rings, spray paint.
Bloody Handprint Windows
Create the illusion of a crime scene with bloody handprints on your windows.
- Setup: Dip hands in red paint and press against windows for a creepy effect.
- Tips: Use washable paint to avoid permanent stains.
- Materials: Red paint, plastic sheeting (optional).
Jack-o’-Lantern Planters
Use carved pumpkins as planters for fall flowers to add festive charm to your yard.
- Setup: Hollow out pumpkins, fill with soil, and plant seasonal flowers like mums.
- Tips: Paint the pumpkins for longer-lasting planters.
- Materials: Pumpkins, soil, flowers.
Potion Bottles
Turn empty bottles into spooky potion bottles for your Halloween display.
- Setup: Paint bottles black and add creepy labels like “Witch’s Brew” or “Snake Venom.”
- Tips: Fill with colored liquid for a more authentic look.
- Materials: Bottles, black paint, labels.
Skull Planter
Transform a plastic skull into a planter for succulents or fall plants.
- Setup: Hollow out a plastic skull and add soil for planting.
- Tips: Use smaller skulls for tabletop decorations.
- Materials: Plastic skull, soil, succulents.
Ghost Balloons
Create floating ghosts using white balloons for an easy, fun Halloween decoration.
- Setup: Cover helium-filled balloons with white fabric and draw ghost faces.
- Tips: Use glow-in-the-dark markers to make them spooky at night.
- Materials: Balloons, white fabric, markers.
Eyeball Plant Stakes
Add a creepy touch to your garden with eyeball plant stakes.
- Setup: Paint ping-pong balls to look like eyes and attach them to stakes.
- Tips: Add red veins with a fine-tip marker for realism.
- Materials: Ping-pong balls, stakes, paint.
Creepy Tree Branches
Use painted tree branches as eerie centerpieces or yard décor.
- Setup: Spray-paint branches black and display in vases or pots.
- Tips: Add faux cobwebs for extra creepiness.
- Materials: Tree branches, black paint, faux cobwebs.
Shrunken Head Garland
Make a garland of creepy shrunken heads using dried apples.
- Setup: Carve faces into apples and let them dry to create a shrunken head effect.
- Tips: String them together with twine to hang as garland.
- Materials: Apples, carving tools, twine.
Witch Hat Centerpiece
Create a whimsical witch hat centerpiece for your Halloween table.
- Setup: Make a witch hat using black felt and decorate with ribbons and spiders.
- Tips: Use glitter for an extra magical touch.
- Materials: Black felt, ribbon, faux spiders, glitter.
Pumpkin Terrariums
Build spooky terrariums inside plastic pumpkins for a unique decoration.
- Setup: Fill hollow pumpkins with moss, small figurines, and faux cobwebs.
- Tips: Add tiny LED lights to illuminate the scene.
- Materials: Plastic pumpkins, moss, figurines, lights.
Candy Corn Garland
Add a playful, festive touch to your space with a candy corn garland.
- Setup: Cut candy corn shapes from felt and string them together as a garland.
- Tips: Use felt in bright orange, yellow, and white for authenticity.
- Materials: Felt, string, glue.
Witch Cauldron Planter
Use a black cauldron as a spooky planter for seasonal flowers.
- Setup: Fill a cauldron with soil and plant autumn blooms or succulents.
- Tips: Add fake potion ingredients around the base.
- Materials: Cauldron, soil, plants.
Spiderweb Window Clings
Create your own spiderweb window clings using glue for a subtle yet spooky effect.
- Setup: Draw spiderweb shapes on wax paper with glue, let dry, and peel off.
- Tips: Use glitter glue for added sparkle.
- Materials: Glue, wax paper, glitter (optional).
Bat Toilet Paper Roll Crafts
Halloween is the perfect time to get creative, and one of the easiest and most fun DIY projects is making Bat Toilet Paper Roll Crafts. These adorable and spooky bats are simple to make, budget-friendly, and perfect for decorating your home, classrooms, or even Halloween parties. Whether you’re crafting with kids or looking for a quick and festive project, this bat-themed craft is sure to be a hit!
Materials Needed:
- Empty toilet paper rolls (1 roll per bat)
- Black construction paper
- Googly eyes (optional, but they add a cute touch!)
- Scissors
- Glue or double-sided tape
- Black paint (optional) or markers to color the roll
- White chalk or markers (for drawing the bat’s mouth and fangs)
- Small pieces of black felt or paper (for bat wings)
- String or ribbon (for hanging the bats, optional)
How to Make Toilet Paper Roll Bats:
1. Prepare the Toilet Paper Roll
- Start by painting the toilet paper roll black, or wrap it with black construction paper using glue or tape to cover the entire surface. This will be the bat’s body.
- Allow the paint to dry or make sure the paper is securely wrapped before moving on to the next step.
2. Create the Bat Wings
- While the roll is drying, cut out bat wings from black construction paper or black felt. Draw a simple wing shape resembling an upside-down “W” with curves at the bottom, and cut it out. If needed, find a bat wing template online or freehand it.
- Once the wings are cut, use glue or double-sided tape to attach them to the back of the toilet paper roll, positioning them about halfway down the sides of the roll for balance.
3. Add the Bat’s Face
- Attach googly eyes to the top front of the toilet paper roll. If you don’t have googly eyes, you can also draw eyes using white chalk or a white marker.
- Draw a mouth below the eyes using white chalk or a marker, adding small sharp fangs to give your bat a spooky, yet playful, look.
4. Create and Attach the Bat’s Ears
- Cut two small triangles from black construction paper or felt for the bat’s ears.
- Glue these triangles to the top inside edge of the toilet paper roll, positioning them like pointy ears.
5. Optional: Hang Your Bat Decoration
- If you want to hang the bats as decorations, punch a small hole at the top of the toilet paper roll and thread a string or ribbon through it.
- Tie a knot at the end of the string to create a loop, and hang your bat from the ceiling, doorways, or branches.
Final Touches:
You can get as creative as you want by adding glitter, sequins, or even colored paper to give your bat a unique twist. Make several bats and hang them around your home, or place them on shelves and tables for a fun Halloween atmosphere. This simple craft is perfect for getting into the spooky spirit without too much hassle!
Spider Web String Art
Spider Web String Art is a creative and spooky Halloween craft that’s perfect for adding a touch of eerie elegance to your home décor. This DIY project involves using simple materials like string and nails to create intricate spider web designs that can be displayed on walls, tables, or mantels. It’s an excellent craft for both beginners and seasoned crafters, and it’s sure to impress guests during the Halloween season.
Materials Needed:
- Small wooden boards or plaques (can be any size you prefer)
- Nails or small tacks (enough to form the spider web design)
- Black string, yarn, or embroidery floss (you can also use white for a classic web look)
- Hammer (to secure the nails)
- Pencil or chalk (to sketch the design)
- Scissors (to trim the string)
- Optional: Spider decorations (plastic or felt spiders to place on the web)
Instructions for Creating Spider Web String Art:
1. Prepare the Wooden Board
- Choose a wooden board or plaque that will serve as the base for your spider web design. You can leave the board natural for a rustic look, or paint it black, white, or orange to enhance the Halloween theme.
- Let the paint dry completely if you decide to paint the board.
2. Sketch the Web Design
- Using a pencil or chalk, lightly sketch a simple spider web pattern on the wooden board. Start by drawing a small circle in the center, and then draw lines radiating outwards from the center to the edges of the board (like spokes on a wheel).
- Next, draw curved lines connecting the spokes to form the web pattern. These curved lines will get larger as they move farther from the center.
3. Hammer in the Nails
- Place nails or tacks along the lines you sketched. Start by placing one nail at the center of the web and then hammer nails along the outer lines (spokes) and at each of the intersections where the curved lines connect the spokes.
- Make sure the nails are firmly secured but leave enough of the nail exposed so that the string can be wrapped around it.
4. Begin Stringing the Web
- Tie one end of the black string to the center nail securely.
- Begin by stretching the string from the center nail to the outer nails that form the spokes of the web. Wrap the string around each nail as you go, pulling it taut but not too tight.
- Once all the spokes are connected, start forming the curved lines by wrapping the string in a circular motion around the nails on each layer. This will create the distinctive spider web pattern. Work from the center outwards, making sure to follow the flow of the web.
5. Finish the Web
- Continue wrapping the string around the nails until you’ve completed the spider web pattern. If you want to create a thicker web, you can go over some of the lines multiple times.
- When the web is complete, tie off the string at the last nail and trim any excess with scissors.
6. Add Spider Decorations (Optional)
- To give your spider web an even spookier vibe, you can add plastic or felt spiders to the web. Glue or position the spiders at various points on the web or on the board itself.
Final Touches:
You now have a unique piece of Halloween décor! This Spider Web String Art can be displayed on a wall, leaned on a shelf, or even used as a centerpiece at your Halloween party. Feel free to experiment with different string colors, nail patterns, and board sizes to create your own take on this eerie, festive craft.
Tips for Crafting DIY Halloween Craft Ideas with Kids
Crafting DIY Halloween Craft Ideas with kids is a wonderful way to nurture their creativity, improve motor skills, and spend quality time together. Whether it’s for a holiday, a school project, or just for fun, crafting can be made both enjoyable and safe with the right approach. Here are some tips to ensure a successful and engaging crafting experience for kids of all ages.
1. Age-Appropriate Craft Ideas and Materials
Crafts should be tailored to a child’s age and skill level to ensure they stay engaged and don’t become frustrated. Here are some age-appropriate ideas and materials:
- Ages 2-4 (Toddlers):
- Simple crafts like finger painting, sponge stamping, or creating shapes with playdough.
- Materials: Non-toxic paints, jumbo crayons, large beads for stringing, construction paper, and safe, washable markers.
- Key focus: Encourage sensory play and experimentation with colors and textures.
- Ages 5-7 (Early Elementary):
- Projects like making paper plate masks, popsicle stick creations, or simple collages.
- Materials: Child-safe scissors, glue sticks, stickers, googly eyes, pom-poms, and pipe cleaners.
- Key focus: Build hand-eye coordination and fine motor skills with cutting, gluing, and decorating.
- Ages 8-10 (Middle Elementary):
- More detailed crafts such as DIY greeting cards, friendship bracelets, and basic sewing or weaving projects.
- Materials: Thread, felt, fabric, paint pens, small craft kits (e.g., build-a-birdhouse kits), and modeling clay.
- Key focus: Foster independence in completing projects with step-by-step guidance.
- Ages 11 and Up (Pre-teens):
- Complex projects like string art, scrapbooking, or painting wooden figures.
- Materials: Acrylic paints, advanced craft kits, sewing machines (with supervision), and woodworking tools (with safety measures).
- Key focus: Encourage creative problem-solving and design thinking.
2. Safety Tips for Crafting with Kids
Safety should be a priority when crafting with children. Here’s how to ensure a safe crafting environment:
- Supervise young children when using scissors, glue guns, or any sharp objects. For toddlers, use safety scissors that have rounded edges.
- Use non-toxic, washable materials, especially with younger kids who might put items in their mouths. Look for labels that say “non-toxic” or “child-safe” on paints, markers, and glues.
- Opt for child-friendly tools. For instance, use glue sticks instead of liquid glue for younger kids to avoid sticky messes. Older children may use liquid glue or even low-temperature glue guns with close supervision.
- Keep small parts out of reach for kids under 3 years old. Avoid using beads, buttons, or other small objects that can pose a choking hazard.
- Set up a crafting station with a stable work surface and plenty of space to avoid accidents. Place a protective cover, like newspaper or a tablecloth, to keep surfaces clean.
- Teach kids proper tool usage, such as how to handle scissors correctly (cutting away from their body) and the importance of tidying up after the activity to prevent tripping hazards.
3. Engaging Children with Simple Tasks to Boost Creativity
To keep kids excited about crafting and to nurture their creative expression, try these engagement strategies:
- Let them lead: Give kids the freedom to make choices in their projects, from picking colors to deciding on themes. This boosts confidence and keeps them invested in the craft.
- Start with simple steps: Break down the craft into smaller, manageable tasks. This way, kids won’t feel overwhelmed and can celebrate small successes along the way.
- Offer encouragement, not correction: If a child’s project doesn’t look exactly like the example, celebrate their unique creativity. This will make them feel proud of their work.
- Incorporate storytelling: Turn craft time into a creative storytelling session by asking kids to describe what they’re making and why. This promotes imaginative thinking and language development.
- Provide themes and challenges: Give kids a creative challenge, like building a robot out of recycled materials or making a holiday decoration with only five items. This engages their problem-solving skills.
- Rotate crafts for variety: Keep things exciting by introducing new types of crafts regularly. Mix it up with drawing, painting, sewing, and 3D construction so they stay curious and eager to try new things.
- Make it collaborative: Encourage group projects where children work together to create something bigger, like a mural or a diorama. This helps develop teamwork and communication skills.
Crafting is not only a fun activity, but it also teaches kids valuable skills like patience, following instructions, and creative thinking. By choosing age-appropriate crafts, ensuring safety, and engaging kids through encouragement and challenges, you can help them foster a lifelong love for creativity.
FAQ
What are some easy DIY Halloween Craft Ideas for adults?
Here are some easy DIY Halloween Craft Ideas for adults:
- Spooky Mason Jar Lanterns: Paint jars with Halloween-themed designs and place candles inside for eerie lighting.
- Pumpkin Centerpieces: Decorate real or faux pumpkins with paint, glitter, or fabric for festive table decor.
- Halloween Wreaths: Create a wreath using a foam or straw base, adorned with black and orange ribbons, fake spiders, and seasonal foliage.
- Creepy Candle Holders: Melt wax drips on plain candles or paint them with ghostly designs.
- Spider Web Table Runner: Use black fabric and create spider webs with white yarn for a simple, spooky table decoration.
- DIY Costumes: Upcycle old clothes with fabric paint, patches, or accessories for a unique costume.
These crafts are quick, fun, and perfect for getting into the Halloween spirit!
What materials do I need for DIY Halloween Craft Ideas?
Here are some essential materials you’ll need for DIY Halloween Craft Ideas:
- Basic Supplies:
- Scissors: For cutting various materials.
- Glue: Hot glue gun, craft glue, or Mod Podge.
- Paints: Acrylic or spray paint in Halloween colors (orange, black, purple, green).
- Decorative Items:
- Faux Spiders: For embellishing crafts.
- Ribbons: In Halloween colors or patterns.
- Glitter: For adding sparkle to projects.
- Crafting Tools:
- Paintbrushes: For applying paint and glue.
- Craft Foam or Felt: For creating shapes and decorations.
- Markers: Permanent or paint markers for detailing.
- Natural Materials:
- Pumpkins: Real or artificial for carving or decorating.
- Twigs and Leaves: For rustic accents.
- Recyclables:
- Glass Jars: For lanterns or candle holders.
- Cardboard: For creating bases or structures.
- Fabric and Paper:
- Construction Paper: In various colors for cutouts.
- Old Clothes: For upcycling into costumes or decorations.
These materials will help you create a variety of fun and festive Halloween crafts!
Are there any safety tips for crafting?
Here are some important safety tips for crafting:
- Use Non-Toxic Materials: Choose paints, glues, and other supplies that are labeled non-toxic, especially if children are involved.
- Handle Tools Carefully: Always supervise the use of scissors, knives, and hot glue guns. For young children, opt for safety scissors with rounded tips.
- Create a Safe Workspace: Use a clean, stable surface to craft. Protect the area with newspapers or a tablecloth to avoid spills and stains.
- Ventilation: When using spray paints or materials with strong fumes, work in a well-ventilated area to avoid inhaling harmful chemicals.
- Organize Small Parts: Keep small items like beads or buttons out of reach of young children to prevent choking hazards.
- Clean Up Spills Promptly: Address any spills immediately to prevent slips and falls.
- Follow Instructions: When using tools or materials, always follow manufacturer instructions for safe use.
- Take Breaks: If working on a lengthy project, take breaks to prevent fatigue, which can lead to accidents.
By following these tips, you can ensure a safe and enjoyable crafting experience!
How can I display my completed DIY Halloween Craft Ideas?
Here are some creative ways to display your completed DIY Halloween Craft Ideas:
- Wall Hangings: Use adhesive hooks or nails to hang wreaths, string art, or framed crafts on your walls.
- Table Centerpieces: Arrange pumpkins, candle holders, and decorative jars on dining or coffee tables for a festive touch.
- Shelves and Mantels: Create a spooky display on shelves or mantels by grouping various crafts, such as lanterns, figures, and seasonal decorations.
- Front Door Decor: Hang wreaths or signs on your front door to greet visitors with your Halloween spirit.
- Window Displays: Use window sills or adhesive hooks to showcase crafts like hanging ghosts or window clings.
- Themed Corners: Designate a corner of your home for a Halloween vignette, combining different crafts for an eye-catching display.
- Light It Up: Incorporate string lights or candles with your crafts to enhance the ambiance and highlight your creations.
By using these methods, you can effectively showcase your Halloween crafts and create a festive atmosphere!

-
Save
Hi, I’m Hailey Say, the proud mom and owner of PartyGamesIdea.com. As a dedicated party designer and an expert in party ideas, I have a deep passion for crafting memorable and enjoyable experiences for every occasion. From holiday games to baby showers, bridal showers, bachelor parties, group gatherings, and more, I specialize in creating unique and fun party ideas that cater to all age groups and interests.
With an extensive collection of ideas ranging from printable games, teen and adult games, kids’ party activities, birthday party games, girls’ games, memory games, family games, and outdoor games, I aim to make every event special. My expertise also extends to themed parties such as dinner parties, brunch parties, graduation celebrations, college parties, and fun night games.
On PartyGamesIdea.com, I share my passion and creativity, helping people turn their party visions into reality. With years of experience and a keen eye for detail, I am committed to making your event planning process enjoyable and stress-free. Join me on PartyGamesIdea.com, and together, we’ll create unforgettable memories for you and your loved ones.