
Halloween is a vibrant and festive occasion celebrated every October 31st, marked by spooky decorations, costumes, and an air of excitement. From haunted houses to trick-or-treating, the holiday invites creativity and self-expression in various forms. One fun and often overlooked way to embrace the Halloween spirit is through Halloween Nails Design Ideas. These unique nail art designs not only complement your costume but also serve as a playful nod to the season’s themes of fright and fun.
Themed nail designs play an important role in enhancing the celebration, allowing individuals to showcase their personality and creativity. Whether you’re dressing up as a witch, a ghost, or a classic monster, your nails can be the perfect finishing touch to your Halloween look. By incorporating festive elements into your nail art, you can elevate your entire ensemble and make a bold statement at any Halloween gathering.
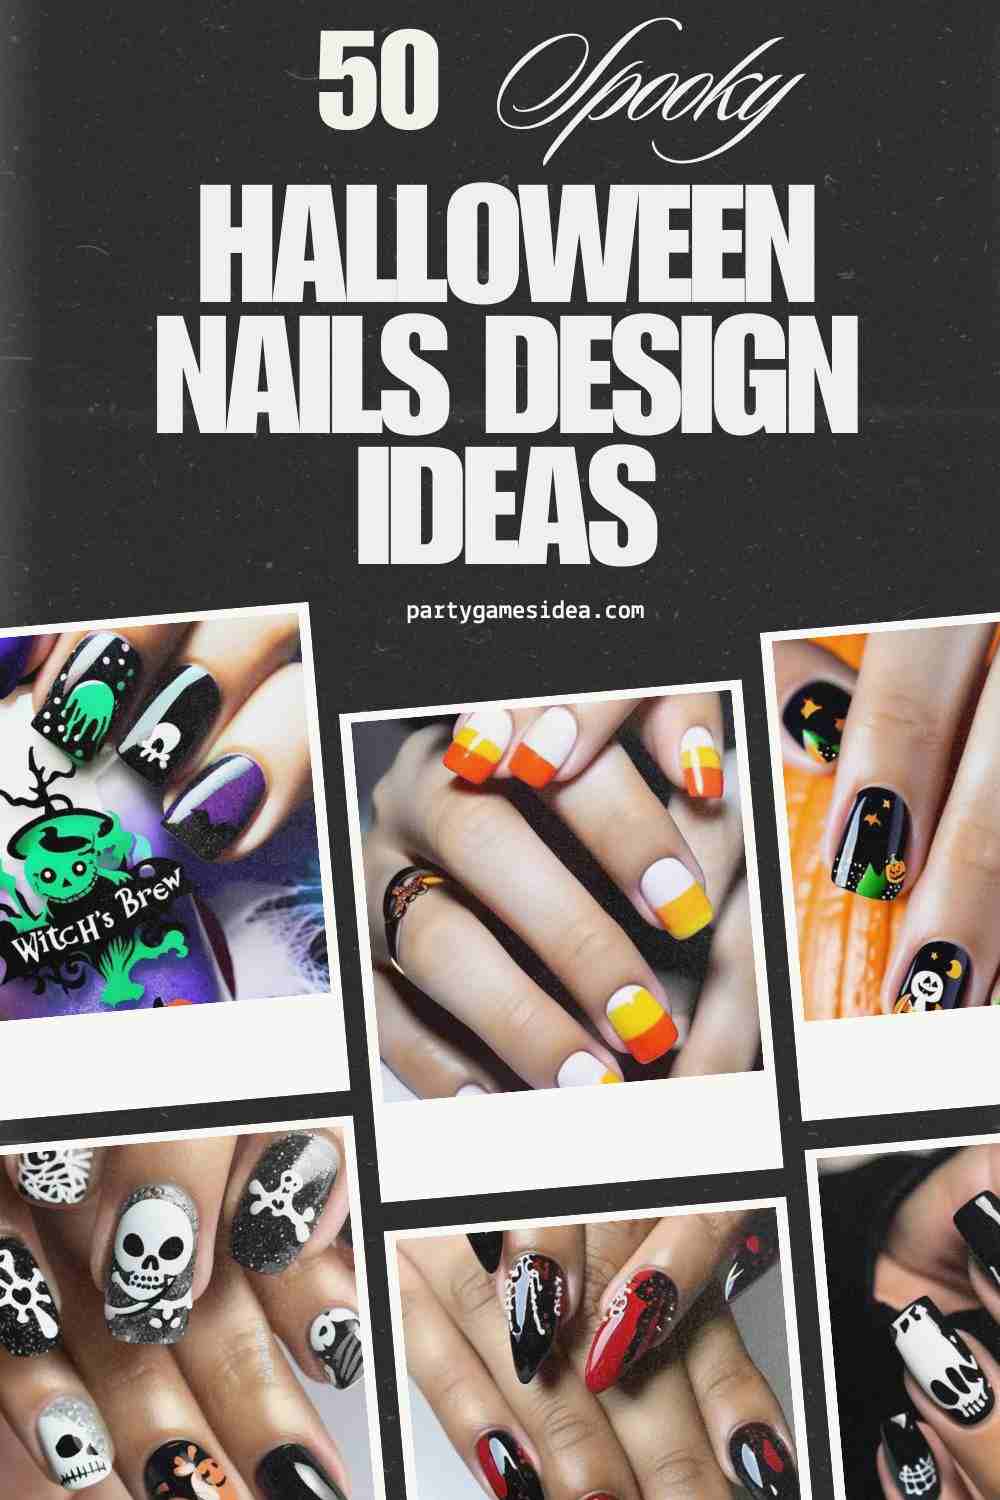
Halloween Nails Design Ideas
Halloween is the perfect time to unleash your creativity and express your festive spirit through nail art. Whether you’re planning to attend a spooky soirée or just want to celebrate at home, these Halloween-themed nail designs will add a fun touch to your look. Here are 50 ideas to inspire your Halloween nails!
Pumpkin Patch Nails
Create a vibrant pumpkin design for a playful look.
- Setup: Paint nails orange, then add green vines and tiny pumpkins.
- Tips: Use a fine brush for details and allow each layer to dry before adding the next.
- Materials Used: Orange nail polish, green polish, dotting tool or fine brush.
Ghostly White Nails
Channel the spooky essence of ghosts with simple yet striking designs.
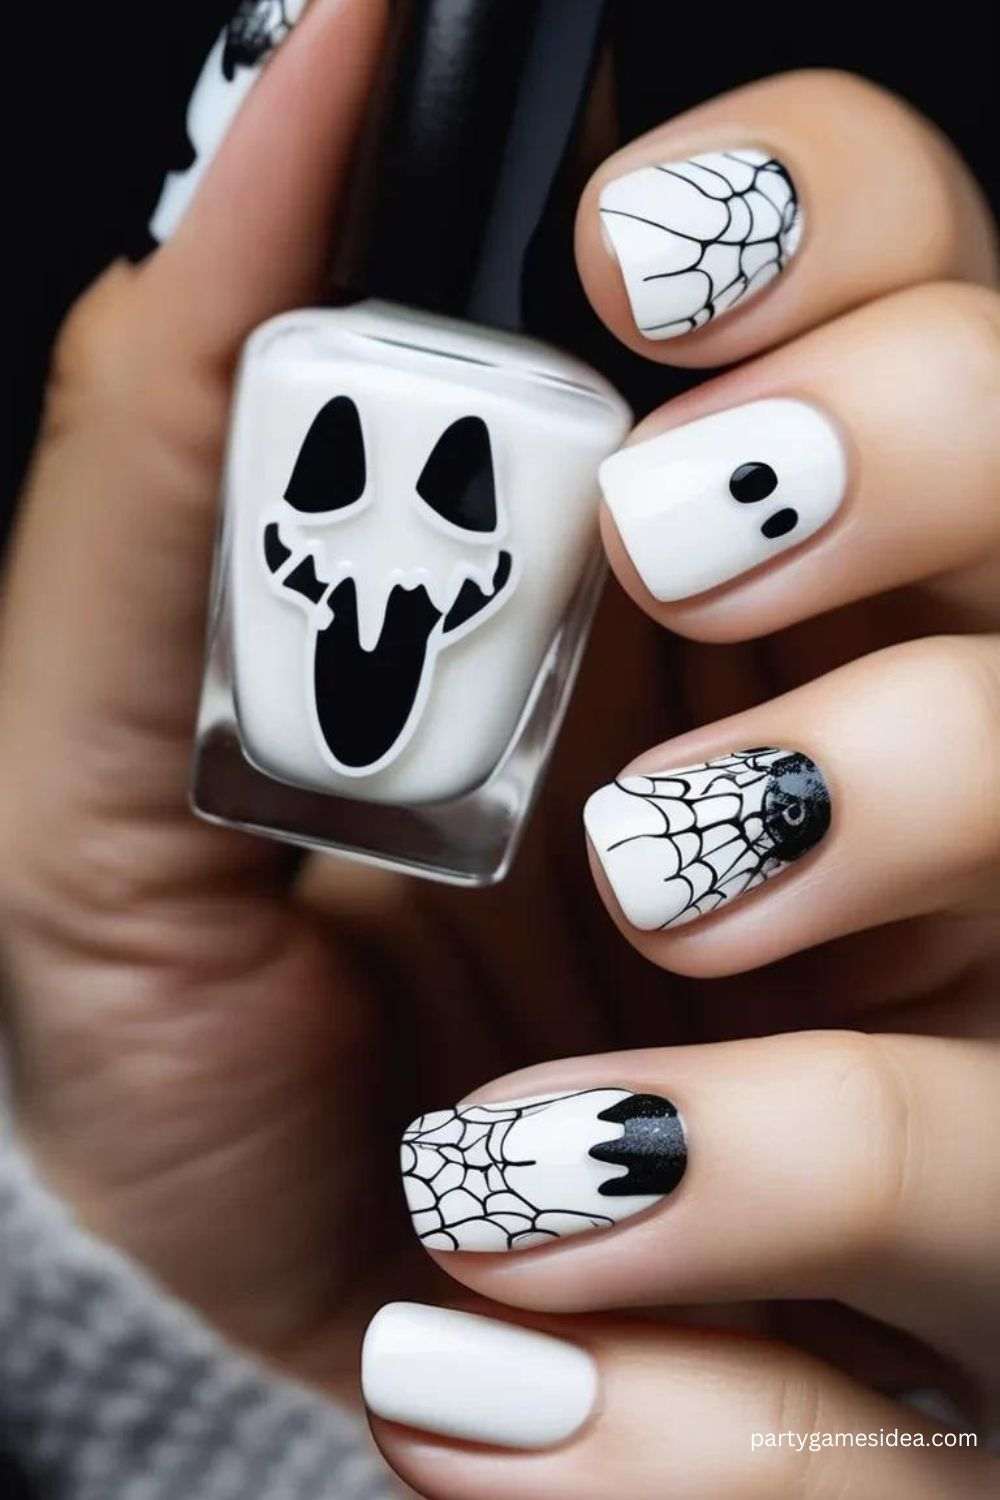
- Setup: Apply a white base coat, then draw ghost faces with black polish.
- Tips: Use nail stickers for precision if you’re not confident in freehanding.
- Materials Used: White and black nail polish, top coat.
Spider Web Design
Add a creepy touch with intricate spider web patterns.
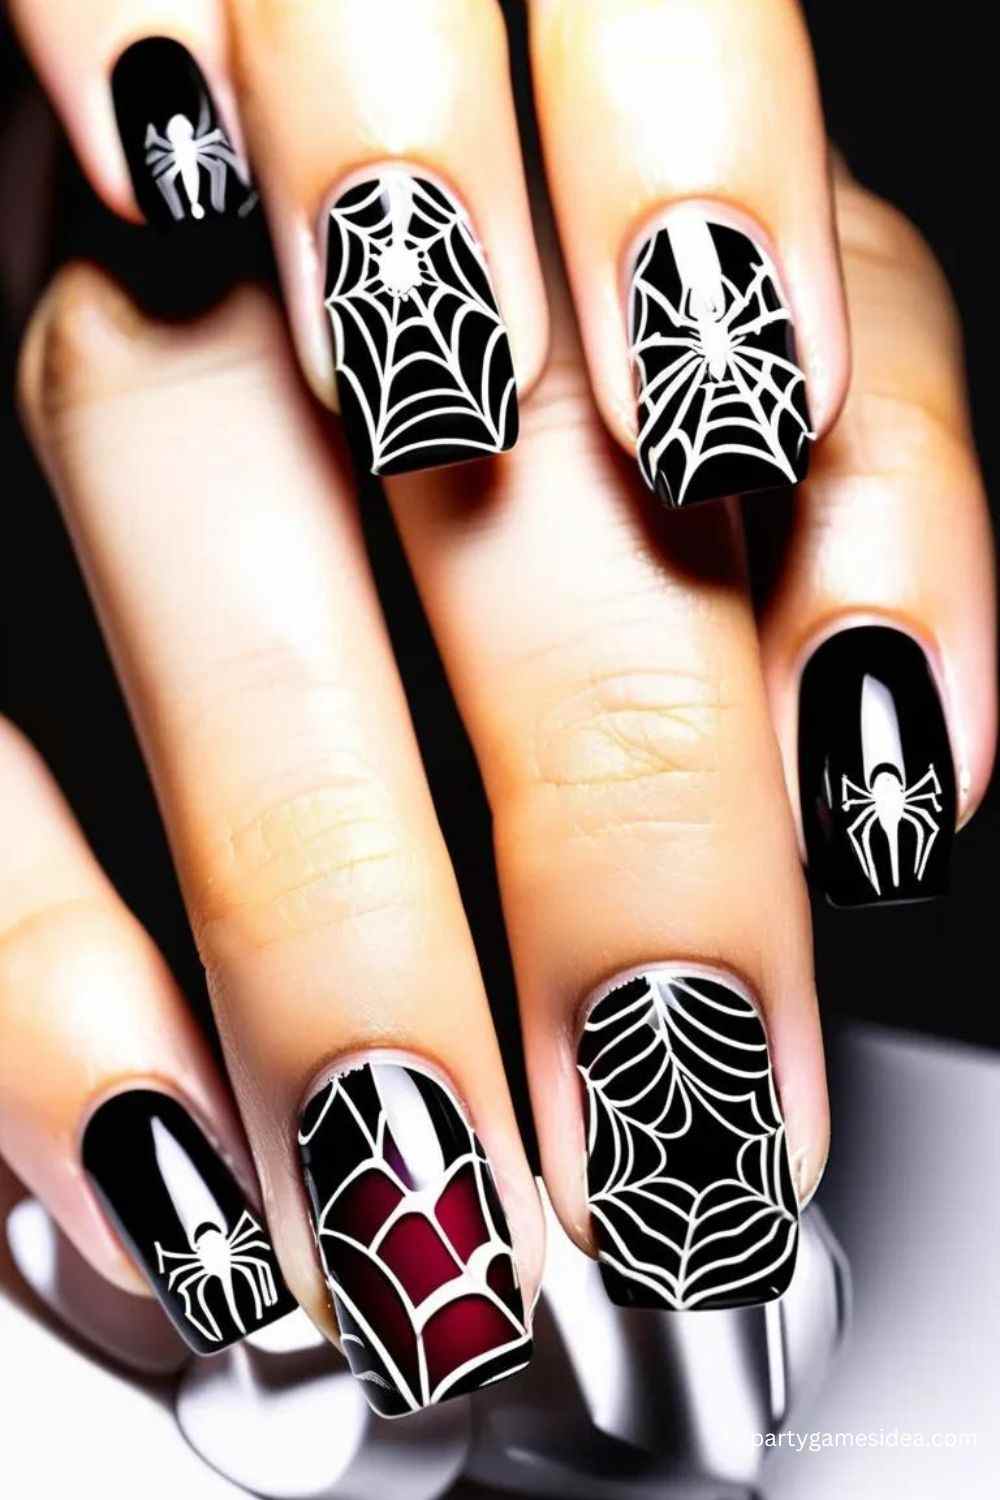
- Setup: Paint your nails black, then use a white polish to create a web design.
- Tips: A thin nail art brush works best for fine lines.
- Materials Used: Black and white nail polish, top coat.
Bloody Drip Nails
Make a statement with a gory, dripping blood effect.
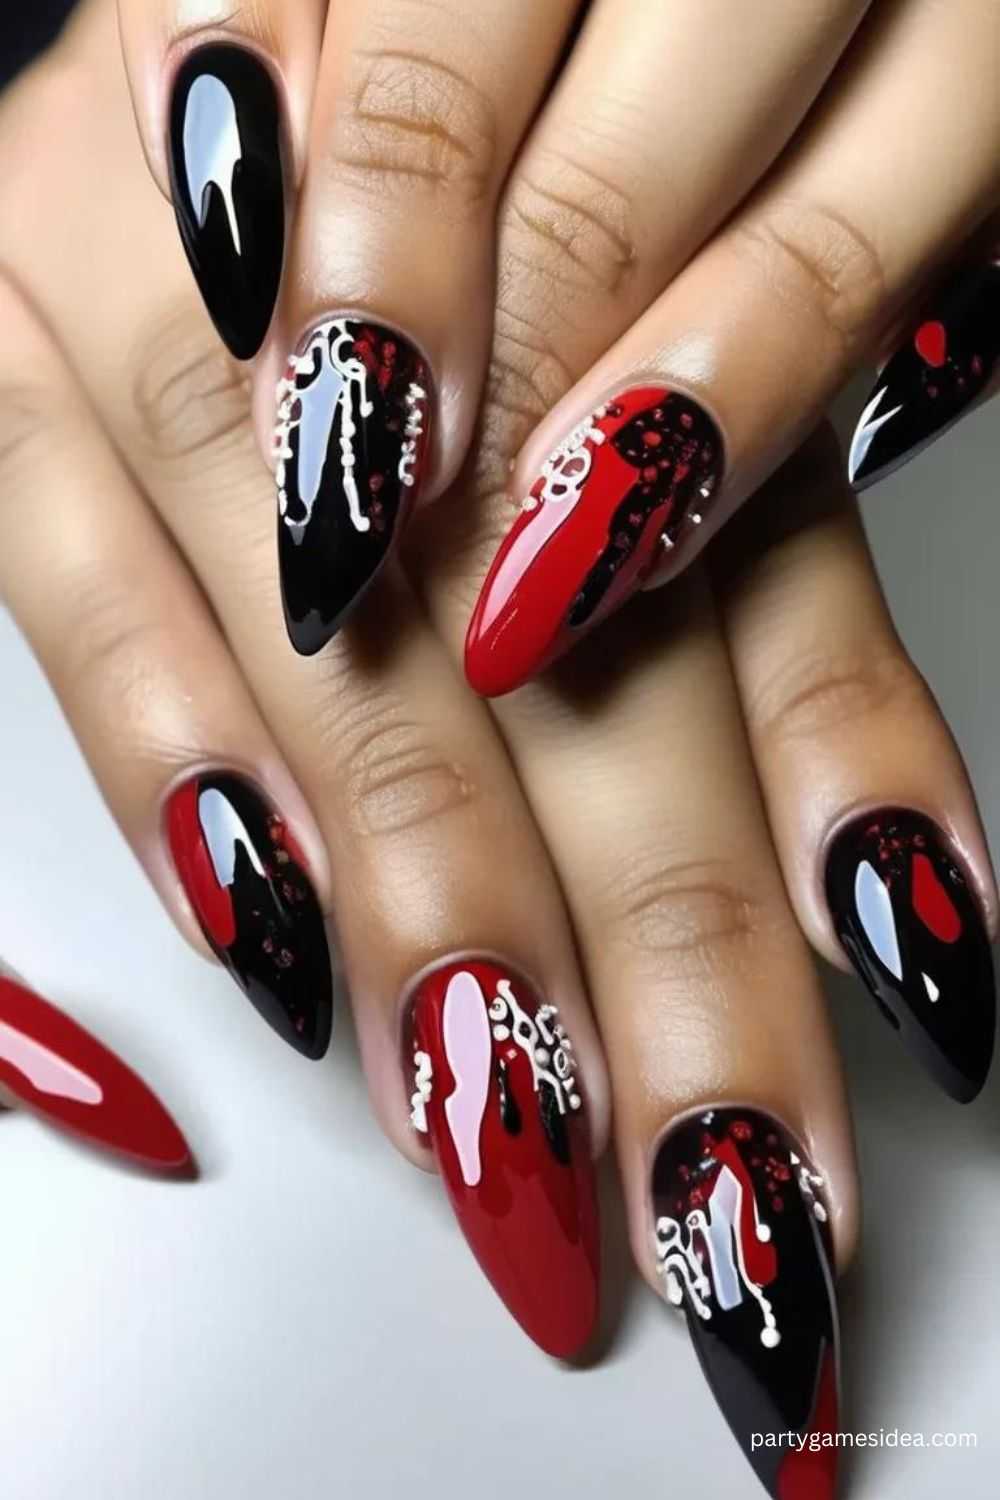
- Setup: Start with a nude or pale base, then add red polish to create drip effects.
- Tips: Use a small brush for realistic drips.
- Materials Used: Nude polish, red polish, clear top coat.
Witch’s Brew Nails
Capture the essence of a witch’s cauldron with bubbling designs.
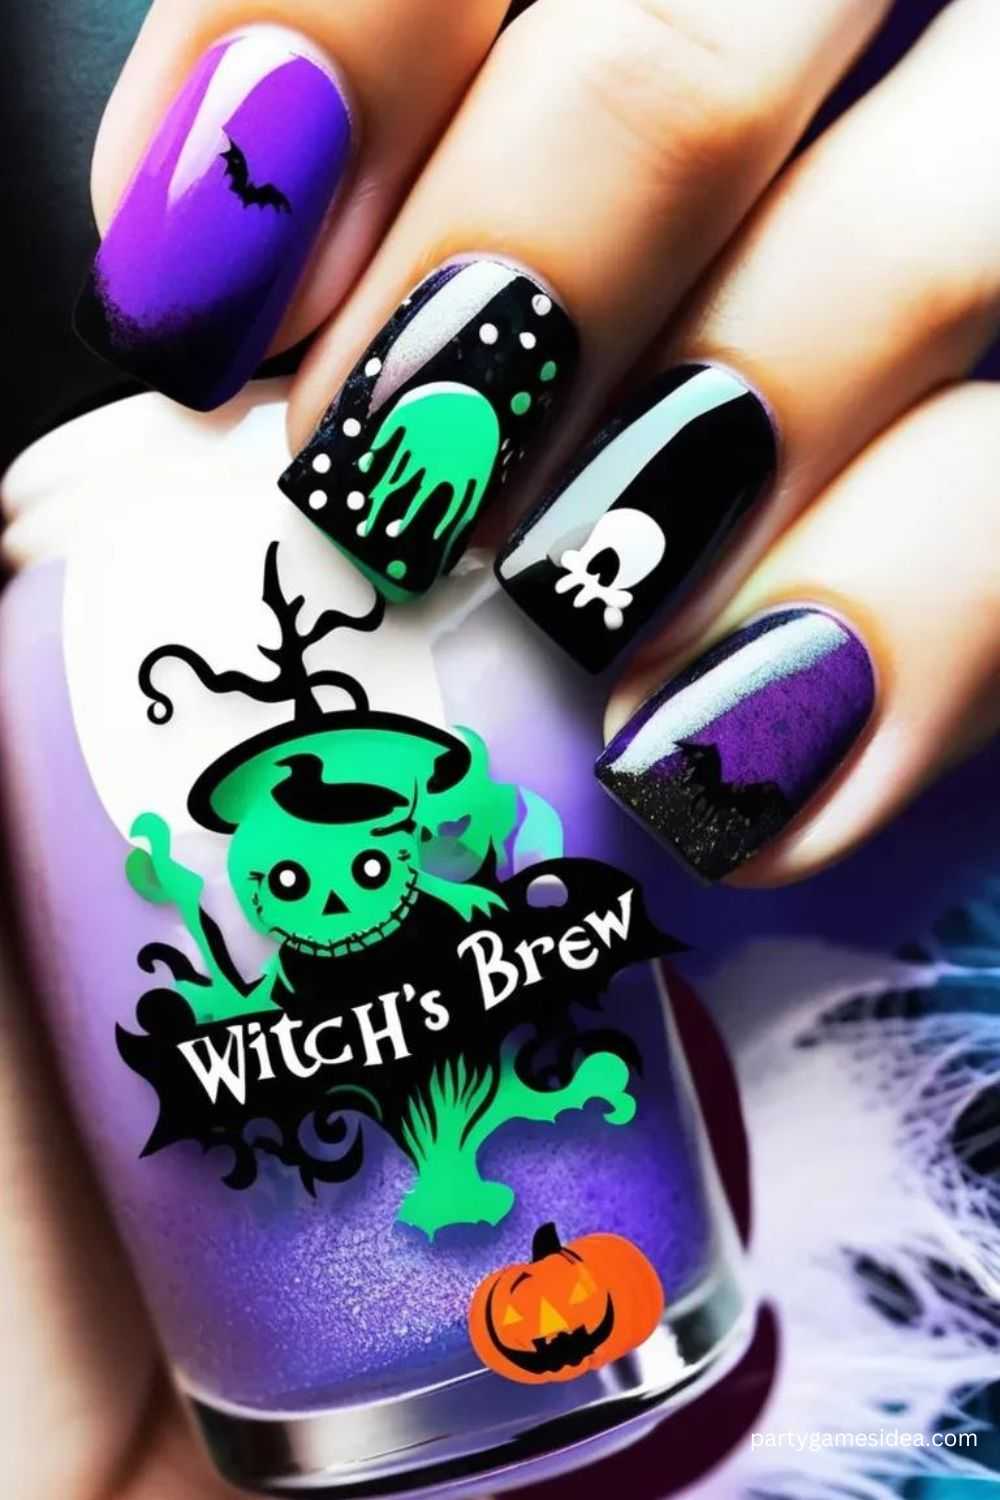
- Setup: Use dark green or purple as a base, then add colorful dots to represent potion bubbles.
- Tips: Mix different colors for a more magical look.
- Materials Used: Dark green/purple polish, colorful polishes, dotting tool.
Skull and Crossbones
Perfect for a pirate-themed Halloween.
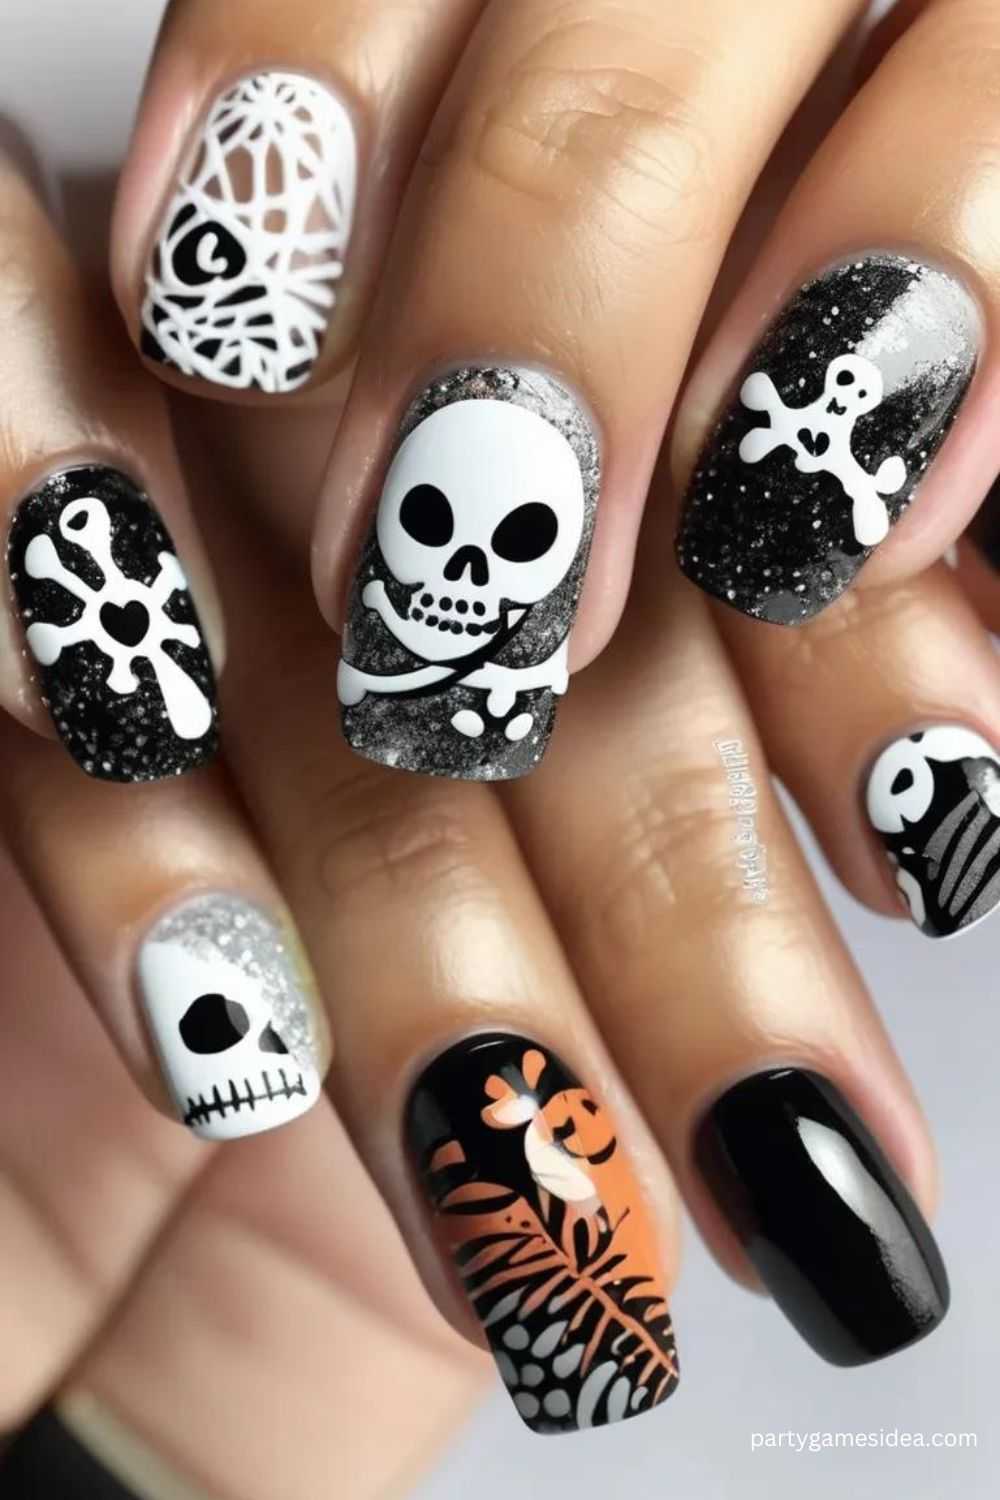
- Setup: Paint nails black and add white skull and crossbones designs.
- Tips: Use nail art pens for sharper details.
- Materials Used: Black and white nail polish, top coat.
Batty Nails
A fun homage to Halloween’s flying creatures.
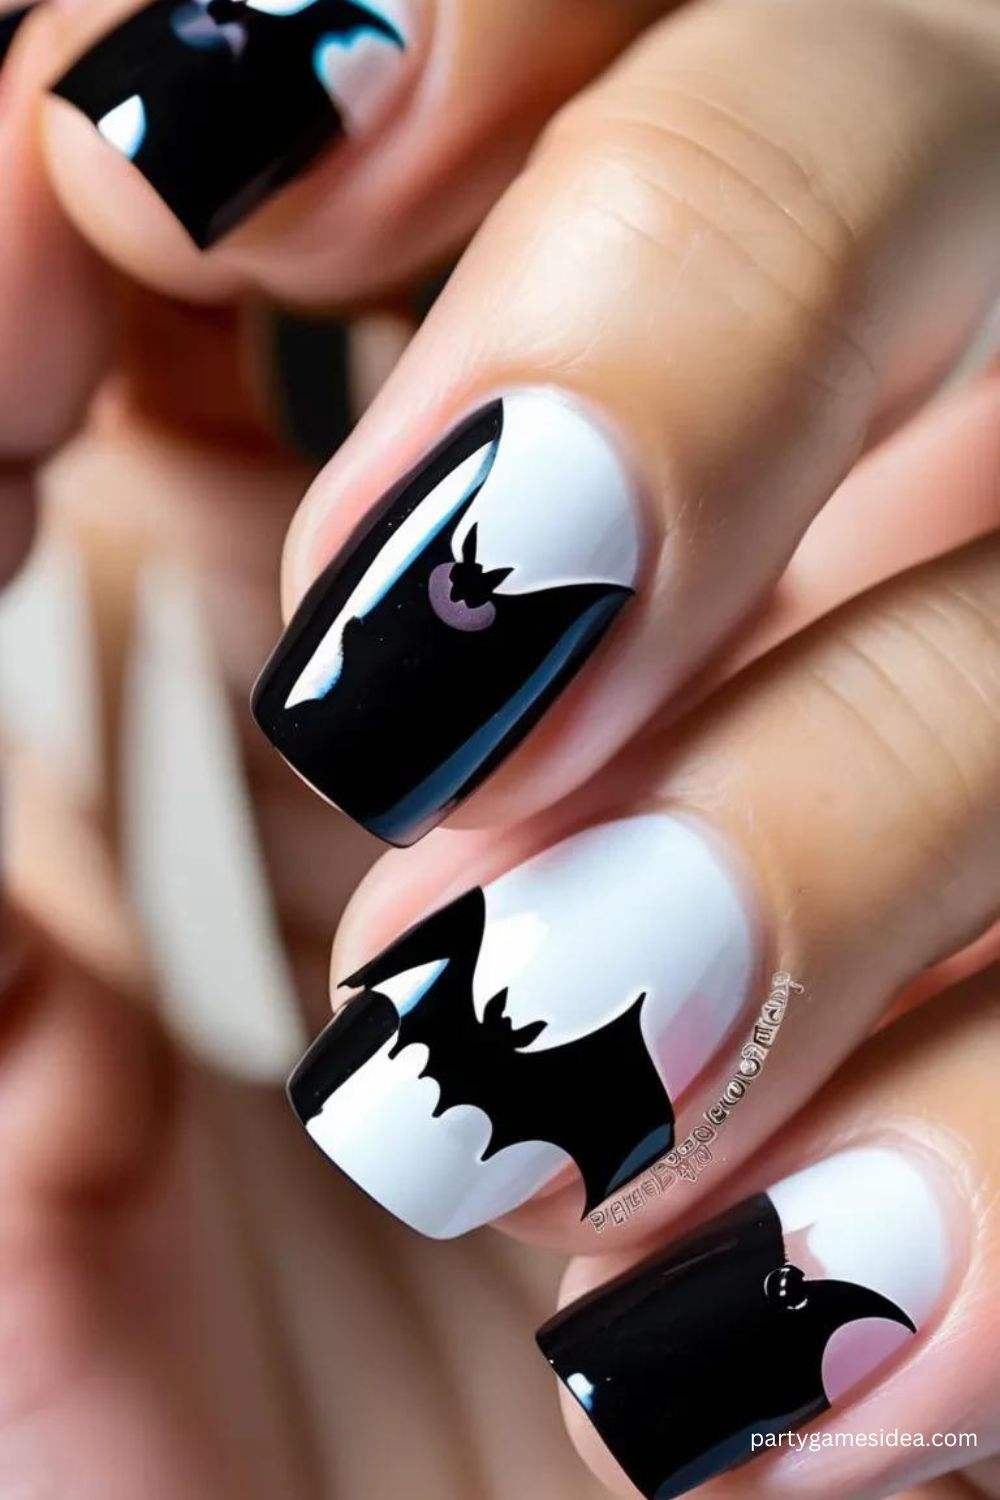
- Setup: Paint a dark base and add bat silhouettes.
- Tips: Cut out bat shapes from nail stickers for an easier application.
- Materials Used: Dark polish, black polish, bat stickers.
Candy Corn Nails
Sweeten your look with iconic Halloween treats.
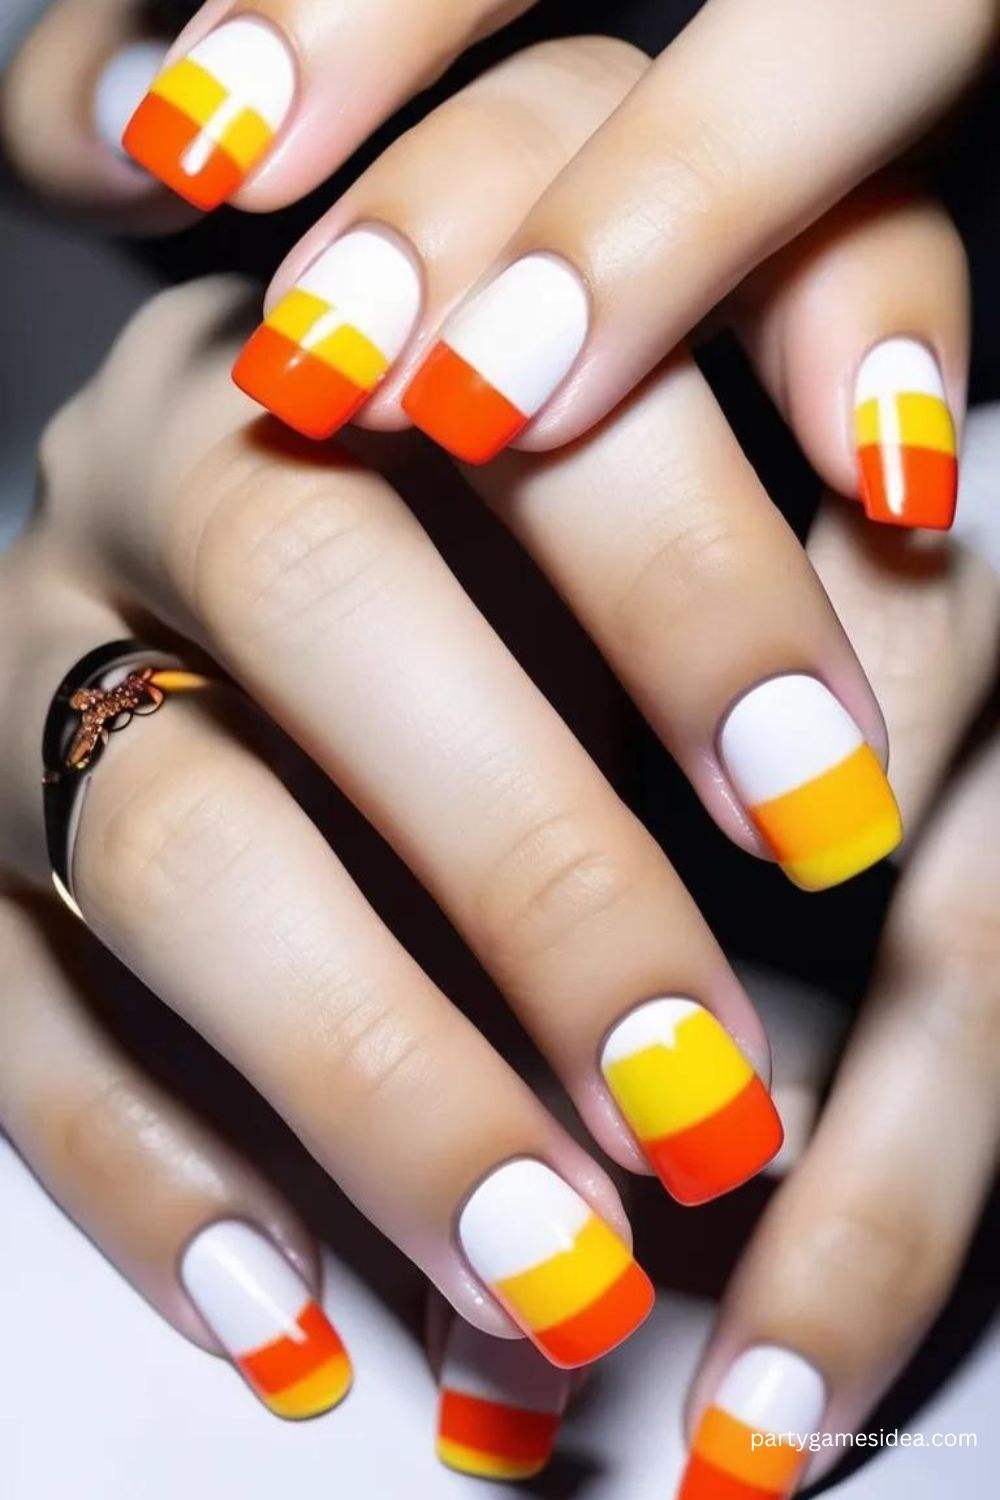
- Setup: Use a gradient of yellow, orange, and white to mimic candy corn.
- Tips: Use tape for clean lines between colors.
- Materials Used: Yellow, orange, and white polishes, tape.
Haunted House Nails
Bring a spooky scene to your fingertips.
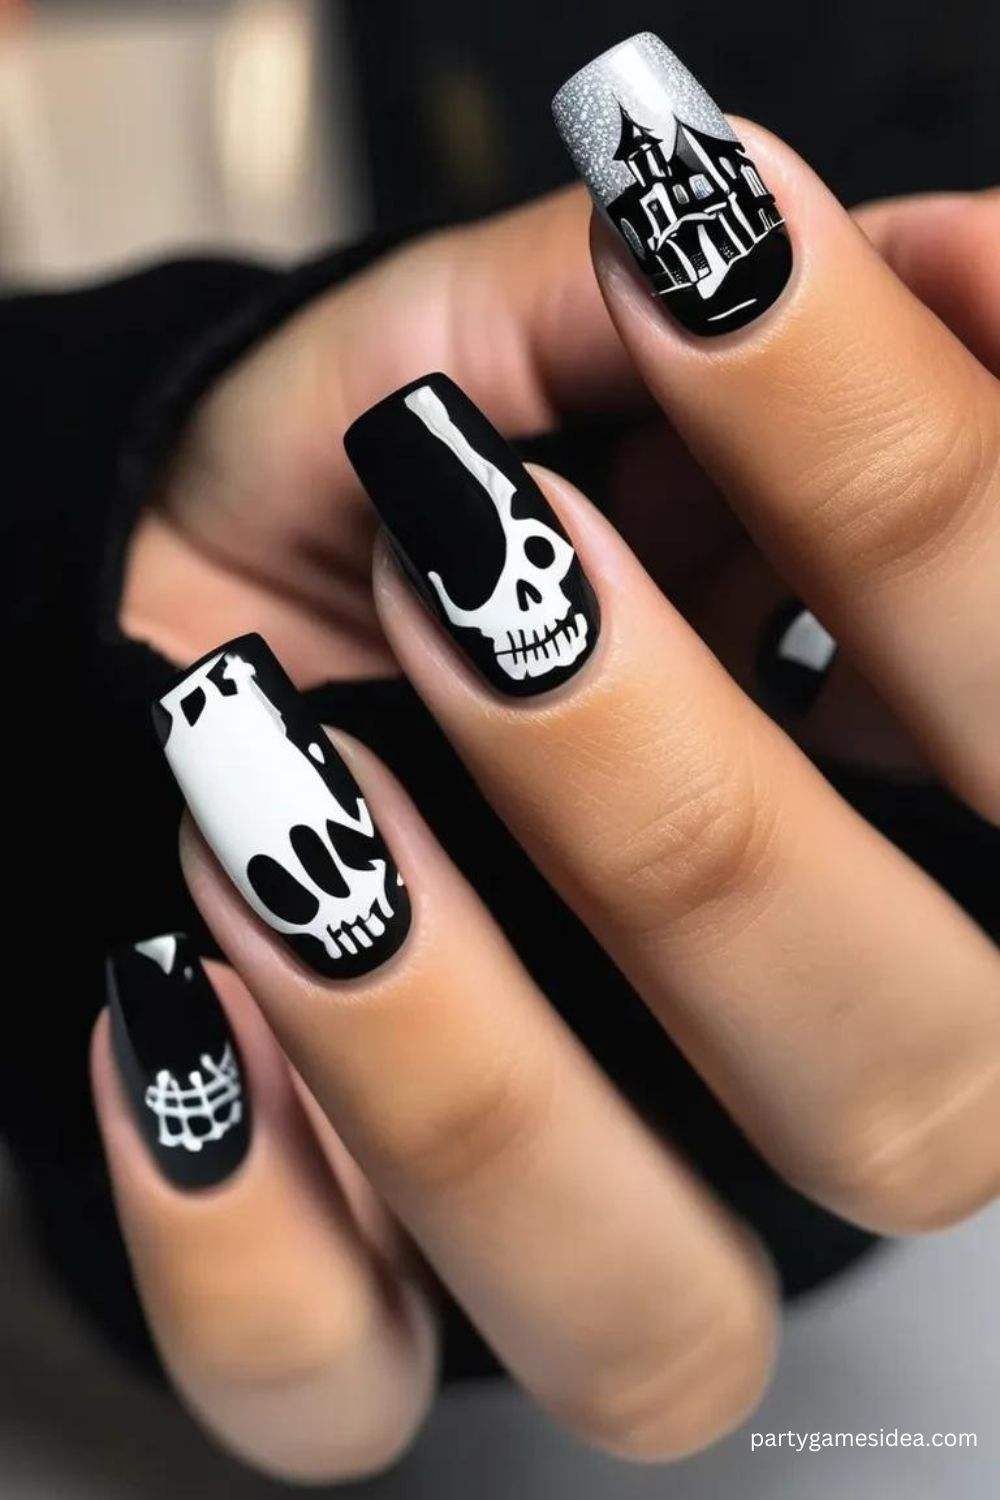
- Setup: Paint a gradient background and add silhouettes of haunted houses.
- Tips: Use a sponge for smooth gradients.
- Materials Used: Dark blue/purple polish, black polish, sponge.
Mummy Nails
Wrap your nails in spooky mummy designs.
- Setup: Apply a light base and use white polish to create bandage lines.
- Tips: Use a textured top coat for an extra spooky effect.
- Materials Used: Light polish, white polish, top coat.
Vampire Bite Nails
Create a dramatic look with blood-red accents.
- Setup: Paint nails deep red and add small “bite” marks with white and black.
- Tips: Use a small brush for precise detailing.
- Materials Used: Deep red, white, and black polish.
Frankenstein’s Monster
Pay tribute to the classic monster with green nails.
- Setup: Paint nails green and add bolts and stitches.
- Tips: Mix shades of green for depth.
- Materials Used: Green polish, black polish, dotting tool.
Witch Hat Nails
Cute and creative, perfect for any witch costume.
- Setup: Paint nails black with tiny witch hats on top.
- Tips: Add glitter for a magical effect.
- Materials Used: Black polish, colored polish for hats, glitter.
Creepy Crawly Nails
Incorporate insects for an eerie vibe.
- Setup: Paint a light base and add tiny bug designs.
- Tips: Use a fine brush for detailing.
- Materials Used: Base polish, various colors for bugs.
Spooky Eyes
Create a set of peering eyes on your nails.
- Setup: Paint a base color and add eyes with various expressions.
- Tips: Vary the sizes for a playful look.
- Materials Used: Base polish, white and black polish.
Potion Bottle Nails
Bring your favorite Halloween potions to life.
- Setup: Paint a base and add tiny potion bottle designs.
- Tips: Use glitter polish for a magical effect.
- Materials Used: Base polish, colored polish for bottles, glitter.
Scarecrow Nails
Embrace fall with scarecrow-themed designs.
- Setup: Paint nails in autumn colors and add straw details.
- Tips: Use a sponge for a textured look.
- Materials Used: Autumn-colored polishes, dotting tool.
Spider Nails
Add a creepy-crawly effect with spider designs.
- Setup: Use a dark base and add spider details.
- Tips: Use nail art stickers for a quick design.
- Materials Used: Dark polish, black polish.
Autumn Leaves
Celebrate the season with colorful leaf designs.
- Setup: Paint a light base and add colorful leaves.
- Tips: Blend colors for a realistic look.
- Materials Used: Base polish, various colors for leaves.
Black Cat Nails
Show off your feline love with black cat designs.
- Setup: Paint nails black and add cat faces with yellow eyes.
- Tips: Use nail art pens for precision.
- Materials Used: Black polish, yellow polish.
Gory Nail Art
Get gruesome with blood splatter designs.
- Setup: Start with a nude base and splatter red polish.
- Tips: Practice splattering techniques on paper first.
- Materials Used: Nude polish, red polish.
Crystal Ball Nails
Add some mystery with crystal ball designs.
- Setup: Paint a mystical background and add crystal balls.
- Tips: Use a glossy top coat for shine.
- Materials Used: Base polish, various colors for crystal balls.
Full Moon Nails
Create a night sky with a glowing full moon.
- Setup: Paint a dark blue base with a yellow moon.
- Tips: Use a sponge for blending the night sky.
- Materials Used: Dark blue polish, yellow polish.
Ghostly Handprints
Make a spooky impression with ghost handprints.
- Setup: Paint a base color and use white to create handprints.
- Tips: Use a makeup sponge for better hand shapes.
- Materials Used: Base polish, white polish.
Skeleton Nails
Pay homage to the classic Halloween figure.
- Setup: Paint a dark base and add skeleton bones in white.
- Tips: Use a fine brush for detailed work.
- Materials Used: Dark polish, white polish.
Tarot Card Nails
Incorporate tarot card designs for a mystical vibe.
- Setup: Paint a base and add mini tarot card designs.
- Tips: Research designs for accuracy.
- Materials Used: Base polish, various colors.
Halloween Candy Nails
Celebrate with designs inspired by Halloween treats.
- Setup: Paint a base and add colorful candy designs.
- Tips: Use stickers for quick application.
- Materials Used: Base polish, various colors.
Night Sky Nails
Bring the beauty of the night sky to your fingertips.
- Setup: Use a dark base and add stars and moons.
- Tips: Use a sponge for a blended look.
- Materials Used: Dark polish, white and yellow polish.
Cursed Nails
Incorporate creepy motifs for a cursed look.
- Setup: Paint a dark base and add cursed symbols.
- Tips: Use a thin brush for fine details.
- Materials Used: Dark polish, white or silver polish.
Halloween Characters
Get creative with classic Halloween characters.
- Setup: Paint nails to represent witches, mummies, or ghosts.
- Tips: Use nail art pens for details.
- Materials Used: Various colored polishes.
Twisted Candy Nails
Add a whimsical twist with candy designs.
- Setup: Paint colorful stripes and add candy swirls.
- Tips: Use a fine brush for clean lines.
- Materials Used: Various colors, top coat.
Day of the Dead Nails
Honor the Day of the Dead with vibrant designs.
- Setup: Paint a bright base and add sugar skulls.
- Tips: Use bold colors for maximum impact.
- Materials Used: Bright polishes, black polish.
Creepy Clown Nails
Embrace the funhouse with clown-inspired designs.
- Setup: Paint bright colors and add clown faces.
- Tips: Use stickers for quick designs.
- Materials Used: Various bright polishes.
Mystery and Magic
Incorporate mystical elements into your nail art.
- Setup: Paint a dark base and add mystical symbols.
- Tips: Experiment with glitter for a magical effect.
- Materials Used: Dark polish, various colors for symbols.
Broomstick Nails
Celebrate the classic witch’s ride with broomstick designs.
- Setup: Paint a dark base and add broomsticks at the tips.
- Tips: Use fine brushes for detailed broom designs.
- Materials Used: Dark polish, brown and black polishes.
Witch’s Potion Nails
Mix and match colors for a potion-themed look.
- Setup: Paint nails in a gradient and add potion bottles.
- Tips: Use a sponge for gradient effects.
- Materials Used: Various colors, top coat.
Pumpkin Spice Nails
Embrace the fall flavor with pumpkin-inspired designs.
- Setup: Use warm autumn colors and add pumpkin shapes.
- Tips: Experiment with glitter for extra flair.
- Materials Used: Autumn-colored polishes.
Scary Clown
Add a creepy touch with clown designs.
- Setup: Paint a bright base and add scary clown faces.
- Tips: Use nail art pens for detail.
- Materials Used: Bright and black polish.
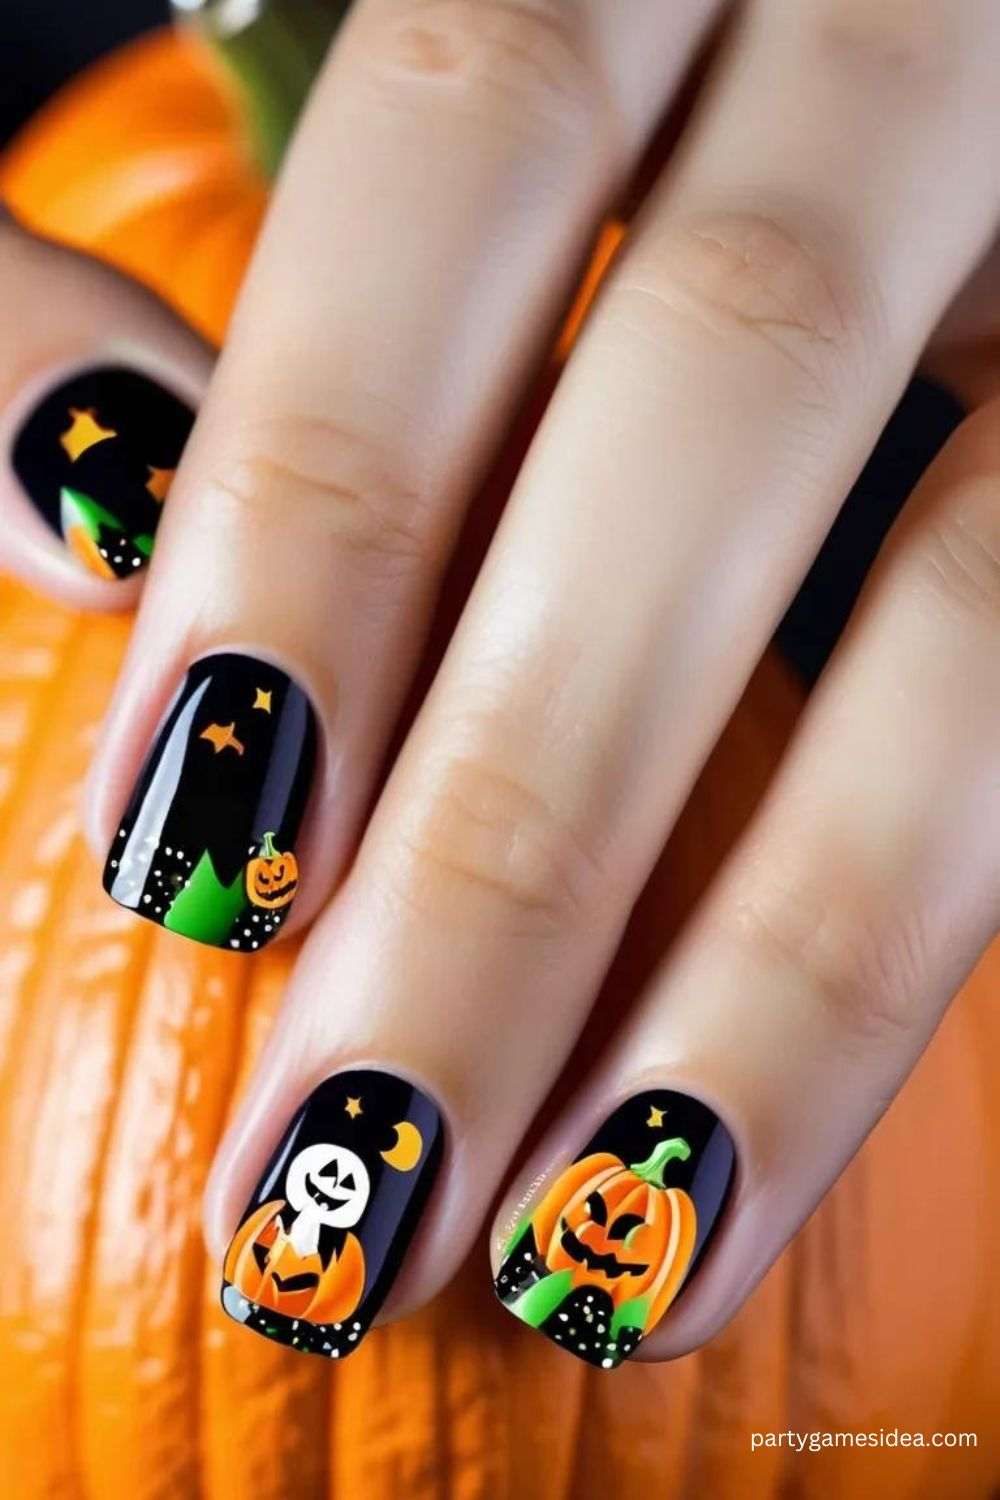
Cursed Pumpkin Nails
Incorporate spooky pumpkins for a haunted vibe.
- Setup: Paint nails orange and add creepy pumpkin faces.
- Tips: Use different shades of orange for depth.
- Materials Used: Orange polish, black polish.
Halloween Monster Mash
Create a mix of all your favorite Halloween characters.
- Setup: Paint a base and add different monster designs.
- Tips: Use nail stickers for intricate designs.
- Materials Used: Various colored polishes.
Enchanted Forest
Bring an enchanted forest to life with leafy designs.
- Setup: Use greens and browns for a natural look and add leaves.
- Tips: Blend colors for a more realistic effect.
- Materials Used: Green and brown polishes.
Moonlit Nights
Create a dreamy effect with a moonlit design.
- Setup: Paint a dark base and add a glowing moon.
- Tips: Use glow-in-the-dark polish for an extra effect.
- Materials Used: Dark polish, glow-in-the-dark polish.
Final Touches
Don’t forget a glossy top coat to seal and shine your creations!
Feel free to mix and match these ideas or customize them to suit your style! Happy Halloween!
Nail Design Techniques
Nail design is an exciting way to express your creativity and celebrate special occasions like Halloween. With various techniques available, you can achieve stunning and unique looks that showcase your personal style. Here are some popular nail design techniques to explore, each offering a different way to transform your nails into works of art.
Nail Art Painting
Nail art painting involves using brushes and nail polish to create intricate designs directly on your nails.
- Tools Needed: Fine nail art brushes or dotting tools allow for detailed work.
- Design Ideas: From spooky silhouettes to festive patterns, the possibilities are endless.
- Tips: Start with a light hand and build up layers for more complex designs. Practice on a nail wheel or paper before applying to your nails.
Freehand Designs for Beginners and Advanced
Freehand nail art allows you to express your creativity without relying on stencils or templates.
- For Beginners: Start with simple shapes and patterns, such as dots, stripes, or basic Halloween icons like pumpkins and bats.
- For Advanced Artists: Experiment with complex designs, blending colors or creating 3D effects using gel polish or acrylic.
- Practice Makes Perfect: The more you practice, the more confident you’ll become in your freehand abilities. Use practice wheels to refine your skills.
Nail Stickers and Decals
Nail stickers and decals are an easy way to achieve intricate designs without the need for painting.
- Easy Application: Simply peel and stick the designs onto clean, dry nails. Seal with a top coat for durability.
- Variety of Designs: Look for Halloween-themed stickers featuring ghosts, witches, and more.
- Time-Saver: Stickers are a great option for those short on time or those who may not feel confident in their painting skills.
Water Marbling
Water marbling creates stunning, swirling patterns on your nails using a simple water technique.
- Setup: Fill a shallow dish with room temperature water and drop various nail polishes onto the surface. Use a toothpick to swirl the colors together.
- Dipping Technique: Dip your nail into the water, capturing the design. This technique allows for unique and unpredictable patterns.
- Tips: Practice makes perfect, and using polishes with similar viscosities will yield better results.
Ombre Effects
Ombre effects blend two or more colors seamlessly for a beautiful gradient look.
- Application Techniques: Use a makeup sponge to dab the colors onto your nails, blending them together for a soft transition.
- Color Combinations: Experiment with Halloween colors like orange and black, or purple and green for a spooky vibe.
- Top Coat: Finish with a glossy top coat to enhance the gradient effect and add shine.
By mastering these nail design techniques, you can elevate your Halloween look and impress friends and family with your creative flair. Enjoy exploring these methods and let your imagination run wild!
Accessorizing Your Halloween Nails Design Ideas
Accessorizing your Halloween nails can elevate your spooky style and make a statement at any festive gathering. With the right embellishments, you can transform a simple design into a stunning masterpiece that captures the spirit of the season. Here are some fun ways to accessorize your Halloween nails:
Nail Gems and Stickers
Adding nail gems and stickers can give your Halloween nails an eye-catching flair.
- Variety of Designs: Choose from various shapes and sizes, such as bats, pumpkins, or spooky skulls.
- Placement Tips: Strategically place gems at the base of your nails or on accent nails for a balanced look.
- Adhesive Options: Use nail glue or top coat to secure gems, ensuring they stay in place throughout your celebrations.
Temporary Tattoos for Nails
Temporary tattoos are a fun and versatile way to enhance your nail art.
- Easy Application: Simply apply the tattoo as you would on your skin, and cut it to fit your nails.
- Unique Designs: Look for Halloween-themed tattoos featuring ghosts, spiders, or witches to match your nail art.
- Durability: Finish with a top coat to seal the tattoo, extending its wear and preventing chipping.
Glitter and Shimmer
Glitter and shimmer can add a magical touch to your Halloween nails.
- Types of Glitter: Use fine glitter for a subtle sparkle or chunky glitter for a bold statement.
- Application Tips: Mix glitter into your nail polish or sprinkle it on wet polish for even coverage.
- Layering Options: Combine different shades of glitter to create a multidimensional effect, perfect for capturing the essence of Halloween.
By incorporating these accessories into your Halloween nail designs, you can create a festive and personalized look that showcases your creativity and love for the holiday. Happy decorating!
Nail Care Tips for Halloween Nails Design Ideas
As you dive into the festive spirit with Halloween-themed nail designs, it’s essential to prioritize nail health. Seasonal designs can be fun and expressive, but taking care of your nails before and after application will ensure they remain strong and healthy. Here are some tips and recommended products to keep your nails looking their best this Halloween.
Maintaining Nail Health with Seasonal Designs
- Prep Your Nails: Before applying any polish or designs, ensure your nails are clean and dry. Gently push back cuticles and trim any hangnails to create a smooth canvas.
- Use a Base Coat: Always apply a base coat before your nail design. This not only helps the polish adhere better but also protects your natural nails from staining.
- Limit Exposure: Avoid prolonged exposure to water or harsh chemicals, as these can weaken your nails. Wear gloves when washing dishes or cleaning.
- Give Your Nails a Break: After Halloween, allow your nails some time to recover from the decorative polish. Go without polish for a week or two to let them breathe.
Recommended Products for Nail Care Before and After Designs
- Nail Strengtheners: Look for products that contain ingredients like keratin or biotin to help strengthen your nails. Brands like OPI and Sally Hansen offer effective options.
- Base and Top Coats: Invest in high-quality base and top coats to ensure your designs last longer and your nails remain protected. Seche Vite and Essie are popular choices.
- Cuticle Oil: Use cuticle oil daily to keep your cuticles hydrated and promote healthy nail growth. Sweet almond oil or jojoba oil are excellent natural options.
- Nail Files and Buffers: Keep a good-quality nail file and buffer on hand to shape your nails and create a smooth surface for polish application.
- Moisturizing Hand Cream: Regularly apply hand cream to keep your hands and nails hydrated, especially after removing polish.
By following these nail care tips and using the right products, you can enjoy beautiful Halloween Nails Design Ideas while maintaining the health and strength of your nails. Happy Halloween!
FAQ
What are Halloween Nails Design Ideas?
Halloween Nails Design Ideas are festive nail designs that celebrate the Halloween season. They feature themes like spooky creatures, autumn colors, and iconic symbols such as pumpkins, ghosts, and bats. These designs add a fun and creative touch to your Halloween celebrations!
How do I create Halloween nail designs at home?
- Gather Your Supplies:
- Nail polish in Halloween colors (orange, black, purple, etc.)
- Base and top coats
- Nail art brushes or dotting tools
- Nail stickers or decals (optional)
- Glitter (optional)
- Prepare Your Nails:
- Start with clean, dry nails.
- Push back cuticles and file your nails for a neat shape.
- Apply a Base Coat:
- Use a base coat to protect your nails and help the polish adhere better.
- Choose Your Design:
- Decide on a design—simple shapes, spooky symbols, or intricate patterns.
- Paint Your Nails:
- Use your chosen colors to create your design. For intricate details, use a fine nail art brush or dotting tool.
- If using stickers, apply them after the base color dries.
- Add Details:
- Use glitter or additional colors for extra flair.
- Seal with a Top Coat:
- Finish with a top coat to protect your design and add shine.
- Clean Up:
- Use a small brush dipped in polish remover to tidy up any mistakes around the cuticles.
Enjoy your spooky nail creations!
What supplies do I need for Halloween Nails Design Ideas?
- Nail Polish:
- A variety of colors, including classic Halloween shades like orange, black, purple, green, and white.
- Base Coat:
- To protect your nails and improve polish adhesion.
- Top Coat:
- For sealing your design and adding shine.
- Nail Art Brushes:
- Fine brushes for detailed work and creating intricate designs.
- Dotting Tools:
- For making dots and patterns easily.
- Nail Stickers or Decals:
- Ready-made designs for quick and easy application.
- Glitter:
- To add sparkle and dimension to your designs.
- Nail File and Buffer:
- For shaping and smoothing your nails.
- Cuticle Oil:
- To keep your cuticles hydrated.
- Nail Remover:
- For easy cleanup and removing old polish.
With these supplies, you’ll be ready to create festive Halloween Nails Design Ideas!
What are some popular Halloween colors to use?
- Orange: Represents pumpkins and autumn leaves, a classic Halloween color.
- Black: Symbolizes the night, witches, and spooky themes.
- Purple: Adds a touch of mystery and is often associated with magic and ghosts.
- Green: Represents monsters and ghouls, adding a vibrant twist.
- White: For ghosts and skeletons, providing contrast and brightness.
- Red: Often used for blood-themed designs, adding a dramatic flair.
- Metallics (Gold/Silver): For a touch of glam and sparkle, perfect for festive accents.
Combining these colors can create stunning and festive Halloween Nails Design Ideas!
How do I remove Halloween Nails Design Ideas?
- Gather Supplies:
- Acetone-based nail polish remover
- Cotton pads or balls
- Foil (optional)
- Cuticle pusher or orange stick
- Soak the Cotton:
- Saturate a cotton pad or ball with the nail polish remover.
- Apply to Nails:
- Place the soaked cotton directly on your nail and hold it there for about 10-15 seconds.
- Wipe Away Polish:
- Gently wipe the nail while pressing down. The polish should come off easily. If it doesn’t, re-soak and repeat.
- Use Foil for Stubborn Designs:
- For glitter or stubborn designs, wrap the soaked cotton pad with foil around your nail. Leave it on for 10-15 minutes before wiping.
- Clean Up:
- Use a cuticle pusher or orange stick to remove any remaining polish around the edges.
- Wash Hands:
- After removal, wash your hands to get rid of any residue from the remover.
- Moisturize:
- Apply cuticle oil and hand cream to hydrate your nails and skin.
Following these steps will help you effectively remove your Halloween Nails Design Ideas!

Hi, I’m Hailey Say, the proud mom and owner of PartyGamesIdea.com. As a dedicated party designer and an expert in party ideas, I have a deep passion for crafting memorable and enjoyable experiences for every occasion. From holiday games to baby showers, bridal showers, bachelor parties, group gatherings, and more, I specialize in creating unique and fun party ideas that cater to all age groups and interests.
With an extensive collection of ideas ranging from printable games, teen and adult games, kids’ party activities, birthday party games, girls’ games, memory games, family games, and outdoor games, I aim to make every event special. My expertise also extends to themed parties such as dinner parties, brunch parties, graduation celebrations, college parties, and fun night games.
On PartyGamesIdea.com, I share my passion and creativity, helping people turn their party visions into reality. With years of experience and a keen eye for detail, I am committed to making your event planning process enjoyable and stress-free. Join me on PartyGamesIdea.com, and together, we’ll create unforgettable memories for you and your loved ones.